essence of the heart sutra pdf
The Heart Sutra PDF, released in 2018, situates the text within Mahayana’s second turning, emphasizing emptiness over suffering. It links to Vulture Peak sermons, highlighting the sutra’s role as a concise guide to non‑self and the avoidance of nihilistic extremes. It supports mind reflection.!

Source and Publication Details
The 2018 release of the Heart Sutra PDF, titled “Essence of the Heart Sutra,” is hosted on the Wisdom Experience platform at this link. Published on October 2, 2018, at 06:05:27 GMT, the file is a 1.2 MB digital rendering of the classic Perfection of Wisdom text, preserving the original Sanskrit verses and their traditional Chinese translations. The PDF includes front‑matter listing the source text, translator, and a brief introduction that situates the sutra within the Mahayana canon. Back‑matter contains a bibliography of related studies, a glossary of key terms such as “emptiness” (śūnyatā) and “non‑self” (anātman), and a note on ethical implications. Licensed under Creative Commons Attribution‑ShareAlike 4.0 International, it allows free sharing and adaptation with attribution. The design follows academic formatting, with a clear typeface, 1.5 line spacing, and page numbers for easy reference. It is intended for students, teachers, and lay practitioners who wish to study the Heart Sutra without a physical copy. The Wisdom Experience team verified the translation against authoritative editions, ensuring reliability. A QR code on the first page links to an audio recitation, adding a sensory dimension. Overall, the 2018 PDF serves as a comprehensive, user‑friendly, and ethically responsible resource for anyone exploring the sutra’s insights into emptiness and reality. The PDF’s concise format and clear layout make it ideal for study groups, individual contemplation, and academic reference.—————
Placement within Mahayana Canon
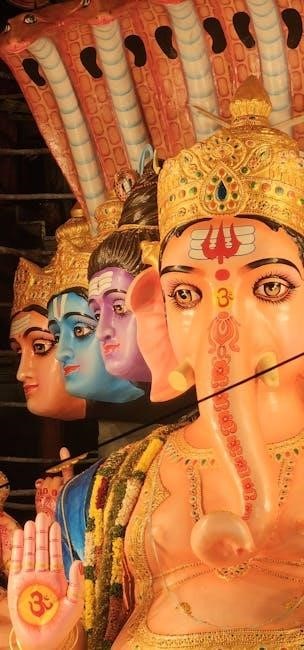
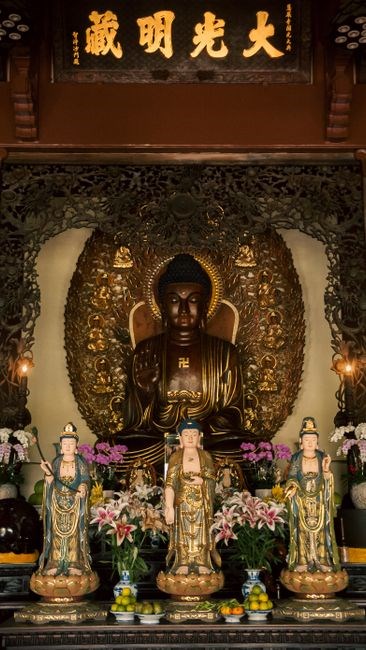
The Heart Sutra is a core text of the Perfection of Wisdom literature, situated within the Mahayana canon as part of the “second turning of the wheel of Dharma.” This collection emphasizes emptiness (śūnyatā) over the first turning’s focus on suffering. The sutra’s origins are traced to the Buddha’s Vulture‑Peak sermons, where he expounded on the nature of phenomena and the path to liberation. In Mahayana, it is grouped with other key Prajñāpāramitā sūtras, the Lotus‑Sūtra, and the Diamond‑Sūtra, forming the doctrinal backbone that shapes philosophical study and devotional practice. Commentators such as Nāgārjuna and Āryaśrī interpret its verses as a concise exposition of emptiness that transcends dualistic distinctions, reinforcing the Mahayana vision of interdependent origination and the non‑existence of inherent essence. The sutra’s brevity and profundity make it a staple for both scholarly analysis and liturgical recitation, bridging doctrinal insight with experiential practice.
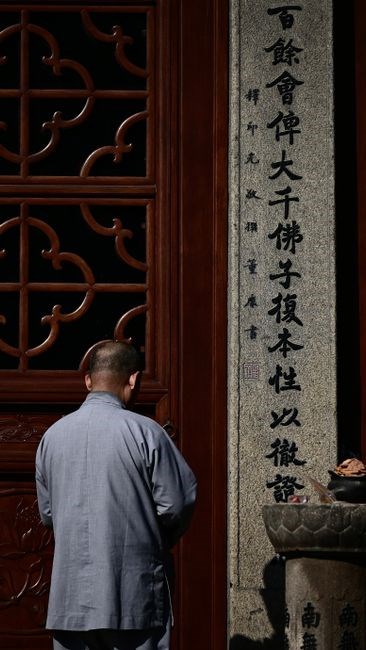
Its canonical status is affirmed across multiple manuscript traditions, including the Chinese Tripiṭaka, Tibetan Kangyur, and Sanskrit editions. Monastic institutions incorporate the Heart Sutra into daily study schedules. The text’s concise form facilitates memorization, chanting, and meditation, making it an essential tool for practitioners seeking to dissolve conceptual fabrications and realize true emptiness. Thus, the Heart Sutra’s placement within the Mahayana canon reflects the tradition’s commitment to disseminating wisdom that leads to liberation through the cultivation of insight and compassion.
Scholars note that the sutra’s concise structure allows for rapid memorization, enabling practitioners to internalize its teachings during meditation and chanting. Its presence in liturgical contexts across East Asian monasteries underscores its role as a bridge between doctrinal study and experiential realization, ensuring that the profound insights into emptiness remain accessible to all levels of practice.
The Three Turnings of the Wheel of Dharma
In Mahayana cosmology, the Buddha’s teachings are traditionally organized into three “turnings” of the Dharma wheel each marking a distinct doctrinal horizon. The first turning, rooted, emphasizes the Four Noble Truths and the cessation of suffering; The second turning, embodied in the Perfection of Wisdom literature, shifts the focus to śūnyatā, or emptiness, revealing that all phenomena lack inherent existence and arisen. The third turning expands upon the second by offering interpretive readings of the Prajñāpāramitā sutras and articulating the theory of Tathāgatagarbha, or Buddha‑nature, which posits an intrinsic potential for awakening within all beings. This tri‑fold structure provides a progressive framework: from the empirical insight into suffering, through the metaphysical insight into emptiness, to the ultimate insight into the innate Buddha‑nature that underlies all experience. Scholars argue that Heart Sutra, as a concise embodiment of second turning, functions as a pedagogical bridge, enabling practitioners to transition from first turning’s analytical approach to second turning’s experiential realization of emptiness, while third turning’s interpretive layers invite deeper contemplation of subtle interplay between emptiness Buddha‑nature. Thus, Three Turnings collectively map the Mahayana path from recognition of suffering to the full realization of luminous, empty nature all phenomena
It deepens insight daily forall
Emphasis on Emptiness in Mahayana
The Heart Sutra PDF, published in 2018, is a concise distillation of Mahayana’s core teaching on śūnyatā, or emptiness. Positioned within the second turning of the Dharma wheel, the sutra reframes the traditional focus on suffering and cessation by asserting that all phenomena lack inherent, independent existence. This emphasis on emptiness is not a negation of reality but a corrective to the mistaken belief that objects possess fixed essence. By declaring that form, feeling, perception, and cognition are empty, the text invites practitioners to see the interdependent, conditioned nature of experience, thereby dissolving attachment and aversion. The PDF’s commentary highlights how this insight serves as a safeguard against nihilism, reminding readers that emptiness is a liberating principle, not a void. The sutra’s brevity—only a few verses—belies its depth, offering a practical meditation anchor that can be recited to cultivate the wisdom of emptiness in daily life. Scholars note that the Heart Sutra’s emphasis on emptiness bridges the first turning’s analytical path with the second turning’s experiential realization, making it an essential tool for Mahayana practitioners seeking to integrate insight into their practice.

In practice, reciting the Heart Sutra daily anchors the mind in the insight that phenomena are empty, allowing practitioners to let go of clinging and to cultivate compassion without attachment. The PDF’s concise form makes it suitable for chanting in meditation, study circles, or as a reminder during moments of stress. By internalizing the sutra’s central mantra, “form is emptiness, emptiness is form,” students develop a flexible, non‑dual awareness that permeates all aspects of life. This dynamic engagement with emptiness fosters resilience, reduces anxiety, and deepens the experiential understanding that all experiences are inter‑dependent and impermanent, thereby supporting the Mahayana goal of awakening for the benefit of all sentient beings. It remains a cornerstone of Mahayana practice, all seekers., practice.!!

Structure of the Perfection of Wisdom Literature
The PDF highlights core texts of the second turning, with the Heart Sutra as a concise example. It shows how these works interlink, presenting emptiness as central, guiding practitioners toward insight. for all seekers, guides us!

Core Texts of the Second Turning
The PDF edition of the Heart Sutra, published in 2018, offers a concise portal into Mahayana’s second turning of the Dharma wheel. It situates the sutra within the Perfection of Wisdom (Prajñāpāramitā) corpus, emphasizing emptiness (śūnyatā) as the ultimate reality beyond dualistic perception. Scholars note that this turning moves from the first turning’s focus on suffering to a radical deconstruction of inherent existence. The Heart Sutra, with its brief verses, encapsulates the insight that form, feeling, perception, mental formations, and consciousness lack inherent nature. The PDF highlights its traditional teaching at Vulture Peak, where the Buddha delivered sermons crystallizing universal compassion coupled with self‑concept deconstruction. Its repeated mantra “Gate Gate Paragate Parasamgate Bodhi Svaha” reinforces the cyclical path toward awakening. The document also references commentarial traditions that place the Heart Sutra alongside key Prajñāpāramitā works such as the Diamond Sutra, illustrating a coherent literary architecture guiding practitioners from foundational emptiness to Buddha‑nature realization; By presenting these core texts in an accessible PDF, the publication invites both novice and seasoned practitioners to engage with the central theme—emptiness—while avoiding nihilistic misinterpretations. The PDF further includes a comparative analysis of variants, a glossary of terms, and reflective prompts encouraging integration into life, thereby cultivating wisdom that permeates every action. Readers are urged to revisit the sutra, noting how repetition sharpens their understanding of interdependence and the nature of phenomena, thereby deepening compassionate practice. Enriching every moment with clarity. This resource is available for all seekers.
Interpretive Readings in the Third Turning

In the third turning of the Dharma wheel, the Heart Sutra PDF is approached not merely as a doctrinal statement but as a living interpretive framework that bridges the foundational emptiness of the second turning with the nuanced teachings of Buddha‑nature. Scholars emphasize that this turning introduces commentarial layers—such as the Yogacara and Tathāgatagarbha schools—that re‑contextualize the sutra’s brief verses into a broader cosmology of consciousness. The PDF includes a comparative table that aligns each stanza with corresponding passages from the Lotus Sutra, the Avatamsaka Sutra, and the Mahāyāna Mahāparinirvāṇa Sūtra, illustrating how the Heart Sutra’s core message is woven into a tapestry of Mahāyāna soteriology. By presenting these interpretive readings, the document invites practitioners to see the sutra as a dynamic dialogue: the first turning’s emphasis on the cessation of suffering, the second’s focus on emptiness, and the third’s expansion into the realization of Buddha‑nature within all beings. The PDF’s commentary section, written by contemporary scholars, argues that the third turning’s interpretive lens helps prevent nihilistic misreadings by framing emptiness as a liberating principle that preserves the integrity of compassionate action. It also offers guided meditation prompts that encourage readers to internalize the sutra’s teachings while simultaneously cultivating an awareness of the subtle interplay between form and emptiness. This PDF invites deeper practice day.

Theory of Buddha Nature (Tathagatagarbha)
The PDF presents the Heart Sutra as a concise expression of the profound Tathāgatagarbha doctrine, illustrating how the notion of an inherent Buddha‑nature permeates even the most distilled Mahāyāna teachings. Scholars note that the sutra’s declaration of “emptiness” is not a negation of all phenomena but a pointing toward the latent, unconditioned essence that resides within every sentient being. By framing emptiness as a dynamic, self‑purifying potential, the text aligns with the Tathāgatagarbha view that all beings possess the seed of Buddhahood, merely obscured by ignorance and karmic afflictions. The PDF includes a side‑by‑side comparison of key verses with passages from the Śrīmālādevī‑Sūtra and the Mahāparinirvāṇa‑Sūtra, underscoring the continuity of this theme across the Mahāyāna canon. It further elaborates on how the sutra’s brief verses serve as a catalyst for practitioners to recognize their own Buddha‑nature, encouraging a practice that transcends mere intellectual assent. The commentary section, authored by contemporary scholars, argues that the Heart Sutra’s emphasis on emptiness functions as a preparatory stage for the realization of Tathāgatagarbha, thereby preventing the misinterpretation of emptiness as nihilism. By integrating the sutra’s message with the broader Tathāgatagarbha framework, the PDF invites readers to cultivate a balanced understanding that honors both the emptiness of inherent existence and the inherent potential for enlightenment.
In practical terms, the PDF offers a series of reflective questions designed to help practitioners interrogate their own perceptions of self and emptiness. By asking whether the sense of a fixed identity persists after the realization of emptiness, readers are guided toward a direct experience of the Tathāgatagarbha. The document also highlights the role of devotion and ethical conduct as essential supports for realizing this inherent nature, echoing the Mahāyāna emphasis on skillful means. Finally, the PDF concludes with a brief meditation script that invites practitioners to sit with the breath, observe the arising and passing of thoughts, and recognize the underlying stillness that reflects the Buddha‑nature within.
Key Themes in the Heart Sutra
The PDF highlights emptiness, non‑self, and the avoidance of nihilism. It underscores the sutra’s concise articulation of the Buddha‑nature doctrine, encouraging practitioners to recognize inherent potential while maintaining ethical practice. The PDF also offers reflective prompts to deepen insight!

Emptiness of Inherent Existence
The 2018 PDF edition of the Heart Sutra presents a distilled exposition of the Mahayana principle that all phenomena lack inherent, independent existence. By tracing its lineage to the second turning of the Dharma wheel, the document underscores how emptiness serves as the antidote to the illusion of self‑sustaining nature. The text cites the Buddha’s Vulture Peak sermons, illustrating that the sutra’s concise verses—“form is emptiness, emptiness is form”—encourage practitioners to recognize the interdependent origination of form, feeling, perception, mental formations, and consciousness. This recognition is not a negation of reality but a clarification that phenomena arise conditioned, lacking a fixed essence. The PDF further warns against the misinterpretation of emptiness as nihilism; it clarifies that the absence of inherent existence does not entail annihilation but invites a compassionate engagement with the world. By integrating the theory of Buddha‑nature, the document shows how practitioners may still cultivate the potential for awakening while fully embracing the emptiness of all conditioned states. The PDF concludes with reflective prompts that invite readers to observe the fleeting nature of thoughts, sensations, and perceptions, thereby deepening their experiential understanding of emptiness and fostering a balanced, non‑attachment‑based practice. The PDF also provides a side‑by‑side translation, allowing readers to compare the Sanskrit terms with their English equivalents, thereby enhancing linguistic insight. Additionally, a brief commentary section contextualizes the sutra within Mahayana, emphasizing its role in guiding practitioners toward realizing emptiness while maintaining compassionate action. Practice regularly, and the subtle truth of emptiness will unfold.
Avoiding Nihilism
The 2018 PDF edition of the Heart Sutra explicitly addresses the danger of interpreting emptiness as nihilism, a misconception that can arise when practitioners focus solely on the absence of inherent existence. The text draws from the Buddha’s Vulture Peak sermons, emphasizing that emptiness is not a negation of reality but a recognition of interdependence. By presenting the sutra’s core mantra, “form is emptiness, emptiness is form,” the PDF guides readers to see that phenomena arise conditioned and lack a fixed essence, yet they continue to exist and function within the causal web. The document warns that a literal, literalist reading of the sutra could lead to a belief that nothing matters, which is antithetical to Mahayana compassion. Instead, the PDF encourages a balanced view: emptiness liberates from attachment and aversion while preserving the capacity for skillful action. The text also references the theory of Buddha‑nature, illustrating that the potential for awakening remains intact even as all conditioned states are empty. By integrating these insights, the PDF offers practical exercises—mindful observation of thoughts, sensations, and perceptions—to help practitioners experience the subtle interplay between emptiness and dependent origination. This experiential approach ensures that the understanding of emptiness does not devolve into nihilistic despair but becomes a foundation for compassionate engagement and spiritual growth.
Daily practice insight grow
Practical Implications for Practitioners
The 2018 PDF of the Heart Sutra encourages mindful recitation of “form is emptiness, emptiness is form.” This practice cultivates insight into interdependence, fostering compassion, action, grounding practitioners in present awarenessdeep.!
Spiritual Development and Emptiness
According to the 2018 PDF of the Heart Sutra, practitioners are invited to engage in a disciplined recitation of the phrase “form is emptiness, emptiness is form;” This mantra serves as a gateway to recognizing the absence of inherent existence in all phenomena, a core Mahayana teaching that distinguishes the second turning of the wheel of Dharma. By repeatedly internalizing the sutra’s concise expression, the mind gradually dissolves attachment to fixed identities, allowing the practitioner to experience the fluid interdependence of mind and matter. The text emphasizes that this insight is not a nihilistic denial of reality but a profound affirmation of the Buddha’s doctrine that emptiness is the true nature of all things. As the practitioner cultivates this awareness, the habitual patterns of craving and aversion loosen, creating space for genuine compassion to arise. The PDF also highlights that the heart sutra’s brevity makes it an ideal tool for meditation, especially in the context of daily practice where time is limited. By integrating this recitation into a routine, practitioners can develop a steady, mindful presence that supports the cultivation of wisdom, ultimately leading to liberation from the cycle of suffering. The document further notes that the sutra’s emphasis on emptiness aligns with the broader Mahayana goal of realizing Buddha nature, encouraging practitioners to view their own mind as a vessel capable of awakening. Thus, the PDF serves both as a practical guide for meditation and as a philosophical anchor that grounds the practitioner’s spiritual journey in the timeless teachings of the Mahayana tradition. Moreover, the PDF suggests pairing the recitation with mindful breathing, noting that each inhalation and exhalation can be synchronized with the syllables of the sutra, thereby reinforcing the connection between breath and emptiness. This technique is especially useful for beginners who may find abstract concepts challenging, as it grounds the practice in sensory experience. Finally, the document reminds practitioners that the ultimate aim is not merely intellectual understanding but the experiential realization that all phenomena arise and dissolve without fixed essence. Such realization, when integrated into everyday life, transforms ordinary moments into opportunities for awakening, thereby fulfilling the Mahayana promise of universal liberation. In sum, the Heart Sutra PDF offers a concise yet profound roadmap for practitioners seeking to weave the wisdom of emptiness into the fabric of their daily lives, ensuring that the path remains both accessible and transformative. Practitioners are encouraged to revisit the sutra regularly, noting subtle shifts in perception that signal deeper integration of emptiness into their worldview. Such shifts often manifest as a gentle loosening of rigid thought patterns.