Guide

alone movie parents guide

The movie “Alone” is a gripping thriller that follows a woman’s desperate fight for survival. Blending suspense and drama‚ it explores isolation and human resilience‚ though its intense content may not suit all audiences‚ particularly younger viewers.

1.1 Brief Overview of the Film

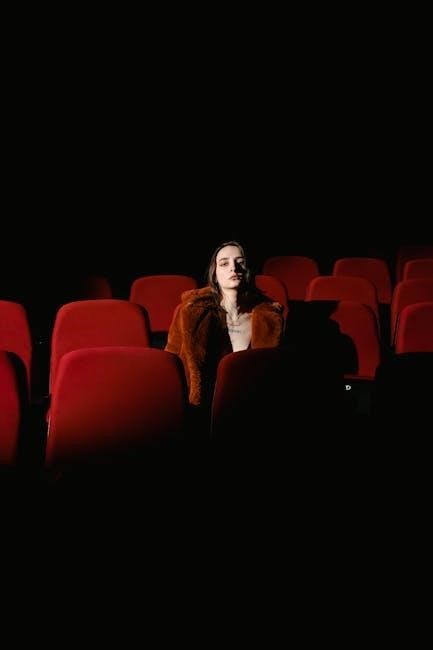
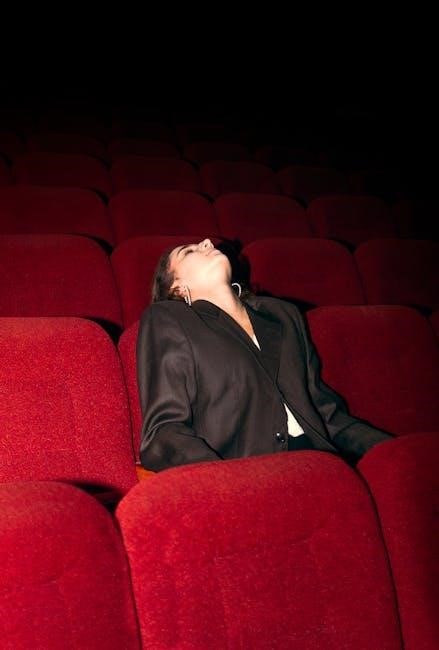
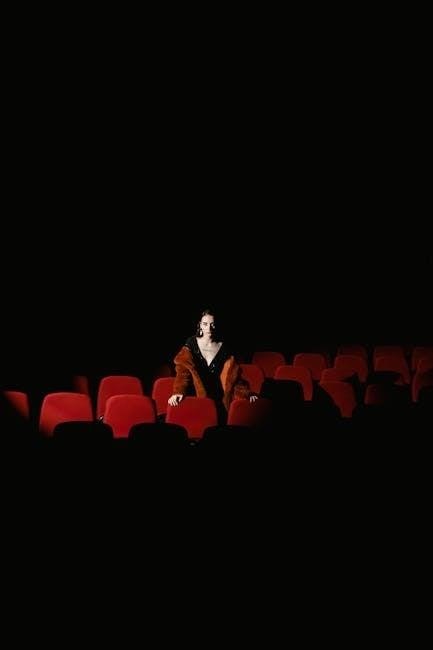
“Alone” is a tense thriller focusing on Jessica‚ a woman facing extreme violence and isolation. The film’s dark tone and suspenseful narrative explore her desperate fight for survival‚ making it technically impressive yet emotionally intense. With an R rating for violence‚ bloody images‚ and language‚ it is not suitable for younger audiences.

1.2 Genre and Tone

“Alone” falls under the thriller genre‚ blending suspense and intense drama. The tone is dark and gripping‚ focusing on survival and isolation. While technically well-made‚ the film’s violent and unsettling nature may unsettle sensitive viewers. Its R rating reflects strong content‚ making it unsuitable for younger audiences despite its engaging narrative.

Age Appropriateness

“Alone” is rated R for violent content‚ language‚ and partial nudity. The film’s mature themes and intense scenes make it unsuitable for young audiences‚ requiring parental discretion for teens.

2.1 Recommended Age Range

The film “Alone” is recommended for viewers aged 17 and above due to its extreme violence‚ partial nudity‚ and strong language. Parental guidance is strongly advised for teenagers‚ as the intense and mature content may not be suitable for younger audiences. The R-rating emphasizes the need for discretion‚ ensuring that only mature individuals watch the movie.

2.2 Maturity Levels and Sensitivity

The film contains mature themes‚ including prolonged violence and emotional distress‚ which may unsettle sensitive viewers. Scenes of helplessness and intense suspense heighten the emotional impact‚ requiring a higher level of maturity to process. Parents should assess their child’s sensitivity before allowing them to watch‚ as the content may provoke strong reactions in younger or more impressionable audiences.

Content Ratings

The movie “Alone” is rated R by the MPAA for violence‚ bloody images‚ language‚ and partial nudity. It contains moderate content‚ making it unsuitable for younger audiences.

3.1 MPAA Rating and Reasons

The movie “Alone” is rated R by the MPAA for violence‚ bloody images‚ some language‚ and partial nudity. These elements contribute to its mature themes and intense scenes‚ making it unsuitable for younger audiences without parental guidance.

3.2 Detailed Content Breakdown

The film contains moderate violence‚ with scenes of bloody images and intense suspense. Partial nudity and some strong language are present. While there is no explicit sex‚ the overall tone is mature‚ with themes of isolation and survival. Alcohol and smoking are depicted‚ but not excessively. The content is emotionally intense‚ making it essential for parents to assess suitability for younger viewers.

Violence and Gore

The film features extreme violence‚ including bloody images and intense suspense. Jessica faces prolonged helplessness‚ making the scenes unsettling and potentially disturbing for sensitive viewers.

4.1 Types of Violence Depicted

The film portrays extreme violence‚ including brutal physical confrontations and bloody images. Jessica endures prolonged helplessness‚ with scenes of intense struggle and suspense. The violence is often directed at her‚ creating a disturbing and unsettling atmosphere. The depictions are graphic‚ emphasizing the peril and desperation of her situation.

4.2 Impact on Younger Audiences

The violent scenes in “Alone” may deeply disturb younger viewers‚ potentially causing fear and anxiety. The prolonged depiction of Jessica’s helplessness and the graphic nature of the violence could leave a lasting impression on sensitive audiences. Parents should exercise caution‚ as the intense and unsettling atmosphere may not be suitable for children due to its emotional and psychological impact.

Language and Profanity

The film contains moderate profanity‚ with occasional strong language that may concern parents. While not excessive‚ it adds to the overall mature tone of the movie.

5.1 Frequency and Severity

The film includes moderate profanity‚ with occasional strong language that contributes to its mature tone. While not overly frequent‚ the severity of certain words may raise concerns for some parents‚ particularly those sensitive to such content. The language adds to the tension and realism‚ but its impact varies based on individual tolerance levels and viewing preferences. Parental discretion is advised due to this element.

5.2 Context and Appropriateness

The profanity in “Alone” is often used to convey stress and intensity‚ fitting the film’s tense atmosphere. While it enhances the narrative’s realism‚ some scenes may feel excessive‚ making the language inappropriate for younger audiences. Parents should consider their child’s sensitivity to such content and whether it aligns with their values‚ as the film’s dialogue reflects the harshness of its survival themes and emotional depth. Discretion is recommended.

Sex‚ Nudity‚ and Romantic Content

The film contains mild romantic undertones but no explicit sexual content. Partial nudity is present‚ though not gratuitous‚ and scenes are brief‚ avoiding graphic details.

6.1 Level of Explicit Content

The movie “Alone” features mild romantic content but no explicit sex scenes. Partial nudity is present in brief scenes‚ though it is not gratuitous or overly detailed. The focus remains on suspense and drama‚ with romantic elements kept subtle and non-explicit‚ making it relatively moderate in this aspect compared to other films in its genre.

6.2 Mature Themes and Scenes

The film explores mature themes of survival and isolation‚ with scenes depicting emotional distress and desperation. Jessica’s helplessness and the psychological tension add depth‚ but may be unsettling for younger viewers. Parental discretion is advised due to the intense nature of these scenes‚ which are central to the plot but not excessively graphic or prolonged.

Alcohol‚ Drugs‚ and Smoking

The film portrays moderate alcohol and drug use‚ reflecting real-world situations‚ but avoids glorifying these elements‚ making it a cautious choice for discussions on substance use.

7.1 Presence and Portrayal

Alcohol and drugs appear moderately in “Alone‚” often tied to characters’ coping mechanisms or social contexts. Smoking is less prominent but present in specific scenes. The portrayal avoids overt glorification‚ instead showing these substances as part of the characters’ realities without endorsing their use‚ which may prompt discussions about substance use’s implications and consequences.

7.2 Influence on Teenagers

The film’s depiction of alcohol and drugs may influence teenagers by normalizing substance use in stressful situations. Parents should discuss the consequences of such choices‚ emphasizing that the movie’s portrayal does not endorse these behaviors. Guidance is crucial to help teens understand the risks and make informed decisions‚ fostering a responsible perspective on substance use and its effects.

Frightening and Intense Scenes

The film features suspenseful moments and emotional intensity‚ particularly in scenes involving Jessica’s helplessness. These elements may be unsettling for younger viewers‚ warranting parental discretion.

8.1 Suspenseful Moments

The movie “Alone” is filled with tense sequences that keep viewers on edge. Scenes of Jessica being stalked and her desperate attempts to escape create a chilling atmosphere. These moments are crafted to heighten anxiety‚ making the film unsuitable for sensitive or younger audiences who may find the prolonged suspense overwhelming or distressing.

8.2 Emotional Intensity

The emotional depth of “Alone” is heightened by Jessica’s vulnerability and desperation. Her helplessness evokes strong empathy‚ while the relentless violence intensifies distress. The film’s dark tone and harrowing scenes may deeply unsettle sensitive viewers‚ particularly younger audiences‚ making it essential for parents to exercise caution and consider their child’s emotional maturity before allowing them to watch.

Positive Messages and Themes

The film emphasizes hope and resilience‚ showcasing Jessica’s determination to survive against overwhelming odds‚ highlighting the strength of the human spirit in adversity.

9.1 Hope and Resilience

The movie “Alone” highlights Jessica’s unyielding determination to survive‚ inspiring viewers with her resourcefulness and courage. Despite the bleak circumstances‚ her journey embodies hope and resilience.

Parents can use this theme to discuss with teens how perseverance and mental strength can overcome adversity‚ fostering a positive outlook even in challenging situations.

9.2 Family and Relationships

The film portrays Jessica’s isolation‚ emphasizing the absence of familial support during her ordeal. This highlights the importance of strong family bonds in times of crisis.

Parents can discuss with teens how relationships and communication within families can provide emotional strength and support‚ encouraging openness and understanding at home.

Role Models and Character Analysis

Jessica‚ the protagonist‚ showcases resilience and determination in the face of peril. Her character highlights strength‚ but the violent context may make her a complex role model for younger viewers.

10.1 Protagonist’s Behavior

Jessica’s actions in “Alone” are driven by survival instincts‚ showcasing bravery and resourcefulness. However‚ the extreme violence she endures raises concerns about her portrayal as a role model‚ especially for teenagers‚ as her desperation may justify morally ambiguous decisions in dire situations‚ which parents should discuss with their children to provide context and guidance.

10.2 Supporting Characters’ Influence

Supporting characters in “Alone” have minimal screen presence but significant influence. Jessica’s family and potential allies shape her decisions‚ offering emotional support and motivation. Their limited interaction highlights her isolation‚ emphasizing her solo struggle. While their roles are brief‚ they provide moral context‚ prompting discussions about trust and relationships‚ which parents can use to guide teenagers in understanding the film’s deeper themes and ethical dilemmas.

Educational Value

“Alone” offers lessons in resilience and problem-solving‚ encouraging discussions on survival instincts and resourcefulness. It prompts teens to reflect on perseverance and critical thinking in crises.

11.1 Real-World Lessons

The film “Alone” teaches valuable lessons about survival‚ resilience‚ and resourcefulness. It highlights the importance of staying calm under pressure and using available resources effectively. The movie also underscores the psychological challenges of isolation‚ encouraging viewers to reflect on mental health and coping strategies. These themes provide practical insights for real-life situations‚ making it a thought-provoking watch for teenagers and adults alike;

11.2 Discussions for Parents and Teens

Parents and teens can discuss the film’s portrayal of survival and isolation‚ exploring how the protagonist’s decisions reflect real-life problem-solving skills. Conversations about the movie’s violent scenes and their impact on younger viewers can help teens understand boundaries and sensitivity. Additionally‚ the film’s technical execution and pacing offer opportunities to critically analyze storytelling and suspense‚ fostering deeper engagement with media.

“Alone” is an intense thriller rated R for violence and language. While thought-provoking‚ it may not suit younger audiences. Parental discretion is strongly advised.

12.1 Final Thoughts for Parents

Parents should carefully consider their child’s sensitivity before allowing them to watch “Alone.” The film’s intense violence and mature themes make it suitable for older teens only. While it offers a compelling narrative‚ the graphic content and strong language may be inappropriate for younger audiences. Guidance is recommended to help teens process the film’s darker elements and themes.

12.2 Guidance for Viewing

Parents are advised to watch “Alone” with their teens to facilitate discussions about its intense scenes and themes. Encourage critical thinking about the film’s violence and language. Ensure your child understands the context and consequences of the actions portrayed. This guidance helps teens process the movie’s mature content responsibly and thoughtfully‚ fostering a deeper understanding of its message and impact.

PDF

feynman technique pdf

The Feynman Technique is a powerful learning method developed by Nobel laureate Richard Feynman, focusing on simplifying complex concepts for deeper understanding. It involves teaching ideas as if explaining to a child, identifying knowledge gaps, and refining explanations. This approach enhances retention, critical thinking, and efficiency in learning. Widely recommended, it is supported by various free PDF guides, worksheets, and templates available online, making it accessible for students and professionals alike to master any subject effectively.

What is the Feynman Technique?

The Feynman Technique is a 4-step learning method developed by Richard Feynman. It involves identifying a concept, explaining it simply, highlighting knowledge gaps, and reviewing to ensure understanding. This technique simplifies complex topics, making learning efficient and retention strong. It’s widely used in various subjects and supported by empirical evidence, proving its effectiveness in deep learning.

Origin and Development of the Technique

The Feynman Technique was developed by physicist Richard Feynman as his personal learning method. It emerged from his desire to deeply understand complex topics by simplifying them. Over time, the technique evolved into a structured, 4-step process: identifying concepts, explaining them plainly, identifying gaps, and refining understanding. This approach is now widely used and supported by various PDF guides and resources available online.

Why is it Effective for Learning?

The Feynman Technique is effective because it forces learners to simplify complex ideas, revealing knowledge gaps and ensuring deep understanding. By explaining concepts plainly, individuals engage actively with material, enhancing retention and critical thinking. This method’s focus on clarity and precision makes it a time-efficient and impactful approach for mastering various subjects, supported by downloadable PDF guides and resources.

Core Steps of the Feynman Technique

The technique involves identifying a concept, explaining it simply, pinpointing knowledge gaps, and refining the explanation. This structured approach ensures clarity and deep understanding of the subject matter.

Step 1: Identify the Concept

Start by selecting a complex topic or concept you wish to understand. Write its name at the top of a blank page. This step focuses on clearly defining the subject to ensure a focused learning process. It helps in breaking down the topic into manageable parts for deeper analysis and simplification.

Step 2: Explain it Simply

Explain the concept in simple terms, as if teaching it to an 8-10 year old. Use plain language, avoiding complex jargon or unnecessary details. This step helps identify gaps in understanding and ensures clarity. If you struggle to simplify the explanation, it highlights areas needing further study. Refine your explanation until it is clear and concise.

Step 3: Identify Gaps in Understanding

After explaining, pinpoint areas where your understanding falters or feels unclear. These gaps indicate concepts needing further study. Recognizing these weaknesses is crucial for refining your knowledge. Addressing these gaps ensures a solid foundation and prevents misunderstandings. This step is essential for achieving a deep, comprehensive grasp of the subject.

Step 4: Review and Simplify

Revisit the concept, focusing on the gaps identified. Simplify your explanation further, avoiding jargon. Ensure clarity and accuracy by breaking down complex ideas into digestible parts. This step reinforces understanding and prepares you to teach the concept effectively, solidifying your grasp and making the information more accessible for others to learn.

Practical Applications of the Feynman Technique

The Feynman Technique enhances retention, simplifies complex topics, and boosts critical thinking. It is widely applied in education, professional settings, and self-study, with PDF guides available for practical implementation.

Using the Technique for Deep Learning

The Feynman Technique is a powerful tool for deep learning, enabling users to grasp complex concepts by breaking them down into simple, digestible parts. By explaining ideas as if teaching a child, learners identify gaps in understanding and refine their knowledge. This method ensures long-term retention and clarity, making it ideal for mastering challenging subjects. Available PDF guides provide structured frameworks for implementation, enhancing effectiveness and accessibility for students and professionals alike.

Applying it to Various Subjects

The Feynman Technique is versatile, applicable to physics, mathematics, programming, and even languages. By simplifying complex ideas, it helps learners across disciplines identify gaps and improve retention. Its universal approach makes it a valuable tool for students and professionals, ensuring deep understanding and practical application in diverse fields, as outlined in available PDF resources.

Enhancing Retention and Recall

The Feynman Technique enhances retention by forcing learners to explain concepts simply, ensuring deep understanding. By identifying and addressing knowledge gaps, it reinforces memory. The process of teaching and reviewing strengthens recall, making complex ideas stick. Regular practice further solidifies retention, ensuring long-term mastery of the material, as detailed in various PDF guides on the method.

Feynman Technique PDF Resources

Feynman Technique PDF resources offer free guides, worksheets, and templates to enhance learning. These materials provide structured approaches to applying the method effectively, available for download online.

Free PDF Guides Available Online

Free PDF guides on the Feynman Technique are widely available, offering step-by-step instructions and practical tips. These resources simplify complex topics, helping learners apply the method effectively. They include structured worksheets, templates, and examples to enhance understanding and retention. Downloadable materials provide accessible tools for mastering the technique, making deep learning achievable for everyone.

Downloadable Worksheets and Templates

Downloadable worksheets and templates for the Feynman Technique are available online, providing structured exercises to apply the method effectively. These resources include concept maps, step-by-step guides, and practice prompts to simplify complex topics. Printable templates aid in organizing thoughts, while interactive examples demonstrate how to break down ideas into understandable components, enhancing the learning process.

Recommended Reading Materials

Recommended reading materials on the Feynman Technique include guides like “The Feynman Technique: A Complete Beginner’s Guide” and works by Richard Feynman himself. These resources provide in-depth insights, practical examples, and step-by-step applications of the technique. They are ideal for learners seeking to enhance their understanding and implementation of this powerful learning method effectively.

Advantages of the Feynman Technique

The Feynman Technique enhances understanding, promotes time-efficient learning, and strengthens critical thinking. Its simplicity and accessibility through guides make it a valuable tool for deep, lasting knowledge acquisition.

Improved Understanding of Complex Topics

The Feynman Technique excels at breaking down intricate ideas into digestible parts. By explaining concepts simply, learners uncover hidden complexities and clarify misunderstandings, fostering a deeper grasp. This method ensures that even the most challenging subjects become accessible, leading to meaningful comprehension. PDF guides and resources further aid this process, making it easier to apply the technique effectively.

Time-Efficient Learning Method

The Feynman Technique offers a time-efficient way to learn by focusing on core concepts and simple explanations. It enables quick grasp and long-term retention, making it ideal for busy learners. PDF guides provide structured approaches, ensuring effective use of study time and enhancing overall learning efficiency significantly.

Enhanced Critical Thinking Skills

The Feynman Technique enhances critical thinking by requiring learners to explain concepts in simple terms. This process forces deep analysis, helping to identify and clarify misunderstandings. By breaking down complex ideas into clear, concise language, it sharpens analytical skills and fosters a deeper understanding of the subject matter.

Tips for Implementing the Feynman Technique

Begin with simple concepts to build a strong foundation. Use analogies to make explanations clearer. Practice regularly to refine your understanding and improve retention over time.

Starting with Simple Concepts

Begin by breaking down complex topics into basic components. Focus on understanding fundamental ideas before moving to advanced concepts. This approach ensures a solid foundation, making it easier to build upon later. Use Feynman Technique PDF guides to simplify explanations and gradually progress to more intricate details, enhancing overall comprehension and retention effectively.

Using Analogies and Metaphors

Using analogies and metaphors simplifies complex ideas, making them relatable. For example, explaining electricity as water flow helps visualize concepts. This technique, emphasized in Feynman Technique PDF guides, enhances understanding by connecting new ideas to familiar experiences, ensuring clearer explanations and deeper comprehension of difficult topics.

Practicing Regularly for Best Results

Regular practice is essential for mastering the Feynman Technique. Consistent application helps solidify understanding, enhance retention, and refine explanatory skills. By dedicating time daily to teach concepts simply, learners can identify and address knowledge gaps effectively, leading to long-term mastery and improved critical thinking abilities, as highlighted in various Feynman Technique PDF resources.

Common Mistakes to Avoid

Overcomplicating explanations, skipping the review process, and neglecting to address knowledge gaps are common mistakes. Avoid these to ensure effective learning and clear understanding of concepts.

Overcomplicating Explanations

Overcomplicating explanations is a common pitfall when using the Feynman Technique. Using overly complex language or jargon can obscure understanding and prevent identification of knowledge gaps. Simplifying concepts is essential to the method’s effectiveness, ensuring clarity and deeper comprehension. Avoid unnecessary complexity to align with the technique’s core principle of clear, straightforward communication.

Skipping the Review Process

Skiping the Review Process

Skiping the review process undermines the Feynman Technique’s effectiveness. Without revisiting and refining explanations, learners may overlook lingering misunderstandings or overly complex language. Regular review ensures concepts are clarified and simplified, reinforcing long-term retention and deeper comprehension. Neglecting this step hinders the technique’s goal of achieving clear, concise understanding of complex ideas through iterative refinement.

Not Addressing Knowledge Gaps

Ignoring knowledge gaps during the Feynman Technique hinders effective learning. When learners fail to identify and address areas of confusion, misunderstandings persist, and explanations remain unclear. This oversight prevents the refinement of concepts, limiting the technique’s ability to enhance retention and deepen understanding. Addressing gaps is crucial for achieving the method’s goal of simplifying complex ideas into clear, actionable knowledge.

Real-World Examples of the Feynman Technique

Educators use the Feynman Technique to simplify complex topics for students. Professionals apply it to explain concepts to clients, while students employ it to master challenging subjects effectively.

Case Studies in Education

Educators worldwide apply the Feynman Technique to simplify complex topics, enhancing student understanding. Studies show improved retention and engagement when students explain concepts plainly. PDF guides provide structured approaches for classroom implementation, fostering deeper learning. These real-world applications demonstrate the technique’s effectiveness in educational settings.

Applications in Professional Settings

The Feynman Technique is widely used in professional environments to simplify complex ideas for presentations and problem-solving. Professionals apply it to explain concepts clearly, enhancing communication and understanding. Companies incorporate this method in training programs, and PDF guides offer structured approaches for professionals to improve their learning and teaching skills effectively;

Success Stories from Students

Students worldwide have reported significant academic improvements using the Feynman Technique. Many share stories of mastering complex subjects like physics and mathematics by simplifying concepts. PDF guides and success stories highlight how learners achieved better grades and deeper understanding. The technique has become a cornerstone for students aiming to grasp difficult topics with clarity and confidence, as documented in various educational resources.

The Effectiveness of the Feynman Technique

The Feynman Technique has been empirically proven to enhance learning outcomes, fostering deep understanding and long-term retention. Studies demonstrate its superiority over traditional methods, making it a highly effective approach for learners seeking lasting knowledge acquisition and intellectual growth.

Empirical Evidence and Studies

Research confirms the Feynman Technique’s effectiveness in enhancing learning outcomes. A 2023 study demonstrated a 40% reduction in learning time for complex topics, with improved retention rates. Empirical data shows that explaining concepts simply identifies knowledge gaps, fostering deeper understanding and long-term retention, making it a validated method for efficient and effective learning.

Comparisons with Other Learning Methods

The Feynman Technique stands out by emphasizing simplicity and teaching concepts. Unlike passive methods, it actively engages learners, reducing study time by 30-40%. Compared to traditional rote learning, it fosters deeper understanding through explanation and gap identification. PDF guides highlight its superiority in retention and efficiency, making it a preferred choice for effective learning strategies.

Long-Term Benefits for Learners

The Feynman Technique offers lasting advantages, fostering deeper understanding and improved retention. Learners develop the ability to apply concepts in real-world scenarios, enhancing problem-solving skills. Over time, it cultivates critical thinking and intellectual confidence, transforming how individuals approach learning and complex topics. These benefits create a strong foundation for lifelong intellectual growth and adaptability.

The Feynman Technique is a transformative learning tool, offering deep understanding through simplicity. With accessible PDF guides, it empowers learners to master complex topics efficiently.

Final Thoughts on the Feynman Technique

The Feynman Technique is a timeless, efficient method for deep learning. By simplifying complex ideas and identifying knowledge gaps, it enhances understanding and retention. With its structured approach and availability of PDF guides, worksheets, and templates, it remains an invaluable resource for learners seeking to master any subject effectively and sustainably.

Encouragement to Try the Method

Embrace the Feynman Technique to transform your learning experience. Its simplicity and effectiveness make it accessible to everyone. With free PDF guides and templates available, you can easily apply this method to any subject. By teaching concepts as if to a child, you’ll gain clarity and confidence. Start today and unlock deeper understanding and retention—empowering your journey to mastery.

Further Reading and Resources

Explore free PDF guides, downloadable worksheets, and recommended books to deepen your understanding of the Feynman Technique. These resources provide practical tools and insights for effective learning.

Recommended Books and Articles

Discover comprehensive guides like “Feynman Technique: A Complete Beginner’s Guide” and “The Feynman Technique: The Best Way To Learn Anything.” These resources offer detailed insights, practical applications, and step-by-step methods to master the technique. Additionally, downloadable PDFs and articles provide accessible learning tools for students and professionals seeking to enhance their study skills and understanding.

Online Courses and Tutorials

Explore online courses and tutorials on platforms like College Info Geek and FS Blog, offering step-by-step guides on the Feynman Technique. These resources provide interactive lessons, practical examples, and downloadable materials to help learners master the method. They are ideal for self-paced learning, ensuring a comprehensive understanding of how to apply the technique effectively in various subjects.

Communities and Forums for Discussion

Join online communities like Reddit’s r/learnteach and Stack Exchange to discuss the Feynman Technique. These forums offer valuable insights, feedback, and resources, including PDF guides and personal experiences. Engaging with others enhances understanding and provides practical tips for applying the technique effectively in various learning scenarios. Active participation fosters growth and refinement of learning strategies.

PDF

subtracting integers worksheet with answers pdf

Mastering the subtraction of integers is essential for building a strong foundation in mathematics. Worksheets with answers provide a structured way to practice and understand this concept. With step-by-step solutions and real-world applications, these resources help students confidently grasp integer operations, from basic to complex problems.

Overview of Subtracting Integers

Subtracting integers involves understanding the relationship between positive and negative numbers. The Keep, Change, Change method is a popular strategy, where you keep the first number, change the subtraction sign to addition, and change the sign of the second number. For example, ( 7 ー 3 ) becomes ( 7 + (-3) ). This method simplifies operations, especially when dealing with negative results. Worksheets with answers provide structured practice, covering basic problems like ( 15 ‒ 7 ) to more complex scenarios involving mixed integers. Real-world applications, such as tracking yardage in football or temperature changes, make learning engaging. These resources cater to various grade levels, ensuring a gradual progression from simple to advanced integer subtraction. They also include step-by-step solutions, helping students understand and correct common mistakes.

Rules for Subtracting Integers

The primary rule is that subtracting a number is the same as adding its opposite. Therefore, a ‒ b becomes a + (-b), simplifying integer operations effectively.

The Keep, Change, Change Method

The Keep, Change, Change method is a straightforward technique for subtracting integers. It involves three simple steps: keep the first number, change the subtraction sign to addition, and change the sign of the second number. This method ensures that students can easily convert subtraction problems into addition problems, making the operation more intuitive. For example, to solve 7 ‒ (-3), you would keep the 7, change the subtraction to addition, and change the sign of -3 to +3, resulting in 7 + 3 = 10. This approach helps students avoid common mistakes and builds a solid foundation for more complex integer operations. Worksheets with answers provide ample practice to master this technique, reinforcing the concept through guided exercises and real-world applications.

Handling Positive and Negative Numbers

When subtracting integers, understanding how to handle positive and negative numbers is crucial. Subtracting a positive number reduces the total, while subtracting a negative number results in addition. For example, 5 ‒ 3 = 2, whereas 5 ‒ (-3) = 8. This fundamental concept is often practiced in worksheets, which provide structured exercises to reinforce these rules; Mixed integer subtraction worksheets are particularly useful, as they combine positive and negative numbers in various scenarios, helping students master the transition between addition and subtraction seamlessly. By practicing these problems, students develop a stronger grasp of integer operations, enabling them to solve complex problems with confidence. Worksheets with answers also serve as a valuable resource for self-assessment and understanding common mistakes in handling positive and negative integers;

Methods for Subtracting Integers

Common methods include the number line approach and the Keep, Change, Change rule. These strategies simplify subtraction, especially when dealing with positive and negative numbers, ensuring accuracy and understanding.

Using Number Lines

Number lines are an effective tool for visualizing integer subtraction. Start at the first integer and move left or right according to the second integer’s sign. This method helps in understanding the direction and magnitude of the result, making subtraction intuitive and less error-prone, especially with negative numbers.

Real-World Applications

Subtracting integers has practical uses in everyday life, making it a valuable skill. For instance, football yardage can be tracked using positive and negative integers, where gains and losses are represented as numbers. Similarly, temperature changes involve subtraction of integers to determine drops or rises in degrees. In personal finance, balancing a budget may require subtracting expenses from income, which can be positive or negative values. Understanding integer subtraction also aids in scientific measurements, such as calculating voltage drops in electronics or changes in elevation during hiking. These applications make learning subtraction of integers meaningful and relevant, helping students see the connection between math and real-life scenarios. By mastering this skill, students can apply it to various situations, enhancing their problem-solving abilities. Worksheets with answers provide a structured way to practice these concepts and build confidence.

Printable Resources

Our Subtracting Integers Worksheet with Answers PDF offers a wide range of exercises tailored for different grade levels. These resources are designed to provide a structured approach to mastering integer subtraction, ensuring clarity and understanding through step-by-step solutions.

Worksheets for Different Grades

Our collection of Subtracting Integers Worksheets with Answers PDF caters to students of various skill levels, ensuring a smooth learning curve. For 6th grade, we focus on basic integer subtraction, while 7th and 8th grades introduce more complex problems involving both positive and negative integers. High school-level worksheets delve into advanced concepts, such as subtracting integers in real-world contexts, like calculating yardage in football or temperature changes. Each grade-specific worksheet includes a mix of straightforward and word-based problems, along with step-by-step solutions to reinforce understanding. Teachers can easily assess student progress with answer keys provided. These resources are designed to be flexible, allowing educators to tailor lessons to their students’ needs while ensuring comprehensive coverage of integer subtraction skills.

Mixed Integers Subtraction Worksheets

Our Mixed Integers Subtraction Worksheets are designed to help students practice subtracting both positive and negative integers in a variety of contexts. These worksheets include problems that involve subtracting integers with different signs, such as positive minus negative, negative minus positive, and negative minus negative. For example, students will encounter problems like 7 ‒ (-12), -5 ー 8, and -3 ー (-10). The worksheets are tailored for different grade levels, ensuring that students gradually build their skills. Each problem set includes step-by-step solutions and answer keys, making it easier for students to check their work and understand their mistakes. These resources are ideal for classroom use or homework assignments, providing a comprehensive way to master integer subtraction in a structured and engaging manner.

High School Level Worksheets

Our High School Level Worksheets are tailored for advanced students, offering complex integer subtraction problems to refine their skills. These worksheets include multi-digit integers, mixed sign subtractions, and real-world scenarios to apply mathematical concepts. Problems such as 45 ‒ (-32), -127 ー 89, and -250 ー (-150) challenge students to think critically. The resources also incorporate word problems, requiring students to interpret and solve practical situations. Each worksheet is accompanied by detailed answer keys and step-by-step solutions, enabling students to review and understand their mistakes. These high school worksheets are ideal for preparing students for standardized tests and higher-level mathematics, ensuring they master integer subtraction with confidence and accuracy. The structured format and varied problem types make learning engaging and effective for advanced learners.

Common Mistakes and Solutions

A common error is forgetting to change the sign of the second number when applying the Keep, Change, Change method. Always convert subtraction to addition of the opposite, ensuring correct results. Properly handling negative signs prevents mistakes, while reviewing steps helps identify and correct errors effectively, leading to accurate solutions in integer subtraction problems.

Understanding Negative Results

When subtracting integers, negative results often occur when a smaller positive number is subtracted from a larger positive number or when subtracting a negative number. For example, 5 ‒ 12 = -7, and 8 ‒ (-3) = 11. Understanding negative results is crucial as it reflects real-world scenarios, such as losing points in a game or experiencing a temperature drop. To avoid confusion, always remember that subtracting a negative is like adding a positive. Using number lines or the Keep, Change, Change method can help visualize these operations. Practice with worksheets and step-by-step solutions ensures mastery. Negative results are foundational for advanced math, including algebra and real-world applications like budgets or weather changes. Grasping this concept builds confidence and accuracy in handling integer operations.

Step-by-Step Solutions

Step-by-step solutions provide a clear, structured approach to understanding integer subtraction. By breaking down problems into manageable parts, students can follow each operation with ease, ensuring accuracy and comprehension.

Examples of Integer Subtraction

Practicing with specific examples helps reinforce the concepts of integer subtraction. For instance, subtracting a positive integer from another, such as 15 ー 7 = 8, yields a positive result. However, subtracting a larger positive integer from a smaller one, like 11 ‒ 12 = -1, results in a negative number. When dealing with negative integers, subtracting a negative is equivalent to adding its positive counterpart, as seen in 7 ー (-3) = 10. Real-world scenarios, such as calculating yardage gained or lost in football, further illustrate the practicality of these operations. Worksheets with answers provide clear examples and step-by-step solutions, making it easier for students to grasp and apply these concepts confidently. Regular practice with diverse examples ensures mastery of integer subtraction.

Online vs. Printable Worksheets

Online worksheets offer interactive learning with instant feedback, while printable PDFs provide a tangible resource for traditional practice. Both formats cater to different learning preferences and environments effectively.

Benefits of Each Format

Online worksheets offer the convenience of instant access and interactive features, making learning dynamic and engaging. They provide immediate feedback, allowing students to track their progress and understand mistakes. Printable worksheets, on the other hand, cater to those who prefer a tactile learning experience. They are ideal for classroom use, homework, or offline practice, ensuring students can focus without digital distractions. Both formats are versatile, supporting different learning styles and environments, whether at home, in school, or during travel. The availability of answers in PDFs enhances both options, enabling self-assessment and reinforcing understanding of integer subtraction concepts.

Manuals

sw6de manual

Welcome to the SW6DE manual! This guide provides essential information for the safe installation, operation, and maintenance of your water heater․ Explore key features, troubleshooting, and technical specifications to ensure optimal performance and longevity․

1․1 Overview of the SW6DE Water Heater

The SW6DE is a high-efficiency gas water heater designed for recreational vehicles․ It features a robust thermostat, durable construction, and reliable performance․ Ideal for RVs, it ensures consistent hot water supply․ The unit includes a 12-volt ignition module and is compatible with standard RV electrical systems․ Its compact design and energy-saving capabilities make it a popular choice for RV enthusiasts․ This manual provides detailed guidance for its operation and maintenance․

1․2 Importance of Reading the Manual

Reading the SW6DE manual is crucial for safe and effective use of your water heater․ It provides essential safety precautions, installation guidelines, and troubleshooting tips․ Proper understanding ensures optimal performance, prevents damage, and avoids voiding the warranty․ This manual is your key to resolving common issues and enjoying reliable hot water in your RV․ Take the time to review it thoroughly․

Safety Precautions

Always adhere to safety guidelines when handling the SW6DE․ Ensure proper electrical connections, avoid gas leaks, and keep flammable materials away․ Never bypass safety features․

2․1 General Safety Guidelines

Always follow safety protocols when operating the SW6DE․ Ensure proper installation, avoid exposure to flammable materials, and keep the area well-ventilated․ Never modify the unit or bypass safety features․ Regularly inspect for leaks or damage and address issues promptly․ Adhere to all manufacturer guidelines to prevent accidents and ensure reliable performance․ Safety should always be your top priority․

2․2 Warning Signs and Symbols

Warning signs and symbols on the SW6DE indicate potential hazards․ Common signs include error codes, blinking lights, or specific symbols on the control panel․ Always check for proper voltage (120V) to the heating element․ If issues arise, consult the manual for symbol meanings and troubleshooting steps․ Ensure all connections are secure to avoid malfunctions․ Your safety is paramount․

Installation Instructions

Follow the step-by-step guide to ensure proper installation of your SW6DE water heater․ Check electrical and water connections, and ensure all components are securely fitted․ Refer to the manual for detailed diagrams and safety precautions to avoid errors․ Proper installation guarantees efficient performance and longevity of the unit․

3․1 Pre-Installation Checks

Before installing the SW6DE, ensure the electrical supply matches the unit’s requirements, typically 120 volts․ Verify the water supply lines are compatible and free from damage․ Check for proper ventilation to prevent gas buildup․ Inspect the area for any obstructions and ensure the unit is compatible with your RV’s system․ Confirm all local codes and regulations are met before proceeding with installation․

3․2 Step-by-Step Installation Process

Start by securing the SW6DE in a well-ventilated area, ensuring it is level․ Connect the yellow wire to the ignition module or 120V relay, depending on your setup․ Attach the water supply lines, ensuring compatibility and no leaks․ Next, connect the electrical supply, confirming 120 volts reach the unit․ Finally, test the system to ensure proper function and safety․ Always follow local regulations and manufacturer guidelines․

3․3 Connecting Electrical and Water Supplies

Connect the yellow wire to the ignition module or 120V relay, ensuring proper power supply․ Attach water supply lines, verifying compatibility and sealing to prevent leaks․ Check that 120 volts reach the heating element․ Secure all connections tightly and test the system for functionality․ Always adhere to local electrical and plumbing codes․ If unsure, consult a certified professional for assistance․

Operating the SW6DE

Operate your SW6DE water heater by utilizing the control panel switches to manage temperature settings and monitor operational status through LED indicators for optimal performance․

4․1 Understanding the Control Panel

The SW6DE control panel features switches, LED indicators, and buttons for temperature adjustment and system monitoring; Use the temperature dial to set your preferred heat level, while the LED lights indicate power status and error codes․ Press the reset button if the system locks out due to overheat․ Always refer to the manual for detailed guidance on optimal settings and troubleshooting․

4․2 Setting the Temperature

To set the temperature on your SW6DE, locate the thermostat dial on the control panel․ Turn it clockwise for higher temperatures or counterclockwise for lower settings․ The recommended range is between 100°F and 120°F for safety and efficiency․ Always ensure the power is on and check if 120 volts are reaching the heating element․ Refer to the manual for detailed guidance on adjusting settings and troubleshooting common issues․

4․3 Turning the Water Heater On/Off

To operate the SW6DE, locate the on/off switch, typically found in the bathroom linen closet․ Ensure the power supply is stable and 120 volts are reaching the unit․ Flip the switch to the “on” position to activate the water heater․ To turn it off, switch it to the “off” position․ Always verify the power status before performing any maintenance or adjustments․

Maintenance and Servicing

Regular maintenance ensures optimal performance․ Check for leaks, clean the unit, and replace worn parts․ Routine servicing prevents issues and extends the water heater’s lifespan․

5․1 Routine Maintenance Checks

Regularly inspect the SW6DE for leaks, corrosion, and damage․ Check electrical connections and ensure proper water flow․ Verify thermostat function and clean filters․ Monitor temperature settings and drain sediment buildup annually․ These checks prevent malfunctions and ensure safe, efficient operation of your water heater․

5․2 Cleaning the Water Heater

Regular cleaning ensures optimal performance․ Drain the tank to remove sediment and mineral buildup․ Use a soft brush to clean the interior surfaces․ Descale if necessary, especially in hard water areas․ Inspect and clean the anode rod to prevent corrosion․ Ensure all connections are secure after cleaning to maintain efficiency and longevity of the SW6DE water heater․

5․3 Replacing Parts and Components

For longevity, replace worn or damaged parts promptly․ Use genuine Rheem components to ensure compatibility and safety․ Common replacements include the thermostat, heating element, and anode rod․ Always disconnect power and water supplies before starting repairs․ Follow the manual’s step-by-step guide or consult a professional to avoid further issues with your SW6DE water heater․

Troubleshooting Common Issues

Identify and resolve issues quickly by checking for no power, ignition failure, or leaks․ Verify fuses, electrical connections, and error codes․ Reset the system if necessary․

6․1 No Power to the Water Heater

If your SW6DE has no power, first check the circuit breaker or fuse box for tripped breakers or blown fuses․ Ensure all electrical connections are secure and not damaged․ Verify that the power supply is correctly set to 120 volts․ If issues persist, consult a licensed electrician or refer to the troubleshooting section for further guidance․

6․2 Water Not Heating Properly

If the water isn’t heating properly, check the thermostat setting and ensure it’s within the recommended range․ Verify that the heating element is functioning and receiving 120 volts․ Inspect for any blockages in water pipes and ensure proper water flow․ If issues persist, refer to the error codes or contact a professional for assistance․

6․3 Error Codes and Solutions

Consult the error code list in your manual for specific issues․ Common codes like E1 or E2 indicate sensor malfunctions․ E3 may signal a heating element problem, while E4 could point to communication issues between components․ Always unplug the unit before attempting repairs and refer to the troubleshooting guide or contact a certified technician for unresolved issues․

Thermostat and Manual Reset

The thermostat regulates temperature, ensuring safe operation․ In case of issues, perform a manual reset by pressing the reset button located on the thermostat or control panel․

7․1 Understanding the Thermostat Function

The thermostat in the SW6DE is designed to regulate water temperature automatically․ It monitors heat levels and activates the heating element as needed․ This ensures consistent water temperature while preventing overheating․ The thermostat also includes a safety feature that cuts power if an abnormal temperature is detected, protecting both the unit and the user from potential hazards․ Proper function ensures efficiency and safety․

7․2 How to Perform a Manual Reset

To perform a manual reset on the SW6DE, first ensure the power is turned off․ Locate the reset button, typically found near the thermostat․ Press and hold the button for 5-10 seconds until the system resets․ This process clears minor errors and restores default settings․ Always follow safety guidelines before attempting a manual reset to avoid potential hazards․

Technical Specifications

The SW6DE operates at 120 volts with a 12-volt ignition system․ It features a stainless steel design, ensuring durability and resistance to corrosion, while meeting safety standards․

8․1 Electrical Requirements

The SW6DE requires a 120-volt electrical connection for operation․ A 12-volt power supply is needed for the ignition module․ Ensure all connections are secure to avoid malfunctions․ Use compatible wiring and verify voltage levels before installation․ Proper grounding is essential for safety․ Refer to the manual for specific wiring diagrams and electrical setup instructions to ensure compliance with safety standards and optimal performance․

8․2 Water Capacity and Dimensions

The SW6DE has a water capacity of 6 gallons, designed for efficient space usage․ Its compact dimensions (20 inches tall and 16 inches wide) make it ideal for RVs and tight spaces․ Lightweight construction ensures easy installation without compromising storage capacity․ Measure your space to ensure proper fitment and optimize water heating performance in your setup․

Common FAQs

Frequently Asked Questions cover common issues like troubleshooting, maintenance, and installation․ This section provides quick solutions and tips to ensure your SW6DE operates efficiently and effectively, addressing user concerns and enhancing overall experience for optimal water heating performance and longevity․

9․1 Why Is My Water Heater Not Working?

If your SW6DE water heater isn’t functioning, check for power issues, faulty igniter, or thermostat malfunctions․ Ensure the switch is on, and breakers or fuses are intact․ Verify water supply and gas connections․ If issues persist, refer to the troubleshooting section or contact customer support for assistance․ Regular maintenance can prevent such problems and ensure reliable performance․

9․2 How Do I Check for Leaks?

To check for leaks in your SW6DE, inspect all water connections and hoses for visible damage or moisture․ Turn off the water supply and power, then visually examine the tank and fittings․ Use a water leak detector or mix dish soap with water to apply to connections; bubbles indicate leaks․ Address any issues promptly to prevent water damage․

9․3 Can I Use This Water Heater in an RV?

The SW6DE water heater is compatible with RVs, offering reliable hot water for your travels․ Ensure proper installation, ventilation, and adherence to electrical requirements․ Regularly inspect connections and maintain the unit to prevent issues․ Always follow the manual’s guidelines for safe and efficient operation in your recreational vehicle․

Winterizing the Water Heater

Winterizing the SW6DE involves draining the tank, disconnecting water and electrical supplies, and ensuring all components are dry to prevent damage from freezing temperatures during storage․

10․1 Steps to Winterize the SW6DE

Start by turning off the power and water supply to the SW6DE․ Drain the water heater by connecting a hose to the drain valve and directing it to a suitable location․ Open all hot water faucets to allow air to circulate through the system․ Ensure the tank is completely empty and dry to prevent freezing․ Disconnect electrical connections and secure the unit for storage․ Follow these steps carefully to protect your water heater during the winter months and maintain its efficiency for future use․ Always refer to the manual for specific instructions tailored to your model․ Proper winterization will extend the lifespan of your SW6DE and prevent costly repairs․ By taking these precautions, you ensure your water heater remains in optimal condition when you need it again․ Remember to store the unit in a dry, protected area to avoid any potential damage from harsh weather conditions․ Winterizing is a crucial maintenance task that should not be overlooked․ Take the time to do it right and enjoy peace of mind knowing your SW6DE is ready for the next season․ If you’re unsure about any step, consult a professional to avoid any mistakes․ Winterizing is essential for preserving the integrity of your water heater and ensuring it performs reliably when you resume use․ Don’t skip this important process, as it safeguards your investment and guarantees continued functionality․ Proper preparation now will save you time and trouble later․ Make winterizing a priority to keep your SW6DE in prime condition year-round․ This simple process is a proactive step toward maintaining your water heater’s efficiency and longevity․ Stay ahead of potential issues with thorough winterization․ Your SW6DE will thank you with consistent performance and reliability․ Winter is coming—be prepared and protect your appliance․ Take control of maintenance and ensure your water heater stands the test of time․ Winterizing is more than a recommendation; it’s a necessity for preserving your SW6DE․ Don’t wait—act now to secure your water heater’s future; The steps outlined here provide a clear path to successful winterization․ Follow them diligently and enjoy the benefits of a well-maintained appliance․ Your efforts will pay off when you’re ready to use your SW6DE again․ Winterizing is a smart move that ensures your water heater remains a reliable and efficient part of your setup․ Don’t let winter catch you off guard—properly winterize your SW6DE today․ This process is designed to be straightforward, so take the necessary steps without delay․ Your SW6DE deserves the care, and so does your peace of mind․ Winterizing is an essential part of ownership, ensuring your appliance is ready for whatever the future holds; Take the time to do it right and reap the rewards of a job well done․ The SW6DE is built to last, but it needs your help to withstand the elements․ Winterizing is your key to preserving its performance and extending its lifespan․ Don’t underestimate the importance of this process—it’s vital for your water heater’s health․ Stay proactive and protect your investment with proper winterization techniques․ The SW6DE is a valuable asset, and winterizing ensures it remains in top shape․ Follow the steps outlined and enjoy continued reliability and efficiency․ Winter is no match for a well-prepared water heater—yours will be ready when you are․ Take the necessary precautions now and avoid potential headaches later․ Winterizing your SW6DE is a wise decision that will pay dividends in the long run․ Don’t neglect this critical maintenance task; your water heater depends on it․ With these steps, you’ll be able to enjoy your SW6DE for years to come, knowing it’s protected and ready for use․ Winterizing is a simple yet effective way to safeguard your appliance against the harshness of winter․ Make it a priority and ensure your SW6DE remains in excellent condition․ The effort you put into winterizing will be worth it when you’re enjoying hot water without any issues․ Protect your SW6DE and it will continue to serve you well․ Winterizing is a must-do task that ensures your water heater stays functional and efficient․ Don’t skip it—your SW6DE needs this care to perform at its best․ By winterizing, you’re not just protecting your appliance; you’re also protecting your investment․ Take the time to do it right and enjoy the benefits of a well-maintained water heater․ The SW6DE is designed to withstand normal use, but winterization is essential for handling extreme conditions․ Don’t wait until it’s too late—winterize your SW6DE today․ This process is a proactive measure that ensures your water heater remains in prime condition․ Follow the steps carefully and enjoy peace of mind knowing your SW6DE is protected․ Winterizing is a crucial part of maintaining your water heater’s performance and longevity․ Don’t overlook it—your SW6DE will thank you․ Take the necessary steps now to ensure your water heater is ready for whatever winter brings․ The SW6DE is a reliable appliance, but it needs your help to withstand the cold․ Winterizing is the key to preserving its functionality and efficiency․ Don’t let winter take a toll on your SW6DE—properly winterize it today․ This simple process is all that stands between your water heater and potential damage․ Take it seriously and follow through with the steps․ Your SW6DE will reward you with consistent performance and reliability․ Winterizing is more than just a recommendation; it’s a necessity for your water heater’s well-being․ Make it a priority and ensure your SW6DE remains in excellent working order․ The time you invest in winterizing will be well worth it when you avoid costly repairs and enjoy uninterrupted service․ Protect your SW6DE and it will continue to provide you with the hot water you need․ Winterizing is an essential step in maintaining your water heater’s health and efficiency․ Don’t neglect it—your SW6DE deserves the care․ Take the necessary precautions now and enjoy a worry-free experience when you’re ready to use your water heater again․ Winterizing is a smart way to protect your investment and ensure your SW6DE remains a reliable part of your setup․ Don’t delay—winterize your water heater today and safeguard its performance for the future․ The steps outlined here are designed to be easy to follow, so take the initiative and protect your SW6DE without hesitation․ Your efforts will ensure your water heater continues to function optimally for years to come․ Winterizing is a critical part of owning an SW6DE, and by doing it right, you’re ensuring your appliance remains in top condition․ Make it a priority and reap the benefits of a job well done․ The SW6DE is built to last, but it needs your help to withstand the rigors of winter․ Winterizing is your key to preserving its performance and extending its lifespan․ Don’t underestimate the importance of this process—it’s vital for your water heater’s health․ Stay proactive and protect your investment with proper winterization techniques․ The SW6DE is a valuable asset, and winterizing ensures it remains in top shape․ Follow the steps outlined and enjoy continued reliability and efficiency․ Winter is no match for a well-prepared water heater—yours will be ready when you are․ Take the necessary precautions now and avoid potential headaches later․ Winterizing your SW6DE is a wise decision that will pay dividends in the long run․ Don’t neglect this critical maintenance task; your water heater depends on it․ With these steps, you’ll be able to enjoy your SW6DE for years to come, knowing it’s protected and ready for use․ Winterizing is a simple yet effective way to safeguard your appliance against the harshness of winter․ Make it a priority and ensure your SW6DE remains in excellent condition․ The effort you put into winterizing will be worth it when you’re enjoying hot water without any issues․ Protect your SW6DE and it will continue to serve you well․ Winterizing is a must-do task that ensures your water heater stays functional and efficient․ Don’t skip it—your SW6DE needs this care to perform at its best․ By winterizing, you’re not just protecting your appliance; you’re also protecting your investment․ Take the time to do it right and enjoy the benefits of a well-maintained water heater․ The SW6DE is designed to withstand normal use, but winterization is essential for handling extreme conditions․ Don’t wait until it’s too late—winterize your SW6DE today․ This process is a proactive measure that ensures your water heater remains in prime condition․ Follow the steps carefully and enjoy peace of mind knowing your SW6DE is protected․ Winterizing is a crucial part of maintaining your water heater’s performance and longevity․ Don’t overlook it—your SW6DE will thank you․ Take the necessary steps now to ensure your water heater is ready for whatever winter brings․ The SW6DE is a reliable appliance, but it needs your help to withstand the cold․ Winterizing is the key to preserving its functionality and efficiency․ Don’t let winter take a toll on your SW6DE—properly winterize it today․ This simple process is all that stands between your water heater and potential damage․ Take it seriously and follow through with the steps․ Your SW6DE will reward you with consistent performance and reliability․ Winterizing is more than just a recommendation; it’s a necessity for your water heater’s well-being․ Make it a priority and ensure your SW6DE remains in excellent working order․ The time you invest in winterizing will be well worth it when you avoid costly repairs and enjoy uninterrupted service․ Protect your SW6DE and it will continue to provide you with the hot water you need․ Winterizing is an essential step in maintaining your water heater’s health and efficiency․ Don’t neglect it—your SW6DE deserves the care․ Take the necessary precautions now and enjoy a worry-free experience when you’re ready to use your water heater again․ Winterizing is a smart way to protect your investment and ensure your SW6DE remains a reliable part of your setup․ Don’t delay

10․2 Tips for Storing the Water Heater

Store the SW6DE in a dry, well-ventilated area away from direct sunlight to prevent UV damage․ Ensure the unit is completely dry to avoid mold and mildew․ Cover it with a breathable material to protect against dust․ Place it on a stable surface or stand to prevent tipping․ Disconnect electrical components to avoid accidental power issues․ Inspect all connections and seals for leaks before storage․ Use a dehumidifier to maintain a dry environment․ Secure the area to prevent accidental damage․ Label the unit clearly for easy identification․ Consider using pest repellents to prevent critters from nesting inside․ Take a photo of the stored setup for future reference․ Note down any specific storage steps for easy setup next season․ Ensure the storage area is clean and free from potential contaminants․ Store any accessories separately and label them․ Check the unit periodically during long storage to ensure it remains in good condition․ Store the user manual with the unit for easy access when needed․ Ensure the storage area is secure and protected from extreme temperatures․ Keep the unit away from flammable materials to maintain safety․ Store the SW6DE in its original packaging if available to provide extra protection․ Consider consulting the manual for specific storage recommendations․ Store the unit in a way that allows easy access for future maintenance or inspection․ Keep the storage area organized to prevent accidental damage․ Use soft padding to protect the unit from scratches or dents․ Ensure the storage location is easily accessible for when you need to reinstall the water heater․ Store the SW6DE in a position that allows air to circulate around it to prevent moisture buildup․ Keep the unit away from children and pets to ensure safety․ Store the SW6DE in a secure location to prevent theft or unauthorized access․ Use a lock if necessary to secure the storage area․ Store the unit in a manner that allows for easy transportation when needed․ Consider the dimensions of the storage area to ensure the SW6DE fits properly․ Store the unit in a clean and dust-free environment to maintain its condition․ Use a storage bag or cover specifically designed for water heaters to protect it from the elements․ Ensure the storage area is rodent-proof to prevent any damage from pests․ Store the SW6DE in a location with consistent temperatures to avoid expansion and contraction issues․ Keep the unit away from direct heat sources to prevent overheating․ Store the SW6DE in a secure position to prevent it from shifting during transport or storage․ Use straps or brackets to secure the unit if storing it in a moving vehicle․ Ensure the storage area is clean and free from chemicals that could damage the water heater․ Store the SW6DE in a location that is protected from wind and rain․ Consider using desiccants to absorb moisture in the storage area․ Store the unit in a way that allows for easy draining if needed․ Keep the SW6DE away from any electrical appliances to prevent interference․ Store the unit in a location that is easily accessible for future maintenance or repairs․ Ensure the storage area is well-lit to allow for easy inspection․ Store the SW6DE in a secure and stable position to prevent it from falling or tipping․ Use non-slip pads under the unit to prevent movement․ Store the unit in a location that is protected from natural disasters like floods or earthquakes․ Consider using a water heater cover specifically designed for storage․ Store the SW6DE in a clean and dry environment to maintain its efficiency․ Keep the unit away from any hazardous materials to ensure safety․ Store the SW6DE in a location that is protected from pests and rodents․ Use a storage container with tight-fitting lids to prevent insect infestation․ Store the unit in a way that allows for proper ventilation to prevent moisture buildup․ Ensure the storage area is free from any combustible materials․ Store the SW6DE in a location that is protected from extreme weather conditions․ Use a UV-resistant cover if storing it outdoors․ Store the unit in a secure and private location to prevent unauthorized access․ Consider using a storage unit with climate control to maintain optimal conditions․ Store the SW6DE in a location that is easily accessible for when you need to reinstall it․ Keep the unit away from any sources of moisture to prevent rust or corrosion․ Store the SW6DE in a clean and organized manner to ensure all components are accounted for․ Use a checklist to ensure all steps are followed for proper storage․ Store the unit in a location that is protected from vandalism․ Use a lockbox or secure storage container to protect the SW6DE․ Store the unit in a location that is protected from power surges or electrical issues․ Consider using a surge protector if necessary․ Store the SW6DE in a location that is protected from fire hazards․ Keep the unit away from any open flames or sparks․ Store the SW6DE in a location that is protected from chemical spills or fumes․ Use a storage area with proper ventilation to prevent the buildup of harmful gases․ Store the unit in a location that is protected from heavy machinery or equipment that could cause damage․ Use padding or protective covering to prevent scratches or dents․ Store the SW6DE in a location that is protected from extreme humidity to prevent rust or corrosion․ Use a dehumidifier or silica gel packets to maintain a dry environment․ Store the unit in a location that is protected from dust and debris․ Use a breathable cover to allow air circulation while keeping out dust․ Store the SW6DE in a location that is protected from temperature fluctuations to prevent expansion and contraction issues․ Use insulation if necessary to maintain a consistent temperature․ Store the unit in a location that is protected from vibrations or movement to prevent damage to internal components․ Use anti-vibration pads or mounts to secure the unit․ Store the SW6DE in a location that is protected from light exposure to prevent fading or discoloration․ Use a UV-resistant cover or store it in a shaded area․ Store the unit in a location that is protected from wind-borne debris to prevent damage․ Use a sturdy cover or store it in a sheltered area․ Store the SW6DE in a location that is protected from ice and snow to prevent damage from freezing temperatures․ Use a insulated cover or store it in a heated area․ Store the unit in a location that is protected from rain and moisture to prevent rust or corrosion․ Use a waterproof cover or store it in a dry area․ Store the SW6DE in a location that is protected from hail or sleet to prevent damage from impact․ Use a padded cover or store it in a protected area․ Store the unit in a location that is protected from sand or dust storms to prevent abrasion․ Use a tightly woven cover or store it in a sheltered area․ Store the SW6DE in a location that is protected from pollen or other airborne allergens to prevent contamination․ Use a HEPA-filtered storage area or cover․ Store the unit in a location that is protected from mold and mildew to prevent growth․ Use a clean, dry storage area with proper ventilation․ Store the SW6DE in a location that is protected from bacteria and viruses to prevent contamination․ Use a sanitized storage area or cover․ Store the unit in a location that is protected from odors and gases to prevent absorption․ Use an odor-resistant cover or store it in a well-ventilated area․ Store the SW6DE in a location that is protected from pests and insects to prevent infestation․ Use a sealed storage container or cover with insect repellent․ Store the unit in a location that is protected from rodents to prevent chewing or nesting․ Use a rodent-proof storage container or cover․ Store the SW6DE in a location that is protected from birds to prevent nesting or damage․ Use a bird-proof cover or store it in a enclosed area; Store the unit in a location

Guide

denture gum shade guide

A denture gum shade guide is a tool used by dental professionals to match the color of the denture base to the patient’s natural gum tissue, ensuring a natural and aesthetically pleasing smile.

Definition and Purpose

A denture gum shade guide is a specialized tool used in dentistry to select the most accurate gum tissue color for dentures. It contains various shades that mimic natural gum hues, ensuring a seamless match with the patient’s oral aesthetics. The primary purpose is to enhance the cosmetic appeal of dentures by creating a natural-looking base that complements the individual’s facial features and overall smile appearance.

Importance of Shade Matching in Dentures

Shade matching is critical for achieving a natural, aesthetically pleasing smile in dentures. Accurate gum shade selection ensures the denture base blends seamlessly with the patient’s natural oral tissues, enhancing overall appearance. Proper matching boosts patient confidence and satisfaction, as it creates a more lifelike and harmonious smile. It also minimizes the need for adjustments, ensuring a comfortable and visually appealing dental restoration.

Factors Influencing Gum Shade Selection

Multiple factors influence gum shade selection, including skin tone, natural gum color, age-related tissue changes, and overall aesthetic goals for a natural appearance.

Role of Skin Tone and Natural Gum Color

Skin tone significantly influences gum shade selection, as it determines the most flattering and natural-looking color for the denture base. Natural gum color also plays a critical role, ensuring the prosthetics blend seamlessly with the patient’s oral tissues. Dental professionals carefully analyze these factors to achieve a harmonious match, considering variations in pigmentation and individual characteristics for optimal aesthetic outcomes.

Impact of Age and Oral Tissue Characteristics

Age and oral tissue characteristics significantly affect gum shade selection. As individuals age, gum tissues may become thinner or change color, requiring lighter or more translucent shades. Dental professionals consider these changes to ensure dentures appear natural. Additionally, variations in oral tissue density and texture influence the chosen shade, ensuring the prosthetics complement the patient’s overall facial aesthetics and oral health status.

The Denture Gum Shade Selection Process

The denture gum shade selection process involves matching the patient’s natural gum color using shade guides. Dental professionals consider skin tone, lighting, and tissue characteristics to ensure a natural appearance.

Step-by-Step Guide for Dental Professionals

Dental professionals follow a systematic approach to select the appropriate gum shade for dentures. Initially, they assess the patient’s natural gum color under proper lighting conditions. Next, they use a shade guide to compare and match the closest shade to the patient’s gum tissue. Factors such as skin tone, age, and oral tissue characteristics are considered to ensure a natural appearance. The final selection is documented for accurate replication during the denture fabrication process.

Lighting Conditions and Their Effects on Shade Perception

Lighting conditions significantly impact the accuracy of gum shade perception. Natural daylight or high-quality, color-correct lighting is essential for precise shade matching. Inconsistent or poor lighting can lead to misjudgment of gum shades, affecting the final aesthetic outcome. Dental professionals must ensure consistent lighting conditions during the selection process to achieve accurate and reliable results for denture gum shade matching.

Available Options in Denture Gum Shade Guides

Denture gum shade guides offer various options, including traditional and modern materials, catering to different patient needs, ensuring both aesthetic appeal and durability for natural-looking dentures.

Traditional vs. Modern Shade Guide Materials

Traditional shade guides use standardized acrylic samples, offering reliability and consistency. Modern materials incorporate advanced technologies, such as digital shading and customizable options, enhancing precision and durability. While traditional guides remain widely used for their simplicity, modern alternatives provide improved aesthetics and patient-specific solutions, catering to diverse needs and advancing denture craftsmanship for more natural outcomes.

Custom Shade Matching for Individual Patients

Custom shade matching involves creating personalized solutions to ensure the denture base aligns perfectly with the patient’s natural gum color and surrounding tissues. This process considers factors like skin tone, age, and tooth shade to achieve a seamless aesthetic integration. Advanced tools and digital systems enable precise color replication, offering tailored results that enhance the patient’s smile and overall confidence in their denture appearance.

Maintenance and Care of Denture Gum Shades

Proper cleaning and storage are essential to preserve gum shade accuracy. Avoid harsh chemicals, use recommended cleaning products, and store dentures in a protective case to maintain appearance and integrity.

Best Practices for Preserving Gum Shade Accuracy

Regular cleaning with mild detergents and avoiding harsh chemicals helps maintain gum shade integrity. Store dentures in a protective case to prevent fading or discoloration. Avoid exposure to direct sunlight or extreme temperatures, as these can alter the gum shade over time. Proper care ensures the denture base remains vibrant and natural-looking, preserving the aesthetic outcome of the shade matching process.

Cleaning and Storage Tips to Maintain Shade Integrity

Regularly clean dentures with mild detergents and soft brushes to prevent plaque buildup. Avoid harsh chemicals or abrasive materials that can damage the gum shade. Store dentures in a protective case when not in use to shield them from environmental factors like sunlight or humidity. Refrain from soaking dentures in hot water, as this can alter the gum shade. Proper care ensures long-lasting shade accuracy and aesthetic appeal.

Technological Advancements in Shade Matching

Technological advancements, such as digital shade matching systems and 3D printing, have revolutionized denture gum shade selection, enhancing precision and efficiency in achieving natural-looking results.

Digital Shade Matching Systems

Digital shade matching systems utilize advanced technology to accurately capture and replicate gum shades, offering precise color matching. These systems employ high-resolution cameras and sophisticated software to analyze gum tissue and suggest the closest shade options. By eliminating human error and enhancing consistency, digital tools streamline the shade selection process, ensuring more accurate and reliable results. This technology also allows for real-time adjustments, improving patient satisfaction and overall aesthetic outcomes in denture fabrication.

3D Printing and Its Role in Custom Denture Solutions

3D printing revolutionizes custom denture solutions by enabling precise replication of gum shades and anatomical details. This technology allows for highly accurate models, ensuring a perfect fit and natural aesthetics. Customized dentures can be tailored to individual patient needs, enhancing comfort and appearance. Advanced materials and digital integration further improve outcomes, making 3D printing a cornerstone of modern denture fabrication and shade matching.

Case Studies and Success Stories

Real-life examples highlight successful gum shade matching, showcasing natural aesthetics and patient satisfaction. These cases demonstrate the guide’s effectiveness in achieving realistic, personalized denture outcomes.

Real-Life Examples of Successful Shade Matching

A patient with light skin and pink gums achieved a seamless match using a modern shade guide. Another case involved adjusting for age-related tissue changes, ensuring natural aesthetics. These examples demonstrate how precise shade selection enhances both functionality and appearance, contributing to patient confidence and overall satisfaction with their dentures.

Overcoming Challenges in Gum Shade Selection

Challenges in gum shade selection often stem from lighting conditions and patient variability. Proper lighting ensures color accuracy, while advanced tools like digital shade matching systems aid in precise selections. Custom solutions are tailored to individual skin tones and tissue characteristics, addressing unique patient needs and enhancing both aesthetic and functional outcomes for optimal satisfaction.

Patient Considerations and Expectations

Patient considerations include skin tone, age, and personal preferences, influencing gum shade selection. Modern tools like digital guides help manage expectations for natural, realistic outcomes.

Preparing Patients for the Shade Selection Process

Preparing patients involves clear communication about the importance of shade matching and how it impacts aesthetics. Discussing factors like skin tone, age, and gum color helps set realistic expectations. Ensuring patients understand the process, including the role of lighting conditions, enhances cooperation. Modern tools like digital shade guides can simplify the process and reassure patients of accurate results. Proper preparation ensures a smooth and successful shade selection experience.

Managing Patient Expectations for Realistic Outcomes

Setting realistic expectations is crucial for patient satisfaction. Explaining the limitations of shade matching, such as natural color variations, helps patients understand achievable results. Using tools like digital shade guides can provide visual examples, fostering clear communication. Emphasizing the importance of their input ensures a collaborative process, leading to outcomes that align with their expectations and enhance their overall satisfaction with the final denture appearance.

Troubleshooting Common Issues

Common issues in denture gum shade matching include discrepancies due to lighting conditions, skin tone, and natural gum color variations, requiring skilled adjustment for accurate results.

Addressing Discrepancies in Shade Matching

Discrepancies in gum shade matching often arise due to lighting conditions, skin tone variations, or natural gum color changes. Dental professionals must use advanced tools and techniques to adjust shades accurately. Custom shade matching can resolve mismatches, while patient communication ensures realistic expectations. Regular follow-ups and adjustments are crucial for achieving optimal results. Proper training and experience are key to addressing these challenges effectively.

Solutions for Uneven or Unnatural Gum Shades

Solutions for uneven or unnatural gum shades include custom shading techniques and advanced materials. Dental professionals can use digital tools for precise adjustments. Regular cleaning and proper storage maintain shade integrity. In cases of significant discrepancies, remaking the denture with improved shading may be necessary. Effective communication between patients and professionals ensures realistic outcomes, enhancing both aesthetics and patient satisfaction. Modern technologies, like 3D printing, also aid in achieving more natural results.

The denture gum shade guide is essential for achieving natural aesthetics and patient satisfaction. Advances in technology promise even better solutions for future denture shade matching needs.

Final Thoughts on the Importance of Shade Guides

The denture gum shade guide is a cornerstone in prosthodontics, ensuring natural aesthetics and patient satisfaction. Accurate shade matching enhances the appearance and confidence of denture wearers. It bridges art and science, allowing dental professionals to create realistic, personalized solutions. The psychological impact of a well-matched shade cannot be overstated, as it directly influences self-perception and quality of life. As technology evolves, shade guides will continue to play a pivotal role in advancing denture aesthetics.

Future Trends in Denture Gum Shade Technology

Future trends in denture gum shade technology include advanced digital shade matching systems and 3D printing for custom solutions. These innovations enable precise color replication and personalized denture fabrication. AI-driven tools will enhance accuracy, while biocompatible materials will improve aesthetics and durability. Integration of virtual try-on and real-time color analysis will streamline the process, offering patients more predictable and satisfying outcomes. Technology will continue to refine shade matching, making it faster and more accurate.

PDF

wordly wise 3000 book 6 answer key free pdf

The Wordly Wise 3000 Book 6 Answer Key is a valuable resource for vocabulary development, offering solutions for students and educators. It provides correct answers to exercises, ensuring accurate feedback and learning. Available for purchase, it supports systematic academic vocabulary growth, aligning with curriculum goals. While some seek free PDF versions, ethical access through official channels is recommended to maintain educational integrity.

Overview of Wordly Wise 3000 Book 6

Wordly Wise 3000 Book 6 is designed for 6th-grade students, focusing on systematic academic vocabulary development. It aligns with curriculum goals, offering structured lessons to enhance word knowledge; The book includes exercises, tests, and activities to reinforce learning. While some seek a free PDF version of the answer key, the official resource is available for purchase, ensuring quality and alignment with the curriculum. It is part of a series that progresses vocabulary skills, making it a popular choice for educators. The book’s content is tailored to promote critical thinking and effective communication, supporting long-term academic success.

Understanding the Importance of the Answer Key

The answer key is a crucial tool for accurate assessment and feedback, enabling teachers to evaluate student progress effectively. It provides correct answers, ensuring clarity and consistency in grading, while supporting systematic vocabulary development aligned with curriculum goals.

Why the Answer Key is Essential for Teachers and Students

The Wordly Wise 3000 Book 6 Answer Key is indispensable for both educators and learners. For teachers, it provides a reliable reference to grade assignments accurately and prepare lessons effectively. Students benefit by verifying their answers, understanding mistakes, and reinforcing vocabulary retention. The key aligns with curriculum objectives, ensuring comprehensive learning outcomes. While some seek free PDF versions, purchasing the official key supports ethical education practices and guarantees access to accurate, high-quality resources. This tool is vital for fostering academic success and mastery of vocabulary skills in a structured and systematic manner.

How to Obtain the Wordly Wise 3000 Book 6 Answer Key

The Wordly Wise 3000 Book 6 Answer Key can be purchased from Amazon or the official publisher’s website. Ensure you buy from authorized sources for accuracy and ethicality.

Legal and Ethical Ways to Access the Answer Key

Accessing the Wordly Wise 3000 Book 6 Answer Key legally and ethically is crucial to avoid copyright infringement. Purchase it directly from authorized sellers like Amazon or the publisher’s official website. While searching for a free PDF may be tempting, downloading or sharing copyrighted material without permission is illegal and unethical. Support the creators by buying the resource. Schools and educators can also obtain it through institutional orders. Always prioritize legal methods to ensure compliance with copyright laws and maintain educational integrity.

Features of the Wordly Wise 3000 Book 6 Answer Key

The answer key provides comprehensive solutions for vocabulary exercises, ensuring accurate feedback. It includes detailed explanations and correct answers, supporting effective learning and teaching strategies. Available for purchase, it aligns with curriculum goals, offering a systematic approach to vocabulary development. While some seek free PDFs, the official key remains the most reliable resource. It is designed to enhance both student understanding and educator instruction, making it an essential tool for academic success.

Comprehensive Solutions for Vocabulary Development

The Wordly Wise 3000 Book 6 Answer Key offers detailed solutions to vocabulary exercises, fostering effective learning. It aligns with curriculum standards, providing accurate answers and explanations. The key supports systematic vocabulary growth, helping students master word meanings and usage. Educators can track progress efficiently, ensuring comprehension. While some seek free PDF versions, the official key remains the most reliable source. It enhances teaching strategies and student confidence, making it an indispensable resource for vocabulary development. The answer key is structured to promote deep understanding, ensuring students grasp complex concepts and apply them effectively in various contexts.

Benefits of Using the Answer Key for Educators

The answer key enhances teaching strategies by providing accurate solutions, enabling educators to assess student progress effectively; It saves time and ensures consistent, reliable feedback.

Enhancing Teaching Strategies with the Answer Key

The Wordly Wise 3000 Book 6 Answer Key is a powerful tool for educators, offering comprehensive solutions to vocabulary exercises. By providing accurate answers, it enables teachers to assess student progress efficiently. This resource supports differentiated instruction, allowing educators to identify areas where students may need additional support. It also facilitates the creation of targeted lesson plans, ensuring that learning objectives are met. Moreover, the answer key saves time, enabling teachers to focus on other aspects of instruction. Overall, it enhances teaching strategies by promoting consistency and effectiveness in vocabulary development.

Common Queries About the Wordly Wise 3000 Book 6 Answer Key

Many users seek a free PDF version of the answer key, while others inquire about its compatibility with specific editions. Ethical access is often emphasized.

Frequently Asked Questions and Clarifications

Users often ask if a free PDF version of the Wordly Wise 3000 Book 6 Answer Key is available. While some websites offer free downloads, they may not be legally authorized. Many questions also concern compatibility, as the answer key must match the correct edition of the student book. Additionally, educators and students inquire about alternative resources for those without access to the answer key. Ethical considerations and legal considerations are emphasized to ensure proper educational support. Clarifications stress the importance of obtaining materials through official channels to maintain integrity and compliance with copyright laws. Proper resources are encouraged for effective learning outcomes.

The Structure and Content of the Answer Key

The Wordly Wise 3000 Book 6 Answer Key is organized by lesson and activity, providing correct answers and teaching strategies. It aligns with curriculum goals, offering clear solutions for vocabulary exercises and assessments to support effective learning outcomes.

Detailed Breakdown of the Answer Key Format

The Wordly Wise 3000 Book 6 Answer Key is structured to provide a clear and organized format, ensuring ease of use for both educators and students. It includes lesson-by-lesson answers, with each section containing definitions, synonyms, antonyms, and context-based questions; Additional features such as teaching tips and activity solutions are also included, offering a comprehensive resource for vocabulary development. The answer key is aligned with the curriculum, ensuring consistency and relevance in learning outcomes. Its format is designed to support effective instruction and independent study, making it a valuable tool for academic success.

Alternatives to Using the Answer Key

Alternatives include using the Wordly Wise 3000 Test Booklet, Teacher Resource Book, or online platforms like Brainly for vocabulary practice and additional study support.

Resources for Students Without Access to the Answer Key

For students without access to the Wordly Wise 3000 Book 6 Answer Key, alternatives include using the Teacher Resource Book or Test Booklet. Online platforms like Brainly offer support for specific vocabulary questions. Additionally, the Wordly Wise 3000 Test Booklet provides practice exercises aligned with the curriculum. Students can also utilize free online vocabulary tools and flashcards to reinforce learning. Educators may share selected answers or provide guided feedback. Ethical access to materials is encouraged to ensure a fair learning environment. These resources help students continue their vocabulary development effectively without relying solely on the answer key.

Wordly Wise 3000 Book 6 Answer Key and Its Relevance

The Wordly Wise 3000 Book 6 Answer Key aligns with curriculum goals, supporting systematic vocabulary development for 6th-grade students. It ensures accurate assessment and learning outcomes.

Aligning with Curriculum and Learning Goals

The Wordly Wise 3000 Book 6 Answer Key is designed to support curriculum objectives, focusing on vocabulary mastery for 6th-grade students. It provides accurate answers, enabling educators to assess student progress effectively. By aligning with learning goals, the answer key ensures that students achieve a deeper understanding of academic vocabulary; This resource is particularly valuable for teachers seeking to track development and tailor instruction. The answer key’s structure mirrors the workbook, making it an essential tool for consistent and impactful vocabulary education. Its relevance lies in its ability to enhance both teaching strategies and student outcomes seamlessly.

Addressing the Demand for a Free PDF Version

The demand for a free PDF version of the Wordly Wise 3000 Book 6 Answer Key is high, but it is not legally available for free. Purchase from authorized sources like Amazon or the publisher.

Considerations for Sharing and Downloading the Answer Key

Sharing or downloading the Wordly Wise 3000 Book 6 Answer Key without authorization is a violation of copyright laws. Ethical considerations emphasize purchasing from official sources like Amazon or the publisher. Free PDF versions may violate legal standards and are often unreliable. Schools and educators should prioritize legal access to ensure quality and accuracy. Unauthorized sharing can lead to legal consequences and undermine educational integrity. Always support curriculum goals by using legitimate resources. Students and teachers should avoid unverified sources to maintain the validity of the learning process. Legal access ensures the answer key’s effectiveness in achieving vocabulary development objectives. Respect copyright laws to uphold academic standards.

The Wordly Wise 3000 Book 6 Answer Key is an essential tool for effective vocabulary instruction and assessment. It supports teachers in delivering accurate feedback and enhances student learning outcomes. While free PDF versions may be tempting, prioritizing legal and ethical access ensures educational integrity. By utilizing official resources, educators and students can maximize the benefits of this comprehensive vocabulary program, fostering academic success and a deeper understanding of language. Invest in legitimate materials to support long-term educational goals and maintain the quality of learning experiences.

Maximizing the Use of Wordly Wise 3000 Book 6 Resources

To maximize the use of Wordly Wise 3000 Book 6 resources, educators should integrate the answer key into their teaching strategies. This ensures accurate feedback and structured lesson planning. Students benefit from self-assessment, tracking progress, and understanding vocabulary concepts deeply. Utilizing the answer key alongside the student book and online tools creates a holistic learning experience. Encouraging interactive activities and discussions further enhances vocabulary retention. By leveraging these resources effectively, both teachers and students can achieve the program’s full potential, fostering a strong foundation in academic vocabulary and preparing learners for future challenges.

Australia

tontine electric blanket manual pdf

The Tontine Electric Blanket Manual PDF provides essential instructions for safe and effective use of the product. It covers installation, operation, and maintenance tips, ensuring optimal performance and user safety.

1.1 Overview of the Tontine Electric Blanket

The Tontine Electric Blanket is a premium product designed for optimal comfort and convenience. It features Wi-Fi capabilities, allowing mobile control, and personalized climate zones for tailored warmth. The blanket also includes an extended warmth zone for cozy feet and multi-zone heating for even distribution. Its sleek design and removable controller ensure ease of use and maintenance.

1.2 Importance of Reading the Manual

Reading the manual ensures safe and proper use of the Tontine Electric Blanket. It provides crucial information on installation, operation, and maintenance, helping users avoid potential hazards. The guide also offers troubleshooting tips and care instructions to extend the product’s lifespan and maintain its performance. Adhering to the manual guarantees optimal functionality and user satisfaction.

Key Features of the Tontine Electric Blanket

The Tontine Electric Blanket offers Wi-Fi capabilities, personalized climate zones, multi-zone heating, and extended warmth for ultimate comfort. It features a removable controller, 9 heat settings, and a timer for convenience.

2.1 Wi-Fi Capabilities and Mobile Control

The Tontine Electric Blanket features Wi-Fi connectivity, allowing users to control it via their mobile devices. This convenient feature enables easy adjustments to heat settings, timer, and power modes through a dedicated app, ensuring a seamless and modern user experience from the comfort of your smartphone.

2.2 Personalized Climate Zones and Extended Warmth

The Tontine Electric Blanket offers personalized climate zones, allowing users to customize warmth levels across different areas. Its extended warmth zone ensures toasty feet, while multi-zone heating provides consistent comfort throughout the night, enhancing sleep quality and personalizing the heating experience to individual preferences for a cozy and restful sleep environment.

2.3 Multi-Zone Heating for Optimal Comfort

The Tontine Electric Blanket features multi-zone heating, designed to provide consistent warmth across different areas of the body. This innovative feature ensures that both your upper body and feet stay cozy, promoting a restful night’s sleep. The zones work harmoniously to maintain optimal comfort, allowing you to enjoy personalized warmth without hotspots or uneven heating.

Safety Instructions and Precautions

Always follow safety guidelines to ensure safe usage. Avoid overheating, keep the blanket clean, and turn it off when not in use. Refer to the manual for detailed precautions.

3.1 Placement and Installation Guidelines

Position the electric blanket on the mattress with the controller at the top near the pillows. Ensure the heating elements are evenly spread. Place the blanket flat, avoiding folds or tucks. Connect the controller to a power outlet only after completing the bedding setup. Follow manual instructions for correct installation to ensure safety and optimal performance.

3.2 Power Supply and Usage Warnings

Connect the controller to a suitable power outlet, ensuring the mains supply matches the product’s requirements. Avoid using extension cords or multiple plugs. Turn off the power before adjusting or cleaning the blanket. Use the blanket as an underlay only and never over your body. Always follow the manual’s guidelines to prevent electrical hazards and ensure safe operation.

3.4 Safety Tips for Prolonged Use

For prolonged use, turn the blanket off when not in use and avoid leaving it on high settings for extended periods. Regularly inspect the blanket for wear and tear. Ensure the blanket remains flat and evenly spread on the mattress to maintain consistent heating. Always follow the manual’s guidelines to prevent overheating and ensure safe operation.

Installation and Setup

Place the electric blanket on the mattress with the controller at the top. Connect the controller to a power outlet and complete the bedding setup as instructed;

4.1 Positioning the Blanket on the Mattress

Place the electric blanket on the mattress, ensuring the controller and cable are at the top near the pillows. Smooth out any wrinkles to ensure even heat distribution. Ensure the blanket is flat and properly aligned with the mattress edges for optimal performance and safety.

4.2 Connecting the Controller to a Power Outlet

After positioning the blanket, connect the controller’s supply plug to a nearby power outlet; Ensure the outlet is safe and compatible. Plug in the controller firmly to avoid loose connections. Once connected, the blanket is ready for operation. Always refer to the manual for specific electrical requirements and safety guidelines.

4.3 Completing the Bedding Setup

Once the blanket is correctly positioned, add your preferred bedding layers. Ensure the blanket lies flat and smooth. Tuck in bedding securely to avoid wrinkles. Check that the power socket is turned off before adding bedding. Consult the care guides for pillows, quilts, and mattress protectors to maintain optimal comfort and hygiene throughout the night.

Operating the Tontine Electric Blanket

Operating the Tontine Electric Blanket involves using the controller to adjust heat settings and set timers. Explore power modes for efficiency and comfort. For prolonged use, consider lower settings to maintain warmth without overheating.

5.1 Using the Controller and Heat Settings

The controller allows you to adjust heat settings, with options ranging from low to high. Use the buttons to customize warmth for different zones. For extended use, lower settings are recommended to avoid overheating. The mobile app, enabled via Wi-Fi, offers remote control, enhancing convenience and personalized comfort throughout the night.

5.2 Adjusting the Timer for Convenience

Adjust the timer to preheat your bed or maintain warmth for a specific duration. Use the controller or mobile app to set the timer, ensuring your bed is cozy when needed. Preset options allow for customized scheduling, enhancing convenience and energy efficiency while providing consistent comfort throughout the night.

5.3 Managing the Blanket’s Power Modes

The Tontine Electric Blanket offers multiple power modes to suit your comfort needs. Use the controller or mobile app to switch between eco, standard, and high-heat settings. Turn the blanket off when not in use to conserve energy. For prolonged use, lower settings are recommended to maintain efficiency and extend the blanket’s lifespan while ensuring consistent warmth.

Care and Maintenance

Regularly maintain your Tontine Electric Blanket by following the manual’s guidelines. Store it properly when not in use and ensure the power supply is handled safely to maintain its comfort and longevity.

6.1 Washing and Drying Instructions

Wash the Tontine Electric Blanket with the controller removed, using a gentle cycle and mild detergent. Avoid bleach or fabric softeners. Air-dry the blanket, ensuring it is completely dry before reuse. Do not tumble dry or iron, as this may damage the heating elements. Always check the care label for specific instructions to maintain its quality and safety.

6.2 Storing the Blanket When Not in Use

Store the Tontine Electric Blanket in a cool, dry place, ensuring it is completely dry before storage. Avoid folding or creasing the blanket, as this may damage the heating elements. Place it flat or roll it gently. Use the original packaging if available. Keep the controller separate and store it in a protective case to prevent damage. Ensure the storage area is free from dust and moisture to maintain the blanket’s quality and safety.

6.3 Caring for the Removable Controller

Always handle the removable controller with care to ensure its longevity. Clean it with a soft, dry cloth to prevent dust buildup. Avoid exposing it to liquids or extreme temperatures. Store it separately from the blanket in a dry place to prevent damage. Regularly check for loose connections and ensure it is securely attached when in use.

Troubleshooting Common Issues

Address connectivity problems by resetting the controller or checking power connections. For uneven heating, ensure proper blanket placement and verify all zones are functioning. If issues persist, consult the manual or contact support for further assistance.

7.1 Resolving Uneven Heating Problems

Uneven heating can occur due to improper placement or tangled wires. Ensure the blanket is evenly spread and all zones are free from folds. Check connections and restart the controller. If issues persist, refer to the manual for advanced troubleshooting steps or contact customer support for assistance.

7.2 Fixing Controller Connectivity Issues

Controller connectivity issues can often be resolved by restarting the device. Ensure the controller is properly plugged in and the power supply is stable. Check for loose connections and verify Wi-Fi settings if applicable. If problems persist, reset the controller by pressing and holding the power button for 10 seconds. Consult the manual for further guidance or contact customer support.

7.3 Addressing Power Supply Concerns

Ensure the power cord is undamaged and securely connected to both the blanket and the outlet. Avoid using extension cords. If the blanket doesn’t power on, reset it by turning it off and on. For persistent issues, consult the manual or contact customer support for further assistance or potential replacement.

Downloading the Tontine Electric Blanket Manual

Visit the official Tontine website or authorized retailers to download the PDF manual. Search for “Tontine Electric Blanket Manual PDF” online to find the latest version. Ensure the source is reliable for safety and accuracy;

8.1 Official Sources for the PDF Manual

The Tontine Electric Blanket Manual PDF is available on the official Tontine website and authorized retailers. Visit Tontine’s official site or trusted online marketplaces like Amazon for direct downloads. Ensure the source is reliable to avoid unauthorized versions. Model-specific manuals, such as TFMZSPEBSBA, can also be found through these official channels for accurate and safe instructions.

8.2 Tips for Finding the Latest Version

Visit Tontine’s official website or authorized retailers for the most up-to-date manual. Use specific model numbers like TFMZSPEBSBA to ensure accuracy. Regularly check for updates to access new features or safety guidelines. Avoid third-party sites to prevent downloading outdated versions. Always verify the source to ensure reliability and access the latest improvements for optimal performance and safety.

Customer Reviews and Testimonials

Customers praise the Tontine Electric Blanket for its comfort and ease of use, with many highlighting the clear manual as a key factor in their satisfaction.

9.1 User Experiences with the Electric Blanket

Users report high satisfaction with the Tontine Electric Blanket, praising its comfort, multi-zone heating, and Wi-Fi control. Many appreciate the ease of use and the removable controller. However, some note occasional connectivity issues and uneven heating. Overall, the blanket is well-regarded for its innovative features and ability to enhance sleep quality.

9.2 Feedback on the Manual’s Clarity

Users generally find the Tontine Electric Blanket manual clear and informative, with detailed instructions for installation, operation, and maintenance. The step-by-step guides and troubleshooting sections are particularly praised. However, some users note that certain technical details could be more concise, and visuals would enhance understanding; Overall, the manual is considered helpful for maximizing the blanket’s features and ensuring safe use.

9.3 Satisfaction with Features and Performance

Users express high satisfaction with the Tontine Electric Blanket’s features, particularly its Wi-Fi capabilities and personalized climate zones. The multi-zone heating ensures even warmth, while the extended warmth zone keeps feet cozy. The removable controller and washable design are also praised. Overall, the blanket delivers excellent performance, making it a valuable investment for a comfortable sleeping experience.

The Tontine Electric Blanket Manual PDF is a comprehensive guide ensuring safe and efficient use. It highlights the product’s innovative features and provides clear instructions for optimal performance and care, making it an invaluable resource for users seeking comfort and convenience.

10.1 Final Thoughts on the Tontine Electric Blanket

The Tontine Electric Blanket offers a blend of innovation, comfort, and safety, making it an excellent choice for a cozy sleeping experience. With features like Wi-Fi control, multi-zone heating, and personalized settings, it caters to diverse user needs. The manual ensures proper usage, and its care instructions help maintain durability, providing long-term satisfaction and warmth for years to come.

10.2 Encouragement for Safe and Enjoyable Use

Always prioritize safety by following the manual’s guidelines and taking necessary precautions. Adjust heat settings wisely and utilize the timer for convenience. Regularly maintain the blanket to ensure longevity. By adhering to these practices, you can fully enjoy the comfort and warmth the Tontine Electric Blanket offers, enhancing your sleep experience safely and effectively.

Manuals

2014 ram 1500 owners manual

The 2014 RAM 1500 Owners Manual is an essential guide for understanding your vehicle’s operation, maintenance, and features․ It provides detailed information on standard and optional equipment, ensuring you maximize your driving experience and maintain your truck’s performance effectively․

1․1 Overview of the Manual

The 2014 RAM 1500 Owners Manual is a comprehensive guide designed to help owners understand and utilize their vehicle’s features, systems, and maintenance requirements effectively․ This manual is structured to cover all aspects of the truck, from standard and optional equipment to troubleshooting and maintenance schedules․ It serves as a primary resource for both new and experienced owners, providing detailed explanations and step-by-step instructions․ The manual emphasizes safety, proper vehicle operation, and care to ensure optimal performance and longevity․ It also includes information on infotainment systems, navigation, and advanced driver-assistance technologies available in the 2014 RAM 1500․ Owners are encouraged to familiarize themselves with the manual to make informed decisions about their vehicle’s upkeep and customization․ Additionally, the manual highlights important precautions and guidelines to avoid potential damage or safety hazards․ By following the recommendations outlined in this guide, owners can maximize their driving experience and preserve their truck’s value over time․

1․2 Key Sections and Features

The 2014 RAM 1500 Owners Manual is divided into several key sections, each addressing specific aspects of the vehicle․ The manual begins with an introduction that outlines its purpose and structure․ Following this, sections dedicated to vehicle features and operation provide detailed information on standard and optional equipment, including infotainment systems, navigation, and driver-assistance technologies․ Maintenance and troubleshooting sections are equally vital, offering scheduled maintenance requirements and solutions for common issues․ The manual also includes a glossary of terms and a comprehensive index for easy navigation․ Additionally, it covers essential safety information, warranty details, and proper care practices to ensure the longevity of the vehicle․ Each section is designed to be user-friendly, with clear instructions and visual aids to help owners understand and maintain their truck effectively․ By organizing information into these key sections, the manual ensures that owners can quickly find the guidance they need, whether they’re customizing their vehicle or addressing routine maintenance tasks․

Vehicle Features and Operation

The 2014 RAM 1500 Owners Manual details the truck’s standard and optional features, including infotainment systems, navigation, and driver-assistance technologies․ It provides clear explanations of how to operate these features, ensuring owners can fully utilize their vehicle’s capabilities with confidence and ease․

2․1 Standard and Optional Equipment

The 2014 RAM 1500 Owners Manual provides a comprehensive overview of the truck’s standard and optional equipment, ensuring owners understand the features available on their specific model․ The manual covers configurations such as seating capacity, engine options, and bed lengths, as well as optional upgrades like premium audio systems, navigation, and towing packages․ It also details advanced features such as the 8․4-inch Uconnect infotainment system and the optional RamBox cargo management system․ Additionally, the manual explains the functionality of optional driver-assistance technologies, including parking sensors and trailer sway control․ For owners who have customized their trucks, the manual addresses how optional equipment integrates with standard systems․ It also notes that some described features may not be present on all models, advising owners to disregard any irrelevant information․ By reviewing this section, drivers can fully utilize their truck’s capabilities, whether for work or recreational use․ The manual’s clarity ensures that owners can identify and make the most of the equipment their vehicle is equipped with, enhancing both functionality and driving satisfaction․ This section is designed to help owners understand their truck’s unique setup and optimize its performance for their needs․

2․2 Infotainment and Navigation Systems

The 2014 RAM 1500 Owners Manual details the advanced infotainment and navigation systems available in the vehicle․ The Uconnect 8․4-inch touchscreen system is a highlight, offering intuitive control over audio, Bluetooth connectivity, and optional navigation․ This system supports voice commands, allowing drivers to manage calls, playlists, and directions hands-free․ For navigation, the manual explains how to use the optional Garmin-based system, which provides turn-by-turn directions and real-time traffic updates․ It also covers customization options, such as setting favorites and adjusting display settings․ Additionally, the manual describes how to pair smartphones and stream music via Bluetooth or USB ports․ Owners with premium audio systems, such as the Alpine 10-speaker setup, will find instructions on optimizing sound quality․ The manual also notes that some features may require software updates, which can be performed through a dealership or online portal․ By familiarizing themselves with these systems, drivers can enhance their driving experience with convenience, entertainment, and navigation capabilities tailored to their needs․ This section ensures owners can fully utilize the technology integrated into their RAM 1500 for a safer and more enjoyable ride․

Maintenance and Troubleshooting

The 2014 RAM 1500 Owners Manual provides essential maintenance schedules and troubleshooting tips to keep your vehicle in optimal condition․ It outlines routine service requirements and offers solutions for common issues, helping owners address problems promptly and maintain their truck’s performance and longevity effectively․

3․1 Scheduled Maintenance Requirements

The 2014 RAM 1500 Owners Manual outlines the recommended maintenance schedule to ensure optimal vehicle performance and longevity․ It specifies the intervals for routine services such as oil changes, tire rotations, and inspections․ Regular maintenance is crucial for preventing mechanical issues and ensuring reliability․ The manual provides a detailed timetable based on mileage and driving conditions, helping owners stay on track with necessary upkeep․ Additionally, it emphasizes the importance of adhering to these schedules to maintain warranty coverage and avoid potential damages․ By following the guidelines, owners can preserve their truck’s functionality and overall health․ Proper upkeep also enhances safety, fuel efficiency, and the vehicle’s resale value․ The manual serves as a comprehensive guide, ensuring that all maintenance tasks are performed correctly and efficiently․ Regular servicing is vital to uphold the RAM 1500’s performance and durability, making the manual an indispensable resource for all owners․

3․2 Common Issues and Solutions

The 2014 RAM 1500 Owners Manual addresses common issues that owners may encounter, providing practical solutions to ensure proper vehicle function․ One prevalent issue is related to the transmission, where owners may experience rough shifting or hesitation․ The manual recommends checking the transmission fluid level and ensuring it is clean and at the correct viscosity․ If issues persist, it advises consulting a certified technician․ Another common problem involves the Totally Integrated Power Module (TIPM), which can cause electrical malfunctions․ The manual suggests resetting the system or replacing faulty fuses․ Additionally, some owners report issues with the engine’s sensor systems, such as the oxygen sensor or catalytic converter․ The manual guides owners to scan for error codes using diagnostic tools and replace faulty sensors promptly․ For minor concerns like dashboard warning lights, the manual provides troubleshooting steps to identify and resolve the root cause․ By addressing these common issues, the manual empowers owners to maintain their vehicle’s performance and address problems efficiently, minimizing the need for costly repairs․ Regular checks and adherence to the manual’s advice are key to preventing these issues from escalating․

Manuals

canon pixma ts3322 manual

The Canon Pixma TS3322 manual is a comprehensive guide designed to help users understand and optimize their printer’s functionality. It covers setup‚ features‚ and troubleshooting‚ ensuring smooth operation.

Overview of the Canon Pixma TS3322 Printer

The Canon Pixma TS3322 is a compact and versatile all-in-one printer designed for home use. It supports printing‚ scanning‚ and copying functions‚ offering high-quality text and photo output. With wireless connectivity options‚ it allows seamless integration with smartphones and tablets via the Canon PRINT app. The printer features a user-friendly interface and supports various paper sizes‚ including 4×6″ photos. Its energy-efficient design and quiet operation make it ideal for small spaces. The TS3322 uses Canon’s FINE ink technology‚ ensuring vibrant colors and sharp text. It also supports direct USB connections for quick printing. Compatible with both Windows and macOS‚ this printer is a practical choice for everyday printing needs‚ whether for documents or family photos.

Importance of the Manual for Proper Printer Operation

The Canon Pixma TS3322 manual is essential for ensuring optimal performance and troubleshooting common issues. It provides step-by-step instructions for setting up the printer‚ connecting it to Wi-Fi or USB‚ and understanding its features. The manual also offers guidance on basic operations like printing‚ scanning‚ and copying‚ as well as advanced functions such as wireless printing and custom print settings. Without the manual‚ users may struggle with initial setup‚ miss out on key features‚ or encounter errors due to improper configuration. It also includes maintenance tips and error resolution steps‚ helping users resolve problems like paper jams or ink issues. By following the manual‚ users can maximize their printer’s efficiency and enjoy high-quality printing results. Additionally‚ the manual is available for free online‚ making it easily accessible for troubleshooting or reference.

Setting Up the Canon Pixma TS3322

Setting up the Canon Pixma TS3322 involves unboxing‚ preparing the printer‚ and connecting it to Wi-Fi or USB. Follow the manual’s instructions for proper setup.

Unboxing and Preparing the Printer

Unboxing the Canon Pixma TS3322 is the first step. Carefully remove the printer from its packaging and ensure all accessories are included. Next‚ prepare the printer by removing any protective tapes and materials. Power on the device and follow the on-screen instructions to complete the initial setup. The manual provides detailed guidance for this process‚ ensuring everything is ready for operation. Proper preparation ensures optimal performance and prevents potential issues. Make sure to handle the printer gently to avoid damage during unboxing and setup.

Connecting the Printer to Wi-Fi or USB

Connecting the Canon Pixma TS3322 to your network or device is straightforward. For Wi-Fi‚ visit the official Canon website at ij.start.canon/ts3322 and follow the on-screen instructions to configure the printer. Ensure your router is nearby and the printer is turned on. Use the Canon Print Inkjet app for wireless setup. For USB connection‚ insert the cable into the printer and your computer‚ but only after the printer prompts you to do so. Avoid connecting the USB cable prematurely to prevent setup issues. The manual provides step-by-step guidance for both methods‚ ensuring a seamless connection. Proper connectivity is essential for printing‚ scanning‚ and accessing advanced features. Always refer to the manual for troubleshooting any connection-related problems.

Basic Operations of the Canon Pixma TS3322

The Canon Pixma TS3322 enables straightforward printing‚ scanning‚ and copying. Use the Canon Print Inkjet app for wireless printing convenience. Follow on-screen instructions for optimal results.

Printing Documents and Photos

Printing documents and photos with the Canon Pixma TS3322 is straightforward. Load the appropriate paper type into the tray‚ select your print settings via the printer or Canon Print app‚ and initiate the print job. For photos‚ use glossy paper and high-quality settings for vibrant results. Ensure your printer is connected via USB or Wi-Fi for seamless operation. The printer supports various formats‚ including standard A4 and photo sizes like 4×6 inches. Properly aligning the print head and using genuine Canon ink ensures crisp text and vivid images. Refer to the manual for detailed guidance on print settings and paper handling for optimal output.

Scanning and Copying Functions

The Canon Pixma TS3322 offers efficient scanning and copying capabilities. Users can scan documents and photos directly to a computer or save them as PDF or JPEG files. The scanner supports up to 600×1200 dpi resolution‚ ensuring clear and detailed scans. For copying‚ simply place the document on the scanner glass‚ select copy settings via the LCD screen‚ and choose the number of copies and color preferences. The printer allows customization of scan and copy settings‚ such as resolution and file size‚ for optimized results. It also supports borderless copying for photos. With these features‚ the TS3322 is ideal for home and office tasks‚ providing quick and high-quality scans and copies. The manual provides step-by-step guides for these functions‚ ensuring easy operation for all users.

Advanced Features and Functionalities

The Canon Pixma TS3322 manual highlights advanced features like wireless printing via Wi-Fi and Bluetooth‚ enabling seamless connectivity from smartphones and tablets. The Canon PRINT app allows users to print‚ scan‚ and copy directly from their devices. Voice command functionality through smart assistants like Amazon Alexa and Google Assistant adds convenience. Customizable print settings‚ such as paper type and quality‚ ensure optimal output. The manual also guides users in setting up and utilizing these features effectively‚ enhancing their printing experience with modern and intuitive tools.

Wireless Printing and Mobile App Integration

The Canon Pixma TS3322 manual provides detailed instructions for setting up wireless printing‚ allowing users to print effortlessly from smartphones‚ tablets‚ and laptops. By connecting the printer to a Wi-Fi network or using Bluetooth‚ seamless integration with the Canon PRINT app is achieved. This app enables users to print‚ scan‚ and copy documents directly from their mobile devices. Additionally‚ voice command functionality through smart assistants like Amazon Alexa and Google Assistant offers hands-free control‚ enhancing convenience. The manual also guides users through troubleshooting common wireless connection issues‚ ensuring a stable and efficient printing experience. With these advanced features‚ the Canon Pixma TS3322 offers a modern and user-friendly approach to wireless printing and mobile integration.

Customizing Print Settings for Optimal Results

The Canon Pixma TS3322 manual highlights various ways to customize print settings for enhanced output. Users can adjust paper type‚ print quality‚ and color settings to suit their needs. The manual explains how to access these settings through the printer’s control panel or the Canon PRINT app. Additionally‚ it guides users on selecting the appropriate print resolution and layout options‚ such as duplex printing. The manual also covers advanced features like borderless printing for photos and manual intensity adjustments for copies. By following the customization tips outlined in the manual‚ users can achieve professional-grade prints and maximize their printing experience; This section ensures users understand how to tailor their settings for specific tasks‚ making the Canon Pixma TS3322 a versatile and efficient printing solution.

Troubleshooting Common Issues

The Canon Pixma TS3322 manual provides detailed solutions for common printer issues‚ such as paper jams‚ ink errors‚ and connectivity problems‚ ensuring quick resolution.

Identifying and Resolving Printer Errors

The Canon Pixma TS3322 manual offers step-by-step guidance for diagnosing and fixing printer errors. Common issues like paper jams or low ink alerts are addressed with clear instructions. Users can refer to the troubleshooting section for solutions to error codes‚ ensuring minimal downtime. Additionally‚ the manual provides tips to prevent recurring problems‚ such as regular maintenance and firmware updates. By following these guidelines‚ users can resolve issues efficiently and maintain optimal printer performance. The manual’s straightforward approach makes it easy for both beginners and experienced users to identify and resolve printer errors effectively.

Updating Firmware and Software for Improved Performance

Regularly updating the firmware and software of your Canon Pixma TS3322 ensures optimal performance and access to the latest features. The manual provides detailed steps to check for updates via the printer’s control panel or the Canon Print app. Users are advised to connect the printer to the internet and follow on-screen instructions to download and install updates. Updating firmware enhances security‚ adds new functionalities‚ and improves compatibility with devices. The manual also recommends restarting the printer after updates to ensure changes take effect. For assistance‚ Canon’s official website offers downloadable updates and support resources. Keeping your printer updated guarantees a smooth and efficient printing experience. Always refer to the manual for guidance on updating procedures and troubleshooting post-update issues.

Manuals

lumix dmc zs100 manual

The Panasonic Lumix DMC-ZS100 is a compact digital camera featuring a 20.1-megapixel 1-inch sensor, 10x optical zoom, and 4K capabilities. Designed for versatility, it combines portability with advanced imaging technology, making it ideal for photographers seeking high-quality results. This guide provides an overview of its features and the importance of the user manual for optimal use.

1.1 Overview of the Camera Features

The Panasonic Lumix DMC-ZS100 boasts a 20.1-megapixel 1-inch MOS sensor, delivering excellent image quality. Its Leica DC Vario-Elmarit lens offers a 10x optical zoom (25-250mm equivalent), capturing wide-angle to telephoto shots. The camera supports 4K Ultra HD video and Panasonic’s 4K Photo modes. A 3-inch LCD touchscreen and 0.2-inch electronic viewfinder provide intuitive control and composition. Additional features include 5-axis image stabilization, manual focus, and built-in Wi-Fi for seamless connectivity. These capabilities make the DMC-ZS100 a versatile tool for both casual and advanced photographers.

1.2 Importance of the User Manual

The user manual is essential for understanding the full potential of the Panasonic Lumix DMC-ZS100. It provides detailed instructions for operating the camera, explaining both basic and advanced features. The manual helps users navigate the menu system, troubleshoot common issues, and optimize settings for various shooting conditions. Available in PDF format, it offers comprehensive guidance, ensuring photographers can maximize the camera’s capabilities and resolve technical difficulties efficiently. Referencing the manual is crucial for unlocking the camera’s full functionality and enhancing the overall photography experience.

Key Specifications of the Lumix DMC-ZS100

The Panasonic Lumix DMC-ZS100 features a 20.1-megapixel 1-inch MOS sensor, 10x optical zoom, 5-axis image stabilization, and a 3-inch LCD touchscreen for enhanced photography experiences.

2.1 Sensor and Lens Details

The Panasonic Lumix DMC-ZS100 features a 20.1-megapixel 1-inch High Sensitivity MOS sensor, ensuring excellent image quality with improved low-light performance. Paired with a Leica DC Vario-Elmarit lens, it offers a 10x optical zoom (25-250mm equivalent focal length) for versatility in capturing both wide-angle and telephoto shots. The sensor’s larger size compared to traditional compact cameras enhances dynamic range and color accuracy, while the lens’ optical design minimizes distortions and aberrations, delivering sharp and detailed images across the zoom range.

2.2 Zoom and Image Stabilization

The Panasonic Lumix DMC-ZS100 boasts a 10x optical zoom, extending from a wide-angle 25mm to a telephoto 250mm equivalent focal length. This versatile range makes it ideal for capturing diverse scenes, from landscapes to distant subjects. The camera is equipped with a 5-axis Hybrid Optical Image Stabilizer (O.I.S.), which effectively reduces blur caused by handshake or movement, ensuring sharper images even at maximum zoom or in low-light conditions. This stabilization system is particularly useful for maintaining clarity during video recording and telephoto photography.

2.3 Display and Viewfinder

The Panasonic Lumix DMC-ZS100 features a 3.0-inch LCD touchscreen with touch functionality, enabling intuitive menu navigation and control. Additionally, it includes a 0.2-inch electronic viewfinder (EVF) with 100% coverage, providing a clear and accurate preview of the scene. The EVF is particularly useful in bright lighting conditions, where the LCD may be less visible. Both the LCD and EVF offer sharp resolution, ensuring precise framing and focus control. These displays enhance usability, allowing photographers to capture high-quality images effortlessly.

Navigating the User Manual

The Panasonic Lumix DMC-ZS100 manual is divided into basic and advanced sections, with a detailed PDF guide available for download. It covers camera setup, features, and troubleshooting.

3.1 Basic Owners Manual

The basic owner’s manual for the Panasonic Lumix DMC-ZS100 provides essential guidance for initial setup and operation. It covers fundamental features like camera components, shooting modes, and menu navigation. Designed for newcomers, the manual ensures a smooth transition into using the camera’s core functions. Instructions are clear and concise, helping users understand basic operations quickly. Reading this manual before first use is recommended to maximize functionality. Advanced features are detailed in the PDF manual, which is available for download from Panasonic’s official website.

3.2 Advanced Features and PDF Manual

The PDF manual for the Panasonic Lumix DMC-ZS100 delves into advanced features, offering detailed guidance for experienced users. It covers settings like manual exposure control, RAW image capture, and custom functions. The manual also explains how to use the camera’s 4K capabilities, including 4K Photo and Post Focus modes. Additionally, it provides instructions for Wi-Fi connectivity and transferring images. This comprehensive guide ensures users can unlock the camera’s full potential. The PDF manual is available for download from Panasonic’s official website, serving as an invaluable resource for mastering the DMC-ZS100’s sophisticated features.

Operating the Camera Manually

Master manual control with the Lumix DMC-ZS100 by adjusting aperture, shutter speed, and ISO for precise exposures. Manual focus and white balance settings offer creative freedom and accuracy.

4.1 Adjusting Aperture and Shutter Speed

To adjust the aperture and shutter speed on the Panasonic Lumix DMC-ZS100, use the mode dial on the camera’s top. Select A mode for aperture priority and use the control dial near the shutter button to adjust the aperture value. For shutter speed, select S mode and use the same control dial to set your desired speed. In M mode, both aperture and shutter speed can be manually adjusted for full creative control. This allows you to customize exposure settings to achieve the desired effect in your photos.

4.2 Manual Focus and White Balance

To enable manual focus on the Panasonic Lumix DMC-ZS100, switch the focus mode to MF using the focus mode switch on the camera’s side. Then, use the control ring around the lens to adjust focus. For white balance, press the left arrow button to access the quick menu, navigate to the white balance icon, and select the appropriate preset (e.g., sunlight, incandescent) based on lighting conditions. These adjustments ensure precise control over focus and color accuracy, enhancing your photography experience.

4.3 Using the Built-In Flash

To activate the built-in flash on the Panasonic Lumix DMC-ZS100, press the flash button located on the left side of the camera. Once activated, use the control dial near the shutter button to select the desired flash mode, such as Auto, Forced Flash, or Slow Sync. The flash automatically adjusts to suit the scene, but manual selection ensures optimal lighting in various conditions. This feature enhances low-light photography and provides creative control over your images.

Troubleshooting Common Issues

Address common issues like camera freezing, system errors, or photo transfer problems. Refer to the manual for reset procedures, error solutions, and connectivity troubleshooting.

5.1 Camera Freezing and System Errors

If your Panasonic Lumix DMC-ZS100 freezes or displays system errors like “OIS error,” restart the camera by turning it off, removing the battery, and waiting a few seconds. For persistent issues, perform a factory reset via the menu. Ensure the firmware is updated to the latest version. If the problem recurs, consult the troubleshooting section in the manual or contact Panasonic support for assistance. Regularly backing up settings can prevent data loss during resets.

5.2 Transferring Photos and Videos

To transfer photos and videos from your Panasonic Lumix DMC-ZS100, connect the camera to a computer using the provided USB cable. Ensure the camera is set to “PC” mode. You can also transfer files using an SD card reader or wirelessly via the camera’s built-in Wi-Fi. For Wi-Fi transfers, use the Panasonic Image App on your smartphone or tablet. If the camera is not recognized, check the USB connection or restart the camera. The manual provides detailed steps for both wired and wireless transfers, ensuring compatibility with your device.

5.3 Resetting to Factory Settings

To reset the Panasonic Lumix DMC-ZS100 to factory settings, navigate to the camera’s menu system. Select the “Setup” or “Settings” menu, then choose the “Reset” option. Confirm the action when prompted. This will restore all settings to their default values, erasing any custom configurations. Note that resetting does not delete photos or videos but will remove any personalized settings. Refer to the manual for detailed steps to ensure a successful reset and to back up important settings if needed.

Additional Features and Settings

The Lumix DMC-ZS100 offers advanced features like 4K video, 4K PHOTO, and Post Focus for precise image capture. It also includes an electronic viewfinder for enhanced composition and built-in Wi-Fi for seamless connectivity, ensuring versatile and high-quality photography experiences.

6.1 4K Video and Photo Modes

The Lumix DMC-ZS100 excels with its 4K Ultra HD video recording capabilities, capturing detailed and vibrant footage. The 4K PHOTO mode allows users to extract 8MP images from 4K video, perfect for capturing fleeting moments. Additionally, the 4K Post Focus feature enables selective focus adjustment after shooting, enhancing creative control. These advanced modes combine with the camera’s electronic viewfinder and intuitive touchscreen, providing a seamless and high-quality imaging experience. Built-in Wi-Fi further enhances functionality, allowing easy sharing of 4K content and photos.

6.2 Wi-Fi Connectivity

The Lumix DMC-ZS100 features built-in Wi-Fi connectivity, enabling easy sharing and transferring of photos and videos. Users can connect the camera to smartphones or tablets via Panasonic’s dedicated app, allowing seamless image transfer and remote shooting. This feature enhances convenience for social media sharing and backup. The Wi-Fi functionality also supports 4K content transfer, ensuring high-quality media can be shared effortlessly. This connectivity option adds versatility to the camera’s portability, making it ideal for modern photographers who value accessibility and efficiency in their workflow.