jello no bake crust mix instructions
Jell-O No-Bake Crust Mix offers a convenient way to create a delicious cheesecake base. It typically includes graham cracker crumbs, sugar, and sometimes salt or cinnamon. Designed to be mixed with melted butter and pressed into a pan, this mix simplifies the process of making a no-bake cheesecake crust. It’s part of a kit that includes both crust and filling mixes, making it an ideal solution for quick and easy desserts without the need for baking.
Overview of the Product
Jell-O No-Bake Crust Mix is a pre-packaged mix designed for easy cheesecake preparation. It typically includes graham cracker crumbs, sugar, and sometimes additional spices like cinnamon. The mix is intended to be combined with melted butter to form the crust, eliminating the need for baking. Part of Jell-O’s no-bake cheesecake kit, it offers a convenient solution for home bakers. The kit usually includes both the crust mix and a filling mix, requiring minimal additional ingredients like milk and butter. This product is ideal for those seeking a quick, hassle-free dessert with a smooth, creamy texture and a sturdy crust.
Key Features of the Mix
The Jell-O No-Bake Crust Mix is a convenient, pre-mixed blend of graham cracker crumbs and sugar, designed for easy preparation. It requires only melted butter to create a sturdy crust, eliminating the need for baking. The mix is part of a complete cheesecake kit, including both crust and filling mixes. It offers a quick solution for dessert preparation, with minimal ingredients needed. The crust mix ensures a consistent texture and flavor, making it ideal for both novice and experienced bakers. Its simplicity and efficiency make it a popular choice for no-bake cheesecake enthusiasts. The mix is also customizable, allowing for added toppings or alternative crust recipes.
Ingredients and Tools Needed
Pantry Staples Required: Jell-O No-Bake Crust Mix, melted butter, sugar, and cold milk for the filling. Essential Tools: Mixing bowl, spoon, 9-inch pie pan, and optional food processor for crust preparation.
Pantry Staples Required
To prepare the Jell-O No-Bake Crust, you’ll need the Jell-O No-Bake Crust Mix, 4 tablespoons of melted butter, and 2 tablespoons of sugar. For the filling, you’ll require 1.5 cups of cold milk. Additional ingredients like cream cheese, vanilla pudding mix, and whipped topping are needed for the cheesecake filling. Ensure you have these pantry staples on hand to complete the recipe successfully. These ingredients combine to create a smooth, creamy dessert with a sturdy crust.
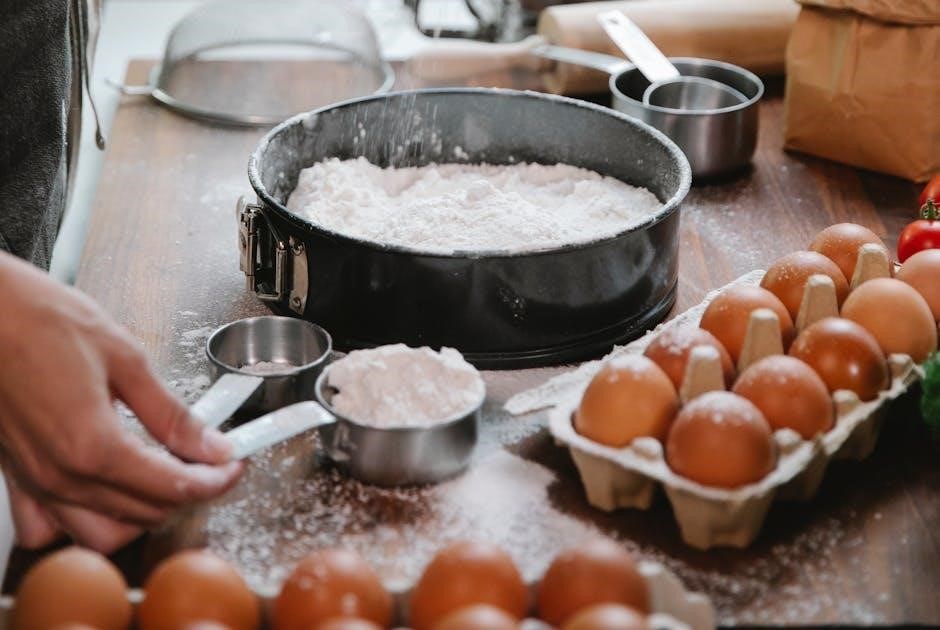
Essential Tools for Preparation
To prepare the Jell-O No-Bake Crust, you’ll need a mixing bowl, measuring cups, and a spoon or spatula for combining ingredients. A pie pan is necessary for pressing the crust mixture into shape. For mini cheesecakes, muffin cups and a muffin tin are optional but useful. These tools ensure a smooth and efficient preparation process, helping you achieve a perfectly formed crust for your dessert.
Step-by-Step Crust Preparation
Combine the crust mix, sugar, and melted butter until well blended. Press the mixture firmly into the bottom of a prepared pan to form the crust base.
Combining Crust Mix, Sugar, and Butter
Start by melting the butter according to the package instructions. In a large mixing bowl, combine the Jell-O No-Bake Crust Mix and sugar. Gradually add the melted butter to the dry ingredients, stirring until the mixture is evenly moistened and crumbly. Ensure there are no dry pockets by mixing thoroughly. This step is crucial for creating a cohesive crust that holds together well when pressed into the pan. Avoid overmixing, as it could make the crust too dense. Once combined, the mixture is ready to be pressed into the prepared pan for the cheesecake base.
Pressing the Crust into the Pan
Once the crust mixture is well combined, it’s time to press it into the pan. Lightly grease the bottom of a pie dish or springform pan to ensure the crust releases easily. Using your fingers or the bottom of a glass, evenly distribute the mixture across the pan. Apply firm, consistent pressure to press the crumbs into the base and up the sides if desired; Make sure the crust is evenly spread and covers the entire surface without gaps. This step ensures a sturdy base for your no-bake cheesecake. Let it chill in the refrigerator for a few minutes to set before adding the filling;
Filling Preparation Instructions
Mix the filling ingredients, such as cream cheese, milk, and pudding mix, until smooth. Ensure all lumps are removed for a creamy texture before pouring into the crust.
Mixing the Filling Ingredients
Beat the cream cheese with a portion of milk until smooth. Gradually add the remaining milk and pudding mix, mixing until well combined. Fold in whipped topping for a light texture. Ensure no lumps remain for a creamy consistency. Optional additions like lemon juice or vanilla extract can enhance flavor. Mix thoroughly but gently to avoid deflating the whipped topping. Pour the filling over the prepared crust and refrigerate until set. This step is crucial for achieving a smooth, even texture in the final cheesecake.

Assembling the Cheesecake
Once the crust is set, pour the prepared filling mixture evenly over it. Smooth the top with a spatula to ensure an even surface. If desired, add toppings like fresh fruit or chocolate shavings immediately. Cover the cheesecake with plastic wrap and refrigerate for at least 3-4 hours or overnight to allow the filling to set. Before serving, let it sit at room temperature for a few minutes to soften slightly. This ensures clean slices and a creamy texture. Avoid over-handling the mixture to maintain its structure and appearance.
Customization Ideas
Elevate your cheesecake by adding fresh fruit, nuts, or chocolate toppings. Drizzle with caramel or berry sauces for extra flavor. Try alternative crust recipes for variety.
Adding Toppings and Sauces

Enhance your no-bake cheesecake with fresh fruit, whipped cream, or chocolate shavings for a decorative touch. Drizzle with caramel, chocolate, or berry sauces for added flavor. For a vibrant twist, mix Jell-O powder into the whipped topping for a colorful, fruity topping. These additions not only elevate the visual appeal but also create a delightful contrast of textures and tastes, making your cheesecake truly special and personalized to your preferences.
Alternative Crust Recipes
For a unique twist, try using vanilla wafers or chocolate sandwich cookies instead of graham crackers. Simply crush the cookies finely, mix with a bit of sugar and melted butter, and press into the pan. Another option is using crushed nuts like almonds or pecans for added texture. You can also experiment with cereal crusts or even cookie dough for a sweeter base. These alternatives allow you to customize the flavor and texture of your crust while maintaining the no-bake convenience. Feel free to get creative and find your favorite combination!
Tips for Success
Ensure the crust is pressed firmly into the pan for a solid base. Chill the crust before adding the filling to prevent it from crumbling; Use room temperature ingredients for a smooth mix and even texture.
Ensuring a Smooth Filling
To achieve a smooth filling, ensure all ingredients, especially cream cheese, are at room temperature. Beat the cream cheese until creamy before gradually adding the Jell-O mix and milk. Avoid overmixing, as it can introduce air bubbles. Pour the filling into the chilled crust and smooth the top with a spatula. Refrigerate until set, ensuring a firm and even texture. For the best results, let it chill for at least 4 hours or overnight to allow the flavors to meld and the filling to fully set.
Avoiding Common Mistakes
When using Jell-O No-Bake Crust Mix, avoid overmixing the crust ingredients, as it can create a dense texture. Use the correct amount of melted butter to ensure the crust holds together without becoming too crumbly. Press the crust firmly into the pan to prevent it from crumbling after chilling. For the filling, avoid adding too much milk, as it can make the mixture too runny. Ensure the cream cheese is softened to prevent lumps. Finally, refrigerate the crust and filling long enough to set properly, as rushing this step can lead to a messy or uneven texture.
Troubleshooting
If the crust is too crumbly, try adding a small amount of melted butter to help bind the mixture. For a cracked filling, ensure ingredients are at room temperature and avoid overmixing.
Fixing a Too-Crumbly Crust
If your crust turns out too crumbly, it may lack sufficient butter to hold the crumbs together. Start by gradually adding small amounts of melted butter to the crust mixture until it reaches the desired consistency. Mix gently to avoid creating air pockets. If the crust has already been pressed into the pan, you can drizzle a little extra melted butter over it and gently press the crumbs together with a spatula or the back of a spoon. This should help bind the crust without making it overly greasy. Ensure the pan is properly prepared to prevent the crust from crumbling when serving.
Preventing Cracks in the Filling
To prevent cracks in the filling, ensure all ingredients, especially cream cheese, are at room temperature before mixing. Avoid overmixing the filling, as this can incorporate too much air, leading to cracks. Once the filling is smooth and well-combined, pour it gently into the prepared crust. Chill the cheesecake in the refrigerator for at least 4 hours to set evenly. Avoid freezing, as this can cause the filling to expand and contract, leading to cracks. A slow, even chilling process ensures a smooth, crack-free surface for your no-bake cheesecake.
Jell-O No-Bake Crust Mix simplifies dessert preparation, offering a quick and easy solution for creamy, delicious cheesecakes without the hassle of baking. Perfect for all skill levels.
Final Thoughts on the Product
Jell-O No-Bake Crust Mix is a game-changer for dessert lovers, offering convenience and delicious results. With its pre-mixed ingredients, it simplifies the process of creating a cheesecake crust. The mix combines perfectly with melted butter to form a sturdy base, while the included filling ensures a smooth and creamy texture. Whether you’re a beginner or an experienced baker, this product delivers consistent results. Its ease of use and versatility make it a great option for quick desserts. For anyone looking to save time without compromising taste, Jell-O No-Bake Crust Mix is a must-try.