what is 6 speed manual
What is a 6-Speed Manual Transmission?
A 6-speed manual transmission is a type of gearbox that allows drivers to manually shift between six forward gears using a clutch pedal and gearstick, enhancing performance and efficiency.
1.1 Definition and Overview
A 6-speed manual transmission is a gearbox with six forward gears, enabling precise control over speed and torque. Drivers use a clutch pedal and gearshift to manually change gears, optimizing performance and efficiency. It typically includes six gear ratios, with the sixth often serving as an overdrive for reduced engine RPM at high speeds. This setup enhances fuel economy and driver engagement. Common in performance vehicles, it balances power delivery and smooth shifting, making it popular in cars like the Cadillac CT4-V Blackwing and Lamborghini Gallardo.
1.2 Key Components of a 6-Speed Manual Transmission
A 6-speed manual transmission consists of a gearbox housing six forward gear ratios, a reverse gear, and a final drive. Key components include the gear set, synchronizers for smooth shifting, a clutch to engage/disengage power, and a shifter mechanism to select gears. High-performance models, like the Tremec T-56 Magnum, feature enhanced torque capacity (up to 700 lb-ft) and dual speed pickups for precise control. These components work together to optimize performance, efficiency, and driver engagement.
History and Development of 6-Speed Manual Transmissions
The 6-speed manual transmission evolved from earlier 5-speed designs, with the Tremec T-56 Magnum emerging as a high-performance benchmark in the early 2000s, offering enhanced torque capacity and precise shifting.
2.1 Early Manual Transmissions and Their Evolution
Manual transmissions originated in the early 20th century, with the first systems offering 3 or 4 gears. These early designs were simple but evolved over time to improve performance and efficiency. The development of 6-speed manual transmissions began in the late 1990s, with the Tremec T-56 Magnum emerging as a landmark model. Early versions focused on durability and precision, using high-strength materials to handle increased torque. This evolution laid the groundwork for modern 6-speed systems, which offer smoother shifting and enhanced driver control.
The 6-speed manual transmission was introduced in the late 1990s, marking a significant leap in performance and efficiency. Initially featured in high-performance vehicles, it offered improved gear ratios and smoother shifting compared to 5-speed systems. The Tremec T-56 Magnum became a benchmark, known for its durability and ability to handle high torque; This innovation catered to both enthusiasts and everyday drivers, providing better acceleration and fuel efficiency, while setting a new standard for manual transmissions in modern vehicles.

How a 6-Speed Manual Transmission Works
A 6-speed manual transmission operates by allowing the driver to manually shift gears using a clutch pedal and gearstick, providing precise control over speed and torque delivery.
3.1 Gear Ratios and Their Functions
Gear ratios in a 6-speed manual transmission determine the speed and torque output for each gear. Lower gears (1st-3rd) provide higher torque for acceleration, while higher gears (4th-6th) optimize fuel efficiency at higher speeds. The transmission model F6MBC, for example, features ratios like 1st: 3.833, 2nd: 2.047, and 6th: 0.975, allowing smooth transitions between gears. Each ratio is designed to balance performance and efficiency, ensuring optimal engine RPM during acceleration and cruising.
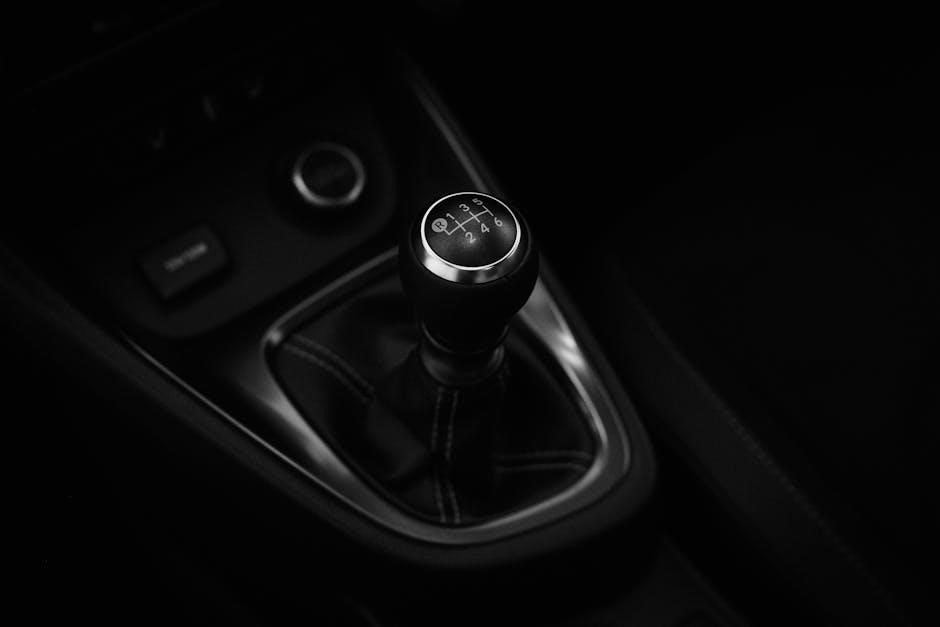
3.2 Clutch and Shifter Mechanism
The clutch and shifter mechanism are essential for smooth gear changes in a 6-speed manual transmission. The clutch disengages engine power, allowing gear shifts, while the shifter selects the desired gear. Modern transmissions, like the T-56 Magnum, offer precise shifts with features like multiple shifter locations and dual speed pickups. The clutch pedal’s smooth engagement ensures seamless control, enabling drivers to master shifting techniques and maintain optimal performance during acceleration and cruising. This mechanism enhances driver engagement and overall vehicle responsiveness.
3.3 Synchronizers and Their Role in Smooth Shifting
Synchronizers in a 6-speed manual transmission ensure smooth gear transitions by synchronizing the speed of the gear being selected with the shaft. This prevents grinding and allows seamless shifting. Advanced systems, like those in the Tremec T-56 Magnum, feature precise synchronizers for crisp shifts. They are critical for performance, especially in higher gears, and contribute to efficient power delivery and driver control. Modern transmissions often include dual or triple-cone synchronizers for enhanced durability and smoother operation across all gears.

6-Speed vs. 5-Speed Manual Transmissions
A 6-speed manual transmission offers an extra overdrive gear compared to a 5-speed, improving fuel efficiency and reducing engine RPM at higher speeds for better performance and economy.
4.1 Differences in Gear Ratios and Performance
The 6-speed manual transmission offers more precise gear ratios compared to a 5-speed, providing better acceleration and control. With an additional overdrive gear, it reduces engine RPM at higher speeds, improving fuel efficiency and reducing wear. The tighter spacing between gears enhances performance, allowing drivers to maintain optimal power delivery. This makes the 6-speed more suitable for both high-performance vehicles and everyday driving, offering a balance of power and efficiency that a 5-speed cannot match.
4.2 Fuel Efficiency and Driving Experience
The 6-speed manual transmission often provides better fuel efficiency than a 5-speed due to its additional overdrive gear, which reduces engine RPM at higher speeds. This results in lower fuel consumption during highway driving. The extra gear also enhances the driving experience by allowing smoother transitions between gears and better utilization of engine power. Drivers can maintain optimal RPM ranges, making acceleration feel more responsive and refined, especially in varied driving conditions. This makes the 6-speed more versatile for both city and highway use.

Advantages of a 6-Speed Manual Transmission
A 6-speed manual transmission offers improved performance, efficiency, and driver engagement. It provides better control, smoother shifting, and enhanced acceleration, making it ideal for both performance and daily driving.
5.1 Improved Performance and Acceleration
A 6-speed manual transmission enhances performance by optimizing gear ratios for precise control and faster acceleration. It allows drivers to maintain optimal engine speed during acceleration, especially in performance vehicles. The additional gear compared to a 5-speed enables better torque management at higher speeds. For instance, the Tremec T-56 Magnum can handle up to 700 lb-ft of torque, making it ideal for high-performance applications like the Cadillac CT4-V Blackwing. This results in a more responsive and dynamic driving experience.
5.2 Better Fuel Economy
A 6-speed manual transmission improves fuel economy by providing additional gear ratios, especially an overdrive gear, which reduces engine RPM at higher speeds. This lowers fuel consumption during highway driving. For example, sixth gear allows the engine to operate at lower revolutions, minimizing fuel usage. Modern 6-speed transmissions, like the ZF-Ecolite 6 S 450 P, are designed for efficiency, making them suitable for light pickup trucks and performance vehicles. This optimization enhances both performance and fuel efficiency.
5.3 Enhanced Driver Control and Engagement
A 6-speed manual transmission enhances driver control and engagement by allowing precise gear selection and responsive acceleration. Manual shifting with the clutch and gearstick requires skill, fostering a deeper connection between the driver and the vehicle. This mechanical interaction provides a more immersive driving experience, making every shift deliberate and satisfying. The ability to optimize gear usage for various conditions ensures better performance and a more engaging drive.

Driving a 6-Speed Manual Transmission
Driving a 6-speed manual transmission involves mastering smooth shifting, clutch control, and precise gear changes to optimize performance and efficiency in various driving conditions.
6.1 Basic Techniques for Smooth Shifting
Smooth shifting in a 6-speed manual transmission requires coordination between the clutch pedal and gearstick. Press the clutch fully, shift into the desired gear, and release slowly while pressing the accelerator. Ensure gears are engaged smoothly to avoid jerking. Practice shifting through all six gears, listening to engine RPMs to determine the right moment to shift. Proper clutch control and timing are essential for seamless transitions and optimal performance. Regular practice helps master these techniques effectively.
6.2 Mastering Clutch Control
Mastering clutch control is essential for smooth operation of a 6-speed manual transmission. The clutch connects and disconnects the engine from the transmission, allowing gear changes. Proper technique involves pressing the clutch fully before shifting and releasing it gradually while accelerating. Practice finding the “biting point” where the engine engages with the transmission. Avoid riding the clutch, as it can cause wear. Smooth, gradual clutch release enhances control and reduces jerking, especially when starting from a standstill or shifting gears.
6.3 Tips for Driving in Various Conditions
Driving a 6-speed manual transmission in different conditions requires adaptability. On hills, use lower gears to maintain control and avoid rolling back. In snowy or wet conditions, shift smoothly and avoid sudden acceleration. In heavy traffic, keep the car in a lower gear for better responsiveness. When driving uphill, downshift before the climb to maintain speed and engine power. Practice in different environments to refine your skills and ensure safe, efficient driving in all situations.

Maintenance and Care of a 6-Speed Manual Transmission
Regular transmission fluid checks and inspections for leaks are essential. Replace worn clutch and gear components promptly. Schedule periodic servicing by a qualified mechanic to ensure optimal performance.
7.1 Regular Maintenance Tips
Regular maintenance involves checking transmission fluid levels and condition. Inspect for signs of leaks around the clutch and gear components. Replace worn parts promptly to prevent damage. Schedule professional servicing every 30,000 to 60,000 miles to ensure smooth operation. Proper care extends the lifespan and maintains optimal performance of the 6-speed manual transmission.
7.2 Common Issues and Troubleshooting
Common issues with 6-speed manual transmissions include clutch wear, gear grinding, and fluid leaks. If gears grind, check clutch engagement and adjust if necessary. Low transmission fluid levels can cause slipping or hesitation. Leaks around seals or gaskets should be addressed promptly. For rough shifting, inspect synchronizers and gear teeth for wear. Regular fluid changes and proper clutch alignment can prevent many of these issues, ensuring smooth and reliable operation.

Popular Vehicles Featuring 6-Speed Manual Transmissions
Popular vehicles with 6-speed manual transmissions include the Chevrolet Camaro, Ford Mustang, Dodge Challenger, Jeep Wrangler, and Lamborghini Gallardo, offering precise control and enhanced driving engagement.
8.1 Sports Cars and Performance Vehicles
Sports cars like the Cadillac CT4-V Blackwing, Porsche 911, and Lamborghini Gallardo feature 6-speed manual transmissions, offering precise control and thrilling acceleration. The Mazda MX-5 Miata and Toyota GR86 also utilize this setup, blending performance with driver engagement. These transmissions enable optimal gear ratios, enhancing acceleration and responsiveness, making them a favorite among driving enthusiasts for their direct connection to the vehicle’s performance capabilities, ensuring an exhilarating experience on both road and track;
8.2 Trucks and SUVs with 6-Speed Manual Options
Certain trucks and SUVs, such as the Jeep Wrangler JK and Mazda BT-50, offer 6-speed manual transmissions for enhanced control and efficiency. These setups provide smooth shifting and optimal gearing for both on-road and off-road conditions. While manual transmissions are less common in larger vehicles, they remain popular among enthusiasts for their direct driver engagement and fuel efficiency. The 6-speed manual option in these models ensures a balance between performance and practicality, catering to drivers who value precision and control behind the wheel.

The Future of 6-Speed Manual Transmissions
The future of 6-speed manual transmissions lies in technological advancements, with companies like TREMEC leading innovation. They integrate modern materials and designs to enhance durability and performance, catering to both enthusiasts and evolving market demands.
9.1 Technological Advancements
Technological advancements in 6-speed manual transmissions focus on improving performance, durability, and efficiency. Innovations like lightweight materials, advanced gear coatings, and optimized synchronizers enhance smooth shifting and reduce wear. TREMEC’s T-56 Magnum, for instance, offers high-torque capacity and precise shifts. Modern designs also integrate dual speed pickups and multiple shifter locations for versatility. These advancements ensure 6-speed manuals remain relevant, catering to both enthusiasts and evolving market demands while maintaining the classic driving experience.
9.2 Market Trends and Consumer Preferences
Market trends show sustained demand for 6-speed manual transmissions among driving enthusiasts, despite the rise of automatics. Consumers prioritize manuals for their tactile driving experience and control. However, the shift toward automatic and dual-clutch transmissions dominates mainstream markets. TREMEC remains a leader in aftermarket 6-speed transmissions, catering to performance-oriented buyers. While manuals are less common in mass-produced vehicles, they retain a niche appeal for purists seeking engagement and precision behind the wheel.
A 6-speed manual transmission offers a perfect blend of performance, efficiency, and driver engagement, making it a preferred choice for enthusiasts. Its ability to optimize gear ratios for acceleration and fuel economy, combined with the tactile driving experience, ensures its relevance. While automatics dominate mainstream markets, the 6-speed manual remains a niche favorite, with advancements like the TREMEC Magnum catering to performance needs. Its enduring appeal highlights the balance between technological progress and the joy of manual driving.