Manuals

weight watchers scale user manual

The Weight Watchers Scale is a smart bathroom scale designed to track weight and body composition. It uses BIA technology to measure fat, water, bone, and muscle mass, syncing with the Weight Watchers app for health insights. Designed for home use, it supports multiple users, aiding in weight management and overall wellness.

Purpose and Benefits of the Weight Watchers Scale

The Weight Watchers Scale is designed to provide comprehensive health insights, tracking weight and body composition through Bio-Impedance Analysis (BIA) technology. It measures fat, water, bone, and muscle mass, offering a detailed health overview. Syncing with the Weight Watchers app allows users to monitor progress, set goals, and receive personalized recommendations, enhancing their weight management journey. Multi-user capability makes it ideal for households, with each user maintaining a separate profile. The scale automatically calculates BMI, providing a quick health assessment. It also tracks hydration levels and muscle mass, crucial for overall wellness. Battery-operated and easy to use, the scale supports long-term health goals with accurate and consistent measurements.

Overview of Key Features

The Weight Watchers Scale offers a range of advanced features tailored for effective health tracking. It incorporates Bio-Impedance Analysis (BIA) technology to measure body fat, water percentage, bone mass, and muscle mass, providing a holistic view of body composition. The scale supports up to four users, allowing personalized profiles for each family member; It automatically calculates BMI, offering a quick health assessment. With a sleek, durable design, the scale is battery-operated and easy to use. It seamlessly syncs with the Weight Watchers app, enabling users to track progress and set goals. The scale also provides hydration level insights, essential for maintaining overall wellness. Its user-friendly interface and comprehensive metrics make it an ideal tool for anyone focused on achieving and maintaining a healthy lifestyle.

Getting Started with the Weight Watchers Scale

Start by unboxing and placing the scale on a flat surface. Sync it with your device via Bluetooth for seamless data tracking and app connectivity.

Unboxing and Initial Setup

When you unbox the Weight Watchers Scale, ensure all components are included: the scale, batteries, and user manual. Place the scale on a flat, stable surface for accurate measurements. Insert the provided batteries, then power it on. Follow the manual’s instructions to set the unit (kg or lbs). Perform the calibration process by turning the scale off, then on again, and ensure it displays “0.0” before first use. This ensures precise weight readings. If the scale times out during setup, restart the process. Proper setup is crucial for accurate data tracking and a smooth user experience.

Syncing the Scale with the Weight Watchers App

To sync the Weight Watchers Scale with the app, first download and install the Weight Watchers app from the App Store or Google Play. Open the app and log in to your account. Ensure Bluetooth is enabled on your device. Turn on the scale and make sure it is in pairing mode. In the app, navigate to the “Devices” or “Connect” section and select the scale from the available devices. Follow the in-app instructions to complete the pairing process. Once synced, your weight and body composition data will automatically transfer to the app, allowing you to track progress and set goals effectively.

Understanding the Weight Watchers Scale Features

The Weight Watchers Scale features advanced BIA technology, measuring weight, body fat, water, bone, and muscle mass. It supports multiple users and syncs seamlessly with the app, providing personalized insights for holistic health monitoring and weight management.

Bio-Impedance Analysis (BIA) Technology

The Weight Watchers Scale utilizes Bio-Impedance Analysis (BIA) technology to measure body composition. BIA sends a small electrical current through the body, which interacts differently with fat, muscle, water, and bone tissues. This allows the scale to calculate metrics like body fat percentage, water percentage, bone mass, and muscle mass. The technology is non-invasive and provides accurate readings when properly calibrated. It works best when the user is well-hydrated and standing barefoot on the scale. BIA is a reliable method for tracking changes in body composition over time, helping users monitor their progress toward health and fitness goals. Regular use can provide valuable insights into overall wellness.

Body Composition Metrics: Fat, Water, Bone, and Muscle Mass

The Weight Watchers Scale provides detailed insights into body composition, including fat, water, bone, and muscle mass. Fat mass measures body fat percentage, essential for understanding weight distribution and health risks. Water mass indicates hydration levels, crucial for overall wellness. Bone mass tracks bone density, vital for assessing skeletal health. Muscle mass reflects lean tissue, important for metabolism and strength. These metrics, tracked over time, help users monitor progress toward fitness goals. The scale offers a comprehensive view of body composition, enabling informed decisions for a healthier lifestyle. Regular monitoring of these metrics supports long-term wellness and weight management efforts. This data empowers users to make positive changes and maintain motivation.

Multi-User Capability and Customization

The Weight Watchers Scale supports up to 4 users, making it ideal for households. Each user can create a personalized profile, ensuring accurate and private tracking of their metrics. Customization options allow users to set specific goals and preferences, tailoring the experience to individual needs. Switching between users is seamless, with the scale automatically recognizing and assigning data to the correct profile. This feature promotes accountability and motivation among all users. The multi-user capability is designed to be intuitive, with clear instructions for setup and use. While the process is straightforward, reading the manual beforehand ensures a smooth customization experience for all users. This makes the scale a versatile tool for shared wellness journeys.

Using the Weight Watchers Scale

Step on the scale, remain still, and wait for your weight and body composition measurements. The scale syncs with the app, tracking progress and providing insights.

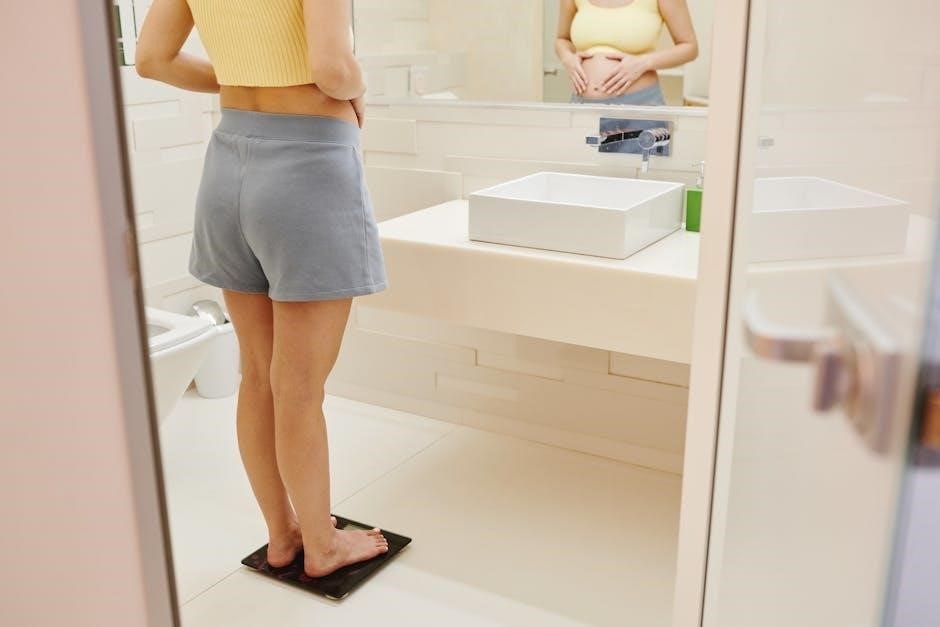
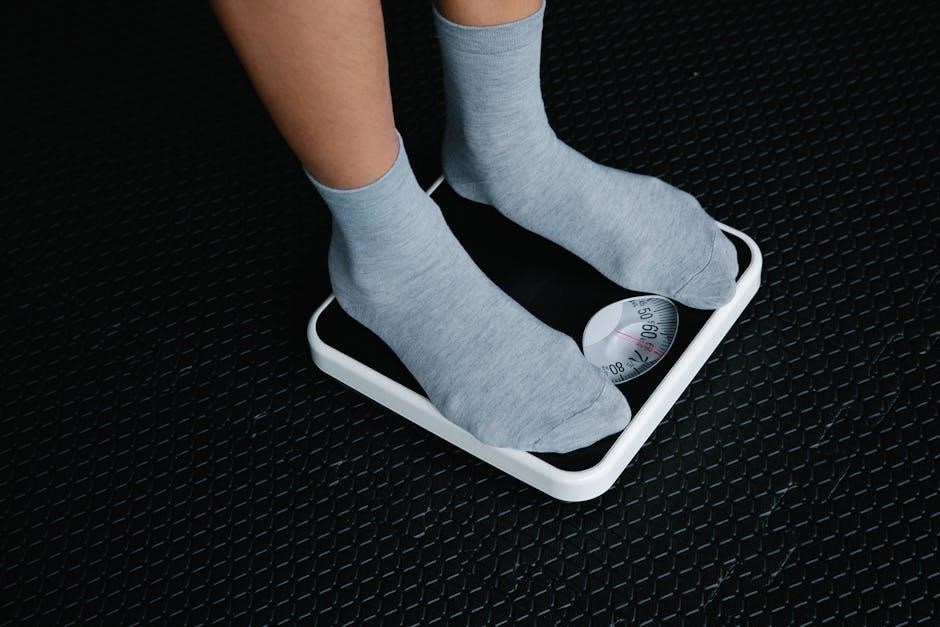
Step-by-Step Guide to Measuring Weight and Body Composition

To measure weight and body composition, ensure the scale is placed on a flat, stable surface. Step barefoot onto the scale, stand still, and wait for the measurement process to complete. The scale will display your weight first, followed by body fat, water percentage, bone mass, and muscle mass. Once the measurements are complete, step off the scale and review the data. For app syncing, ensure your device is nearby and connected via Bluetooth. The app will automatically record your results, providing a comprehensive overview of your progress. Regular use helps track changes in your body composition, supporting your weight management goals effectively.

Interpreting the Results: BMI, Body Fat, and Hydration Levels

Understanding your results is key to tracking progress. BMI (Body Mass Index) is calculated automatically, categorizing your weight status. Body fat percentage measures the proportion of fat relative to your total weight, while hydration levels indicate body water percentage. These metrics, along with bone mass and muscle mass, provide a holistic view of your body composition. The scale assigns BMI levels (L1-L5) to help gauge health. Regular monitoring allows you to identify trends and adjust your goals. Use the app to log and analyze changes over time, ensuring a comprehensive approach to your health and wellness journey with the Weight Watchers Scale.

Maintenance and Troubleshooting

Regularly replace batteries when “Lo” appears. Remove batteries during extended storage to prevent corrosion. Reset the scale by turning it off and on. For issues, recalibrate or restart the device. Ensure the scale is on a flat, stable surface for accurate readings. Consult the manual or support for persistent problems. Proper care extends the scale’s lifespan and ensures reliable performance.

Battery Care and Replacement

Proper battery care ensures optimal performance of your Weight Watchers Scale. The scale operates on replaceable batteries, which should be replaced when the “Lo” indicator appears on the display. Use high-quality alkaline batteries to maintain accuracy and avoid corrosion. Avoid mixing old and new batteries or using rechargeable ones, as this can affect performance. To replace batteries, remove the compartment cover on the underside of the scale, insert the new batteries following the polarity markings, and securely close the compartment. Store unused batteries in a cool, dry place. Remove batteries if the scale will not be used for an extended period to prevent leakage and damage. Regular battery maintenance ensures reliable weight and body composition measurements.

Common Issues and Solutions

Like any electronic device, the Weight Watchers Scale may encounter occasional issues. If the scale displays an error or does not turn on, check the battery level. Replace batteries if the “Lo” indicator appears. For inaccurate readings, ensure the scale is calibrated correctly and placed on a flat, stable surface. If the scale times out during setup, restart the process. Connectivity issues with the app can be resolved by resetting the scale and ensuring your device’s Bluetooth is enabled. For body composition inaccuracies, ensure proper barefoot contact and consistent measurement times. Refer to the user manual or contact customer support for persistent problems. Regular maintenance and troubleshooting ensure accurate and reliable performance.

The Weight Watchers Scale is a valuable tool for weight management, offering precise measurements and insights. By combining BIA technology with user-friendly features, it supports long-term wellness goals effectively.

Maximizing the Benefits of the Weight Watchers Scale

For optimal results, ensure the scale is placed on a flat, hard surface and calibrate it regularly. Consistency in weighing, such as at the same time daily, provides accurate trends. Utilize the app to track progress and set realistic goals. Regularly check and replace batteries to maintain functionality. Cleaning the scale with a soft cloth prevents dust buildup. By following these steps, users can maximize the scale’s benefits, ensuring accurate measurements and a better understanding of their body composition changes over time. This helps in making informed decisions to achieve and maintain a healthy lifestyle effectively.

Manuals

rpnb gun safe manual

Welcome to the RPNB Gun Safe Manual, your guide to understanding and operating your gun safe effectively. This manual covers models like RP19001F, RP2007, and RP311F, providing essential instructions for setup, usage, and maintenance. By following this manual, you’ll ensure your firearms are stored securely and safely. Start with the default code 1-2-3-4 for initial access. Always prioritize safety and proper usage to maximize security and functionality.

1.1 Overview of the RPNB Gun Safe Models

The RPNB Gun Safe series includes models like RP19001F, RP2007, RP311F, and RP5FR, each designed for secure firearm storage. These models feature advanced locking systems, including biometric and digital options, ensuring convenience and security. They cater to different needs, from compact pistol safes to larger gun cabinets, offering reliable protection for your firearms;

1.2 Importance of Reading the Manual

Reading the RPNB Gun Safe Manual is crucial for proper setup, operation, and maintenance. It provides essential guidance on safety precautions, programming fingerprints, and setting codes. Understanding the manual ensures secure storage of firearms and prevents potential risks. Follow the instructions carefully to maximize security and functionality of your RPNB Gun Safe.

Key Features of the RPNB Gun Safe

The RPNB Gun Safe features a biometric fingerprint lock, electronic digital keypad, and auto-open lid for enhanced security and convenience. Designed for quick access and secure storage of firearms.

2.1 Biometric Fingerprint Lock System

The RPNB Gun Safe features an advanced biometric fingerprint lock, enabling quick and secure access. The system allows multiple fingerprint registrations and ensures only authorized users can open the safe. Before programming, any fingerprint can access the safe, but programming is necessary for enhanced security. The biometric scanner provides rapid recognition, making it ideal for emergency situations while maintaining high-level security for your firearms.

2.2 Electronic Digital Lock with Keypad

The RPNB Gun Safe includes a reliable electronic digital lock with a keypad for secure access. Enter the default code 1-2-3-4 to open the safe. After accessing, press and hold the PROGRAM button to customize your code. The keypad offers rapid entry, and the system ensures secure locking. Backup keys are provided for emergency access, maintaining convenience while prioritizing safety and security.

2.3 Auto-Open Lid Functionality

The RPNB Gun Safe features an auto-open lid mechanism for seamless access. Once the correct code is entered or fingerprint verified, the lid opens automatically, enhancing convenience. This feature ensures quick retrieval of firearms while maintaining security. The safe also includes an auto-lock function, securing the lid when closed. This combination of ease and security makes the RPNB Gun Safe a practical choice for firearm storage.

Installation and Mounting

The RPNB Gun Safe includes pre-drilled holes and mounting screws for secure installation. Follow the provided fitment guide to ensure proper placement and stability. This ensures your safe is anchored correctly, enhancing security and preventing unauthorized movement.

3.1 Pre-Drilled Holes for Secure Mounting

Your RPNB Gun Safe comes with pre-drilled holes on the bottom for easy and secure mounting. These holes are strategically positioned to ensure stability and prevent tipping. Use the included screws to anchor the safe to a sturdy surface, such as a floor or shelf, enhancing the overall security of your firearms and valuables.

3.2 Included Mounting Screws and Hardware

The RPNB Gun Safe includes high-quality mounting screws and hardware for secure installation. These screws are specifically designed to fit the pre-drilled holes, ensuring a stable and reliable setup. Use the provided hardware to avoid damaging the safe or compromising its security features. Proper installation with the included screws guarantees optimal safety and prevents potential risks associated with improper mounting.

Safety Precautions

Always read the manual before use. Never store loaded firearms. Use new AA alkaline batteries and avoid mixing old ones. Ensure proper mounting to prevent damage or injury. The user assumes all responsibility for safe usage and suitability of the RPNB Gun Safe.

4.1 Do’s and Don’ts for Safe Usage

Always store unloaded firearms and keep the safe out of children’s reach. Use only new AA alkaline batteries and avoid mixing old and new ones. Mount the safe securely to prevent tipping. Regularly check battery levels and replace them as needed. Never store loaded guns or hazardous materials inside. Follow all manual instructions for safe operation. Ensure proper lid closure for auto-lock functionality. Maintain a clean and dry environment for optimal performance. Avoid using incorrect power sources or tampering with the locking mechanism. Always ensure the safe is properly secured to a flat surface using the pre-drilled holes and included hardware. Never exceed the recommended weight capacity. Keep backup keys in a safe and accessible location. Avoid using the safe in extreme temperatures or humid environments. Regularly inspect the safe for damage or wear. Follow all local laws and regulations regarding firearm storage. Never share access codes or fingerprints with unauthorized individuals. Ensure all users understand and follow safety guidelines. Always test the locking mechanism after programming or resetting the safe. Keep the safe away from direct sunlight and moisture. Never use force to open the safe if it malfunctions. Contact customer support immediately if you encounter any issues. Always refer to the manual for troubleshooting steps before attempting repairs. Never store flammable or explosive materials inside the safe. Ensure the safe is placed on a stable and level surface. Avoid overloading the safe with more firearms or items than recommended. Always lock the safe when not in use. Never leave the safe open or unattended. Ensure all firearms are stored securely and in accordance with the manufacturer’s guidelines. Always verify the safe’s locking mechanism is engaged before walking away. Never store valuable items that are not firearms in the safe. Keep the safe’s exterior clean and free from obstructions. Avoid using harsh chemicals or abrasive cleaners on the safe. Always follow the manufacturer’s instructions for maintenance and upkeep. Never modify the safe’s components or alter its structure. Ensure all users are familiar with the safe’s features and operation. Always prioritize firearm safety and responsible storage practices. Never ignore safety precautions or warnings provided in the manual. Ensure the safe is installed in a location that is not easily accessible to unauthorized individuals. Always check for updates or recalls on your safe model. Never store the safe in a location prone to flooding or water damage. Ensure proper ventilation around the safe to prevent moisture buildup. Always follow local and national regulations regarding firearm storage and safety. Never store firearms with ammunition in the same compartment. Keep the safe’s keys and access codes in a secure location. Avoid using the safe as a substitute for professional firearm storage solutions. Always ensure the safe is properly grounded and installed according to the manual’s instructions. Never use the safe near open flames or sparks. Ensure the safe is placed in a location that is difficult for burglars to access. Always test the safe’s locking mechanism after installation or relocation. Never store items that could cause damage to the firearms or the safe. Keep the safe’s interior clean and free from dust or debris; Always follow the manufacturer’s recommendations for organizing and storing firearms. Never exceed the safe’s capacity or weight limit. Ensure the safe is properly maintained to ensure long-term reliability and security. Always refer to the manual for specific instructions on programming or resetting the safe. Never attempt to bypass the safe’s locking mechanism or security features. Ensure all users understand the importance of firearm safety and responsible storage. Always store the safe in a location that is cool, dry, and protected from the elements. Never use the safe in a way that contradicts the manufacturer’s guidelines or safety precautions. Ensure the safe is regularly inspected for any signs of wear or damage. Always prioritize the safety and security of your firearms and the safe. Never store the safe in a location that is easily visible or accessible to potential intruders. Ensure the safe is installed in a way that prevents unauthorized access or removal. Always follow the manual’s instructions for programming fingerprints or access codes. Never share your access codes or fingerprints with anyone you do not trust. Ensure the safe is placed in a location that is secure and out of reach of children and unauthorized individuals. Always maintain the safe’s condition to ensure optimal performance and security. Never ignore any warnings or alerts provided by the safe’s electronic system. Ensure the safe is used solely for its intended purpose of storing firearms and related accessories. Always refer to the manual for guidance on resolving any issues or malfunctions. Never attempt to repair the safe yourself unless instructed by the manufacturer. Ensure the safe is installed and maintained according to the manufacturer’s specifications. Always prioritize firearm safety and responsible storage to protect yourself and others. Never store the safe in a location that is prone to vibrations or movement. Ensure the safe is placed on a sturdy surface that can support its weight. Always follow the manual’s instructions for programming or resetting the safe’s electronic features. Never use the safe in a way that could compromise its security or integrity. Ensure the safe is regularly updated with the latest firmware or software if applicable. Always refer to the manual for specific instructions on maintaining and troubleshooting the safe. Never store the safe in a location that is exposed to direct sunlight or extreme temperatures. Ensure the safe is placed in a location that is well-ventilated and protected from moisture. Always follow the manufacturer’s recommendations for cleaning and maintaining the safe’s exterior and interior. Never use abrasive cleaners or harsh chemicals that could damage the safe’s finish or components. Ensure the safe is installed and maintained according to the manual’s instructions to ensure optimal performance and security. Always prioritize the safety and security of your firearms and the safe. Never store the safe in a location that is easily accessible to unauthorized individuals. Ensure the safe is placed in a location that is difficult for burglars or intruders to access. Always refer to the manual for specific instructions on programming or resetting the safe’s features. Never attempt to bypass the safe’s security mechanisms or locking system. Ensure the safe is used solely for its intended purpose of storing firearms and related accessories. Always maintain the safe’s condition to ensure optimal performance and security. Never ignore any warnings or alerts provided by the safe’s electronic system. Ensure the safe is installed and maintained according to the manufacturer’s specifications. Always prioritize firearm safety and responsible storage to protect yourself and others. Never store the safe in a location that is prone to vibrations or movement. Ensure the safe is placed on a sturdy surface that can support its weight. Always follow the manual’s instructions for programming or resetting the safe’s electronic features. Never use the safe in a way that could compromise its security or integrity. Ensure the safe is regularly updated with the latest firmware or software if applicable. Always refer to the manual for specific instructions on maintaining and troubleshooting the safe. Never store the safe in a location that is exposed to direct sunlight or extreme temperatures. Ensure the safe is placed in a location that is well-ventilated and protected from moisture. Always follow the manufacturer’s recommendations for cleaning and maintaining the safe’s exterior and interior. Never use abrasive cleaners or harsh chemicals that could damage the safe’s finish or components. Ensure the safe is installed and maintained according to the manual’s instructions to ensure optimal performance and security. Always prioritize the safety and security of your firearms and the safe. Never store the safe in a location that is easily accessible to unauthorized individuals. Ensure the safe is placed in a location that is difficult for burglars or intruders to access. Always refer to the manual for specific instructions on programming or resetting the safe’s features. Never attempt to bypass the safe’s security mechanisms or locking system. Ensure the safe is used solely for its intended purpose of storing firearms and related accessories. Always maintain the safe’s condition to ensure optimal performance and security. Never ignore any warnings or alerts provided by the safe’s electronic system. Ensure the safe is installed and maintained according to the manufacturer’s specifications. Always prioritize firearm safety and responsible storage to protect yourself and others.

4.2 Battery Usage Guidelines

Use only new AA alkaline batteries for optimal performance. Avoid mixing old and new batteries to prevent malfunction; Replace batteries every 2 years or when low-battery alerts occur. Install batteries correctly to ensure proper function. Never use rechargeable or damaged batteries. Keep spare batteries handy to avoid lockouts. Follow these guidelines to maintain reliable operation and security of your RPNB gun safe.

Programming and Customization

Enter default code 1-2-3-4 to start programming. Press and hold the PROGRAM button until keys flash blue. Customize access settings and fingerprint scans for enhanced security.

5.1 Setting Up the Default Code (1-2-3-4)

To begin, enter the default code 1-2-3-4 on the keypad to open the safe. With the safe open, press and hold the PROGRAM button for 3 seconds until the keypad keys flash blue. Enter your new code, press the PROGRAM button again, and confirm by re-entering the code. The safe will beep to indicate the code has been successfully set.

5.2 Fingerprint Programming Process

Open the safe using the default code. Locate the fingerprint sensor and press your finger firmly. Wait for the beep, then lift your finger. Repeat the process to complete registration. The safe will confirm successful enrollment with a beep. You can register multiple fingerprints for convenient access. The system supports up to 30 unique fingerprints for enhanced security.

5.3 Customizing Access Settings

Access the settings menu by entering the master code. Customize features like fingerprint sensitivity, keypad timeout, and auto-lock delay. Enable two-point authentication for added security. Adjust settings to balance convenience and safety. Save changes to ensure personalized preferences are active. These customizations enhance user experience while maintaining optimal security levels for your firearms storage needs.

Operating the Safe

Open the safe using the keypad with your programmed code or fingerprint. The lid opens automatically once unlocked. Ensure the lid is fully closed for auto-lock functionality.

6.1 Opening the Safe with Keypad and Fingerprint

To open the safe, enter your programmed code using the keypad. For fingerprint access, press your enrolled finger on the scanner. The safe will unlock, and the lid will auto-open. Ensure the safe is fully closed to activate the auto-lock feature. Always verify proper closure for security.

6.2 Auto-Lock Feature When Lid is Closed

The RPNB safe features an auto-lock mechanism that activates when the lid is fully closed. This ensures your firearms remain secure even if you forget to manually lock the safe. The auto-lock function enhances security and provides peace of mind. Always verify the lid is completely closed for the feature to engage properly.

Guide

book of mormon study guides

The Book of Mormon study guides are comprehensive resources designed to enhance understanding and deepen spiritual insights. They offer structured approaches‚ including question-and-answer formats and expert commentary‚ making scripture study accessible and engaging for individuals and families. These guides provide historical context‚ doctrinal explanations‚ and practical applications‚ enriching personal and group study experiences.

Overview of the Book of Mormon

The Book of Mormon is a sacred record of ancient American peoples‚ detailing their spiritual‚ cultural‚ and historical journeys. First published in 1830 by Joseph Smith‚ it is a testament of Jesus Christ‚ complementing the Bible. The book is divided into 15 main books‚ named after their primary authors‚ such as Nephi‚ Alma‚ and Mormon. It recounts stories of faith‚ prophets‚ and divine interventions‚ offering teachings on gospel principles‚ morality‚ and the plan of salvation. Its narrative spans centuries‚ from approximately 600 BCE to 421 CE.

Purpose of Study Guides

Book of Mormon study guides are designed to assist individuals and groups in understanding the scripture’s complex themes‚ doctrines‚ and historical contexts. Their purpose is to provide structured frameworks for exploration‚ helping readers grasp key messages and apply them to daily life. These guides often include questions‚ insights‚ and commentary to deepen comprehension and foster spiritual reflection‚ making them invaluable tools for both personal and group study settings.

Benefits of Using Study Guides

Using Book of Mormon study guides offers numerous benefits‚ including deeper scriptural understanding and enhanced spiritual growth. These guides simplify complex themes‚ provide historical context‚ and offer doctrinal insights‚ making the scripture more accessible. They encourage application of teachings in daily life and facilitate meaningful discussions in group settings. By fostering engagement and reflection‚ study guides enrich personal and family study experiences‚ helping individuals gain a stronger testimony and connection to the gospel.

Structure of Book of Mormon Study Guides

Book of Mormon study guides are structured with a comprehensive question-and-answer format‚ divided into clear sections for easy navigation‚ and enriched with insights from General Authorities.

Comprehensive Question-and-Answer Format

Book of Mormon study guides often utilize a comprehensive question-and-answer format‚ offering detailed insights and clarifying complex doctrines. This method encourages deep engagement by breaking down scriptures into manageable parts. Questions address key themes‚ historical context‚ and doctrinal principles‚ while answers draw from General Authorities‚ scholarly commentaries‚ and scriptural references. This approach facilitates personal reflection‚ group discussions‚ and a richer understanding of the text. It also helps bridge gaps in comprehension‚ making study sessions more meaningful and interactive for learners of all levels.

Division into Sections for Easy Navigation

Book of Mormon study guides are thoughtfully divided into clear‚ manageable sections‚ ensuring easy navigation and organized learning. These divisions align with scripture chapters‚ doctrines‚ or historical events‚ making it simpler to focus on specific topics. Each section is designed to build upon the previous one‚ providing a logical flow that enhances understanding. This structured approach helps users track progress‚ locate content quickly‚ and engage with the material more effectively‚ whether for personal study or classroom use.

Inclusion of Insights from General Authorities

Book of Mormon study guides often incorporate insights from General Authorities‚ offering profound doctrinal understanding and spiritual guidance. These contributions provide authoritative perspectives‚ enriching personal study and fostering deeper connections to the scriptures. By including quotes and teachings from Church leaders‚ the guides help users apply timeless gospel principles to their lives. This feature not only enhances comprehension but also strengthens testimony‚ making the study guides invaluable for both individual and group scripture study experiences.

Key Sections of the Book of Mormon Study Guides

Key sections include detailed analyses of major books like 1 Nephi‚ Alma‚ and Mosiah‚ providing overviews‚ themes‚ and insights to deepen understanding of the scripture.

1 Nephi: Overview and Key Themes

1 Nephi explores the journey of Lehi’s family‚ emphasizing obedience to God’s commandments and faith amidst challenges. It includes key events like obtaining the brass plates and Nephi’s vision of the tree of life. Study guides highlight themes such as the importance of scripture‚ divine guidance‚ and the prophetic mission of Jesus Christ. These resources provide insights into Nephi’s spiritual journey and his testimony‚ helping readers connect with the text on a deeper level for personal and group study.

Alma: Detailed Analysis and Insights

Alma is a foundational book in the Book of Mormon‚ offering profound doctrinal insights and narratives. Study guides delve into Alma’s teachings on faith‚ repentance‚ and the plan of salvation‚ providing context for complex passages. They explore his missionary journeys‚ interactions with dissenters‚ and his role as a spiritual leader. These resources also highlight Alma’s personal struggles and redemption‚ offering lessons on humility and forgiveness. The guides enhance understanding of Alma’s contributions to the gospel‚ making his teachings accessible and relevant for modern readers.

Mosiah: Historical and Cultural Context

The book of Mosiah provides rich historical and cultural insights into the Nephite civilization‚ detailing the transition from a monarchy to a system of judges. Study guides explore Mosiah’s reign‚ societal changes‚ and religious practices‚ offering context for events like the abolition of kings and the rise of prophets. These resources highlight the cultural significance of Mosiah’s teachings and their impact on Nephite society‚ helping readers understand the historical backdrop and its relevance to modern spiritual growth and understanding.

Effective Study Techniques

Effective study techniques involve verse-by-verse analysis‚ multimedia integration‚ and personal reflection. These methods enhance understanding‚ foster engagement‚ and deepen spiritual connection with the Book of Mormon.

Verse-by-Verse Study Methods

Verse-by-verse study methods provide a detailed approach to understanding the Book of Mormon. By examining each verse‚ readers gain insights into doctrinal principles‚ historical context‚ and spiritual applications; This method encourages slow‚ thoughtful reflection‚ allowing individuals to uncover deeper meanings and connections. Study guides often include questions and commentary to enhance comprehension. Such systematic analysis fosters a stronger connection to the scripture‚ making it easier to apply its teachings in daily life and strengthen personal testimony.

Utilizing Multimedia Resources

Multimedia resources significantly enhance Book of Mormon study by providing engaging and interactive tools. Videos‚ audio recordings‚ and immersive platforms offer deeper insights and accessibility. Apps like ScripturePlus allow users to explore texts with multimedia enhancements‚ while platforms like Book of Mormon Central provide videos‚ images‚ and maps for context. These resources cater to diverse learning styles‚ making scripture study more dynamic and enriching for individuals and families. They also facilitate shared learning experiences‚ fostering a more immersive and meaningful engagement with the text.

Recording Personal Insights and Reflections

Recording personal insights and reflections is a powerful way to deepen spiritual growth and testimony. Study guides often encourage journaling or note-taking to capture thoughts and feelings during scripture study. This practice helps individuals track their progress‚ identify patterns‚ and personalize their learning experience. By documenting insights‚ learners can reflect on how doctrines apply to their lives‚ fostering a stronger connection to the Book of Mormon. This habit nurtures meaningful spiritual journeys and lasting personal growth;

Resources and Tools for Deeper Study

Explore recommended books‚ online platforms‚ and community tools to enhance your study experience. Multimedia resources‚ apps‚ and family-friendly activities provide enriched learning opportunities and deeper engagement.

Recommended Books and Commentaries

Enhance your study with recommended books like The Book of Mormon Study Guide: Start to Finish and The Book of Mormon Made Easier Study Guide by David J. Ridges. These resources provide in-depth insights‚ historical context‚ and doctrinal explanations. They include question-and-answer formats‚ scholarly commentary‚ and practical applications‚ making them invaluable for both personal and group study. Such books complement scripture study by offering fresh perspectives and enriching your understanding of key themes and teachings.

Online Platforms and Apps for Scripture Study

Online platforms and apps like Scripture Central and ScripturePlus offer immersive tools for studying the Book of Mormon. These resources provide video commentaries‚ interactive maps‚ and multimedia presentations to enhance comprehension. Apps like Gospel Learning and Book of Mormon Online offer accessible formats for reading‚ note-taking‚ and exploring historical context. They cater to both individual and group study‚ making scripture exploration engaging and convenient for learners of all levels‚ while fostering a deeper connection to the teachings and narratives of the Book of Mormon.

Community and Family Study Ideas

Engaging family and community study ideas enhance collective learning and spiritual growth. Group discussions‚ interactive activities‚ and shared insights foster deeper understanding. Family study guides provide structured lessons with thought-provoking questions‚ encouraging participation from all ages. Community events‚ such as scripture-themed gatherings or service projects‚ reinforce teachings. Multimedia resources like videos and KnoWhys from platforms like Book of Mormon Central add engaging elements. These collaborative approaches create meaningful experiences‚ strengthening faith and fostering unity among participants while exploring the Book of Mormon together.

Impact of Study Guides on Spiritual Growth

Study guides deepen spiritual growth by enhancing understanding of the Book of Mormon. They foster a stronger testimony of Jesus Christ and His gospel‚ guiding individuals to apply teachings in daily life and strengthen their connection with the Savior.

Enhancing Gospel Doctrine Classes

Book of Mormon study guides enrich Gospel Doctrine classes by providing deeper insights and structured discussions. They equip teachers with comprehensive materials‚ fostering engaging lessons and encouraging participation; These guides help class members connect doctrines to real-life applications‚ strengthening testimony and unity. By offering thought-provoking questions and expert commentary‚ they enhance understanding and create a collaborative learning environment‚ making scripture study more meaningful and impactful for all participants.

Personal Witness and Testimony Building

Book of Mormon study guides empower individuals to deepen their personal witness and testimony. By exploring doctrines‚ historical context‚ and spiritual insights‚ these guides help readers connect with the scriptures on a profound level. They encourage reflection and personal application‚ fostering a stronger relationship with Jesus Christ. As individuals gain deeper understanding‚ their testimony grows‚ enabling them to share the gospel with confidence and sincerity‚ enriching their spiritual journey and commitment to faith.

Community Engagement and Shared Learning

Book of Mormon study guides foster community engagement by providing structured content for group discussions and shared learning experiences. They encourage collaborative study‚ helping individuals connect with others while deepening their understanding of the scriptures. These guides often include discussion questions and activities that promote unity and mutual support. By participating in group study‚ individuals strengthen their faith collectively‚ creating a sense of belonging and shared purpose in their spiritual journey. This collaborative approach enriches learning and fosters stronger relationships within the community.

Book of Mormon study guides offer invaluable insights‚ inspiring deeper scripture exploration. Continue your journey‚ seeking spiritual growth and a stronger connection to the teachings of the Book of Mormon.

Final Thoughts on the Importance of Study Guides

Book of Mormon study guides are invaluable tools for deepening understanding and fostering spiritual growth. They provide structured insights‚ expert commentary‚ and practical applications‚ making scripture study engaging and accessible. By offering historical context‚ doctrinal clarity‚ and thought-provoking questions‚ these guides enrich both individual and group study experiences. Their comprehensive approach helps learners connect with the teachings of the Book of Mormon on a deeper level‚ fostering testimony and inspiring lifelong scripture engagement.

Encouragement to Continue Exploring the Book of Mormon

Continuing to explore the Book of Mormon through study guides offers a profound way to deepen spiritual understanding and connection with its teachings. These guides provide comprehensive insights and structured formats that make scripture study engaging and accessible for individuals and families alike. By utilizing question-and-answer sections and expert commentary‚ readers can gain a richer understanding of the doctrine and historical context. This invites a deeper personal reflection and application of the scriptures in daily life‚ fostering spiritual growth and a stronger testimony.

Instructions

instructions for the chevrolet chevelle ss 1966 amt model pdf

The 1966 Chevrolet Chevelle SS AMT model is a classic muscle car replica, offering a detailed and rewarding build experience for hobbyists of all skill levels․

Overview of the Model and Its Significance

The 1966 Chevrolet Chevelle SS AMT model is a 1/25 scale replica of the iconic muscle car, offering a detailed and authentic building experience․ With over 100 parts, it captures the essence of the original vehicle, making it a beloved choice for hobbyists․ The kit includes chrome and clear components, rubber tires, and decals, ensuring a realistic finish․ Its historical significance and customizable features make it a timeless project for modelers of all levels, blending nostalgia with precision engineering․

Importance of Following Instructions for a Successful Build

Importance of Following Instructions for a Successful Build

Following the instructions for the 1966 Chevrolet Chevelle SS AMT model is crucial for a precise and enjoyable assembly․ The detailed guide provides step-by-step directions, ensuring accuracy and minimizing errors․ Adhering to the instructions helps modelers achieve a professional finish, while deviations can lead to frustrating setbacks․ The PDF guide offers clear diagrams and exploded views, making it an indispensable resource for both beginners and experienced hobbyists․

Essential Tools and Materials Needed

A hobby knife, glue, clippers, sandpaper, and paint are essential tools for assembling the 1966 Chevrolet Chevelle SS AMT model․ Additional materials like reference guides enhance accuracy․

Basic Tools Required for Assembly

A hobby knife, glue, clippers, sandpaper, and files are essential for assembling the 1966 Chevrolet Chevelle SS AMT model․ Additional tools like paintbrushes, tweezers, and a workbench enhance precision and efficiency․ Ensure all tools are readily available to streamline the assembly process and achieve a professional finish․

Recommended Additional Materials for a Professional Finish

For a polished look, consider adding fine-grit sandpaper, acrylic paints, and a clear coat․ Detailing brushes, masking tape, and a decal setter enhance precision․ Optional upgrades like metal axles or photo-etched parts can elevate realism․ A paintbrush set and tweezers improve small detail work, ensuring a high-quality, professional finish for your 1966 Chevrolet Chevelle SS AMT model․

Understanding the Kit Contents

The AMT 1966 Chevrolet Chevelle SS kit includes detailed parts, chrome components, clear pieces, and decals․ It also provides assembly instructions for guidance․

Detailed List of Parts and Components

The kit includes over 100 detailed parts, molded in white plastic, with chrome-plated components, clear pieces for windows, and rubber tires․ A water-slide decal sheet is provided for accurate markings․ The assembly instructions, available in PDF, guide through the build process, ensuring all components are correctly placed․ The kit also includes a paint guide for a professional finish․

Overview of the Assembly Manual Structure

The assembly manual is comprehensive and well-structured, providing clear step-by-step instructions․ It includes detailed diagrams, exploded views, and reference images to guide the build process․ Organized by major sections such as chassis, engine, body, and final assembly, the manual ensures a logical workflow․ Suitable for all skill levels, it offers a user-friendly approach to constructing the 1966 Chevelle SS model accurately․

Step-by-Step Assembly Guide

A comprehensive guide with detailed instructions and diagrams, the assembly manual walks you through building the 1966 Chevelle SS, from chassis to final touches, ensuring a smooth experience․

Preparation and Initial Setup

Begin by inventorying all parts and tools, ensuring nothing is missing․ Organize components by type and stage for easy access․ Carefully review the instructions to understand the assembly sequence․ Prepare your workspace with a clean, flat surface and essential tools like clippers and sandpaper․ Apply a small amount of adhesive to secure parts during fitting․ Use spray cans in a well-ventilated area for painting․ This initial setup ensures a smooth and efficient building process․

Chassis and Engine Assembly

Start by assembling the chassis, ensuring proper alignment and secure attachment of suspension and axle components․ Install the engine, carefully fitting it into the chassis․ Attach the exhaust system and drivetrain parts, following the manual’s step-by-step guide․ Use adhesive to secure parts permanently․ Paint components before assembly for a professional finish․ Allow glue and paint to dry completely between steps to avoid misalignment or peeling․

Body and Interior Assembly

Attach the body panels to the chassis, ensuring proper alignment and smooth joints․ Use sandpaper to eliminate any rough edges․ Install the interior components, such as seats, dashboard, and steering wheel, following the manual’s guidance․ Paint and assemble the interior separately before fitting it into the body․ Apply decals carefully for an authentic look․ Secure parts with adhesive, allowing proper drying time to maintain precision and durability․

Final Assembly and Quality Check

After painting and detailing, carefully align all major components, ensuring a precise fit․ Secure parts with adhesive, double-checking alignment and accuracy․ Inspect the model for any imperfections or gaps․ Verify that all decals are properly applied and chrome parts are securely attached․ Conduct a thorough visual inspection to ensure a polished and professional finish, reflecting the iconic 1966 Chevelle SS design․

Tips and Tricks for a Professional Finish

Use precision tools, follow the guide for accurate alignment, thin paint for smooth coats, apply decals with a setting solution, and avoid common mistakes for a professional finish․

Painting and Detailing Techniques

For a professional finish, prime surfaces thoroughly and apply thin coats of paint․ Use masking for sharp lines and avoid heavy layers․ Sand lightly between coats for smoothness․ Weathering techniques like washes or edge highlights add realism․ Apply decals with setting solutions for proper adhesion․ Reference the PDF guide for accurate color schemes and detailing tips specific to the 1966 Chevelle SS model․

Common Mistakes to Avoid

Avoid rushing through assembly steps, as this can lead to misaligned parts․ Ensure proper alignment of chassis and body components․ Insufficient sanding or priming can result in a rough finish․ Always follow the PDF guide for accurate detailing and paint application․ Ignoring instructions may cause structural issues․ Double-check part numbers before gluing to prevent errors․

Paint Guide and Decal Application

Follow the PDF guide for recommended paint schemes and colors․ Use a spray gun for even coats and allow proper drying time․ Apply decals using water-slide techniques for a professional finish․

Recommended Paint Schemes and Colors

The 1966 Chevrolet Chevelle SS AMT model offers historically accurate paint schemes, including classic factory colors like Butternut Yellow, Azure Turquoise, and Ermine White․ These colors were popular for the original vehicle and are detailed in the PDF guide․ Optional metallic and custom finishes are also available for those seeking a unique look, ensuring your model stands out with authentic or personalized styling․

Proper Techniques for Applying Decals

For a professional finish, apply decals using water-slide techniques․ Soak decals in warm water, then slide onto the model, smoothing with a soft brush to avoid air bubbles․ Use a decal setting solution for adherence and seal with a clear coat․ Follow the PDF guide for accurate placement and alignment to achieve a realistic look on your 1966 Chevelle SS model․

Modifications and Customizations

Enhance your 1966 Chevelle SS model with optional upgrades like engine swaps, custom interiors, or unique paint schemes for a personalized touch and improved realism․

Optional Upgrades for Enhanced Realism

Optional upgrades for the 1966 Chevelle SS AMT model include engine swaps, custom paint jobs, and interior modifications․ Adding detailed wiring, exhaust systems, and realistic decals can enhance authenticity․ These upgrades allow builders to personalize their models while maintaining historical accuracy, making the final piece more visually striking and true to the original vehicle’s spirit․

Custom Paint Jobs and Unique Modifications

Custom paint jobs and unique modifications allow builders to personalize their 1966 Chevelle SS AMT models; Using high-quality paints and creative designs, enthusiasts can replicate rare color schemes or create one-of-a-kind finishes․ Additional modifications, such as upgraded wheels or interior details, enhance the model’s realism and appeal, making each build truly distinctive and reflective of the builder’s personal style․

Troubleshooting Common Issues

Common issues during assembly include paint spills and part misalignment; Refer to the PDF instructions for solutions, and use proper tools to fix errors effectively․

Identifying and Solving Assembly Problems

Common assembly issues include misaligned parts, paint spills, or incorrect decal placement․ Refer to the PDF instructions for troubleshooting guides․ Use sandpaper for minor fixes and touch-up paint for corrections․ Ensure proper tool usage to avoid damaging components․ Double-check part numbers before assembly to prevent mismatches․ Patience and careful following of the manual will help resolve most issues effectively․

Fixing Paint and Decal Errors

For paint errors, use touch-up paint to correct small mistakes․ If paint smudging occurs, gently sand the area and repaint․ Decal errors, such as air bubbles or misalignment, can be fixed using a decal setting solution or water․ Apply a clear coat to seal decals and prevent peeling․ For major paint issues, disassemble the affected part and repaint following the instructions provided in the PDF guide․

Historical Accuracy and Legacy

The 1966 Chevrolet Chevelle SS captures the essence of a bygone era, embodying the spirit of American muscle cars․ Its legacy endures as a cultural icon, cherished by automotive enthusiasts and modelers alike․ The AMT model kit preserves this heritage, allowing builders to recreate a piece of automotive history with precision and authenticity․

Importance of Historical Accuracy in Model Building

Historical accuracy ensures the model faithfully represents the 1966 Chevrolet Chevelle SS’s authentic design and features․ Attention to detail mirrors the original car’s specifications, preserving its legacy․ This dedication to realism allows modelers to connect with the era’s automotive history, fostering appreciation for the Chevelle SS’s cultural and historical significance․ Accuracy enhances the model’s educational and nostalgic value, making it a timeless tribute to American muscle cars․

The Legacy of the 1966 Chevrolet Chevelle SS

The 1966 Chevrolet Chevelle SS is an iconic symbol of American muscle cars, embodying power and style․ Its bold design, robust engine options, and timeless appeal have cemented its legacy in automotive history․ As a favorite among collectors and enthusiasts, the Chevelle SS continues to inspire nostalgia and admiration, making it a cherished classic for generations of car lovers and modelers alike․

Additional Resources and Support

For comprehensive guidance, refer to the official AMT instructions PDF and explore online forums like Team Chevelle for expert tips and community support from seasoned modelers and enthusiasts․

Recommended Books, Videos, and Online Forums

For detailed guidance, the 1964-1966 Chevelle Factory Assembly Manual CD-ROM offers accurate PDF reproductions․ Online forums like Team Chevelle and AutoWorld provide valuable insights and community support․ Additionally, Round2 (AMT’s current owner) and Model Car Forums are excellent resources for modelers seeking tips, videos, and expert advice on building the 1966 Chevelle SS AMT model․

Manufacturer Support and Community Help

The manufacturer, Round2, offers official support for the AMT model, including downloadable PDF instructions and customer service․ The 1964-1966 Chevelle Factory Assembly Manual CD-ROM provides detailed assembly guides․ Additionally, online communities like Team Chevelle and dedicated model forums offer extensive support, tips, and resources for modelers seeking assistance or sharing their builds․

Building the 1966 Chevrolet Chevelle SS AMT model is a rewarding experience, combining historical accuracy with creative expression․ Completing this project brings a sense of accomplishment and pride in crafting a detailed replica of a classic muscle car․

Final Thoughts on Building the 1966 Chevrolet Chevelle SS AMT Model

Completing the 1966 Chevrolet Chevelle SS AMT model is a deeply satisfying experience, offering a blend of nostalgia and craftsmanship․ Whether you’re a seasoned modeler or a beginner, this kit provides a challenging yet rewarding project that enhances your skills․ The attention to detail and historical accuracy make it a standout piece for any collection, celebrating the legacy of a classic muscle car․

Encouragement for Modelers to Share Their Creations

Sharing your finished 1966 Chevrolet Chevelle SS AMT model with online communities and forums is a great way to inspire others and gain feedback․ Showcase your hard work on social media or modeling platforms to connect with fellow enthusiasts․ Whether you’re a novice or an expert, your creation can spark creativity and passion in others, fostering a sense of camaraderie within the modeling community․

PDF

gravity and orbits phet worksheet answer key pdf

The PhET Gravity and Orbits simulation offers an interactive way to explore gravitational forces and orbital motion․ Students can adjust parameters like mass, distance, and velocity to visualize how these factors influence planetary and celestial movements․ This tool aligns with concepts such as Kepler’s laws, providing a hands-on approach to understanding complex astronomical phenomena․ By manipulating variables, users gain insights into the fundamental principles governing gravity and orbital dynamics, making it an invaluable resource for both education and research․

1․1 Overview of the PhET Simulation

The PhET Gravity and Orbits simulation is an interactive educational tool designed to explore gravitational forces and orbital mechanics․ It allows users to adjust parameters such as mass, distance, and velocity to observe their effects on orbital paths and gravitational interactions․ The simulation provides visual representations of forces and trajectories, enabling students to investigate concepts like Kepler’s laws and orbital motion․ Its user-friendly interface makes it accessible for learners to experiment and understand complex astronomical phenomena in a hands-on manner․ This tool is widely used in educational settings to enhance engagement and understanding of gravity and orbital dynamics․

1․2 Importance of Studying Gravity and Orbits

Studying gravity and orbits is essential for understanding the fundamental forces shaping our universe․ Gravity governs planetary motion, celestial mechanics, and the behavior of galaxies․ It explains phenomena like tides, orbital paths, and the stability of planetary systems․ This knowledge is crucial for advancing space exploration, satellite technology, and astronomical research․ Additionally, it fosters critical thinking and problem-solving skills, preparing students for careers in STEM fields․ By exploring these concepts, learners gain a deeper appreciation for the intricacies of the cosmos and the laws that govern it․

Fundamental Concepts of Gravity and Orbital Motion

Gravity is a universal force acting between masses, while orbital motion describes how objects move under gravitational influence․ These fundamental concepts explain planetary orbits and celestial mechanics․

2․1 What is Gravity? Definition and Basic Principles

Gravity is a natural force attracting objects with mass․ Defined by Newton’s law, it’s proportional to the product of masses and inversely related to the square of their distance․ Einstein’s relativity describes gravity as spacetime curvature caused by mass and energy․ Gravity is universal, acting between all objects, from planets to stars․ Its strength depends on mass and distance, shaping orbital motion and cosmic structures․ Understanding gravity is crucial for explaining phenomena like falling objects, planetary orbits, and galaxy formation, making it a cornerstone of physics and astronomy, as explored in the PhET simulation․

2․2 Understanding Orbital Motion: Key Concepts

Orbital motion describes how objects move around a central body due to gravitational forces․ Kepler’s laws outline orbital shapes, sizes, and speeds․ Velocity determines orbit stability; too low, objects fall; too high, they escape․ Gravitational force provides the necessary centripetal force for circular or elliptical paths․ The PhET simulation allows exploration of these principles, showing how mass, distance, and velocity interact․ By adjusting parameters, students visualize how orbital motion works, gaining insights into planetary movements and gravitational influences․ This interactive approach simplifies complex concepts, making orbital dynamics accessible and engaging for learners of all levels․

Exploring the Relationship Between Gravity, Mass, and Distance

This section examines how gravitational force varies with mass and distance, as described by Newton’s Law of Universal Gravitation․ The PhET simulation demonstrates these relationships interactively and clearly․

3․1 Newton’s Law of Universal Gravitation

Newton’s Law of Universal Gravitation states that every particle attracts every other particle with a force proportional to the product of their masses and inversely proportional to the square of the distance between their centers․ This fundamental principle, expressed as ( F = G rac{m_1 m_2}{r^2} ), where ( G ) is the gravitational constant, explains how gravity acts between celestial bodies․ The PhET simulation allows users to visualize and experiment with this law by adjusting masses and distances to observe changes in gravitational force, providing a hands-on understanding of its universal application in orbital mechanics and planetary motion․

3․2 How Mass and Distance Affect Gravitational Force

Gravitational force is directly proportional to the product of the masses of two objects and inversely proportional to the square of the distance between them․ Increasing the mass of either object amplifies the force, while doubling the distance reduces it to one-fourth of its original strength․ The PhET simulation demonstrates this relationship by allowing users to adjust the masses and distances of celestial bodies, such as planets or moons, and observe the resulting changes in gravitational force․ This interactive approach helps visualize how these factors influence orbital stability and motion in our universe․

Kepler’s Laws of Planetary Motion

Kepler’s Laws describe the motion of planets around the Sun; The first law states orbits are elliptical, the second explains varying orbital speeds, and the third relates orbit size to period;

4․1 Kepler’s First Law: The Elliptical Shape of Orbits

Kepler’s First Law states that planets orbit the Sun in elliptical paths, with the Sun located at one of the two foci․ This law challenges the earlier belief that orbits were perfect circles․ The PhET simulation allows students to visualize this by adjusting the mass of the central body and observing how the orbiting object’s path changes shape․ By experimenting with different parameters, users can see how elliptical orbits form and understand the Sun’s influence on planetary motion․ This interactive approach helps reinforce the concept of elliptical orbits and their significance in astronomy․

4․2 Kepler’s Second Law: The Speed of Planets in Orbit

Kepler’s Second Law explains that planets move faster when closer to the Sun and slower when farther away, sweeping equal areas in equal times․ This law highlights the variation in orbital speeds due to gravitational influence․ The PhET simulation illustrates this by allowing users to adjust parameters and observe how the orbiting object’s velocity changes with distance․ As the object moves nearer to the central mass, its speed increases, and vice versa․ This visualization aids in understanding the dynamic relationship between distance and velocity in orbital mechanics, aligning with Kepler’s observations on planetary motion․

4․3 Kepler’s Third Law: The Relationship Between Orbit Size and Orbital Period

Kepler’s Third Law establishes a relationship between a planet’s orbital size and its period, stating that the square of the orbital period is proportional to the cube of the semi-major axis of its orbit․ This law applies universally to planets in the solar system and beyond․ The PhET simulation allows users to explore this relationship by adjusting the orbit size and observing how the period changes․ Larger orbits result in longer periods, demonstrating the mathematical harmony in planetary motion․ This law provides a foundational principle for understanding orbital dynamics and gravitational interactions in our cosmos․

Visualizing Orbits with the PhET Simulation

The PhET simulation enables interactive exploration of orbital mechanics, allowing users to adjust mass, distance, and velocity․ This tool visualizes how these variables affect orbit shapes and speeds, providing a dynamic learning experience․

5․1 Adjusting Parameters: Mass, Distance, and Velocity

In the PhET simulation, users can manipulate three key parameters: mass, distance, and velocity, to observe their effects on orbital motion․ Adjusting the mass of objects alters the gravitational force between them, influencing the orbit’s stability and shape․ Changing the distance between objects modifies the gravitational pull and orbital period․ Velocity adjustments affect the object’s path, potentially transitioning from circular to elliptical orbits or even causing escape from the gravitational field․ These interactive adjustments provide a clear visualization of how these variables interplay in determining orbital dynamics and gravitational interactions․

5․2 Observing the Effects of Different Orbital Scenarios

The PhET simulation allows users to observe how varying mass, distance, and velocity parameters affect orbital motion․ By experimenting with these variables, students can visualize changes in gravitational forces and orbital paths․ For instance, increasing the mass of objects strengthens gravitational attraction, while altering distance modifies the orbital period․ Adjusting velocity can transition orbits from circular to elliptical or even result in objects escaping gravitational pull․ These observations align with Kepler’s laws, offering insights into how celestial bodies behave under different conditions, making complex orbital dynamics more accessible and understandable through interactive exploration․

Answer Key for the Gravity and Orbits Worksheet

This section provides clear answers to questions about gravitational force direction, orbital velocity, and how parameters like mass and distance affect orbital motion, aiding student understanding․

6․1 Questions and Answers on Gravitational Force Direction

The gravitational force exerted on an orbiting object is always directed toward the central body (e․g․, Earth for a satellite)․ For example, a satellite experiences gravitational force pulling it toward Earth’s center․ Similarly, planets orbiting the Sun have gravitational forces directed toward the Sun․ The PhET simulation visualizes this with vectors, showing the force direction․ Understanding this helps clarify why orbital motion follows elliptical or circular paths, as objects constantly fall toward the central mass while moving forward․ This concept aligns with Newton’s law of gravitation and is crucial for explaining planetary and celestial mechanics․

6․2 Questions and Answers on Orbital Path and Velocity

The orbital path of an object is determined by its velocity and the gravitational force acting on it․ In circular orbits, velocity remains constant, while in elliptical orbits, velocity varies․ According to Kepler’s first law, orbits are elliptical with the central body at one focus․ The PhET simulation shows how changing velocity affects the path, transitioning from circular to elliptical orbits․ Higher velocities at perihelion (closest point) and lower at aphelion (farthest point) demonstrate this variation․ This aligns with Kepler’s third law, where orbital period depends on size and velocity, providing insights into gravitational influences on celestial motion․

The PhET Gravity and Orbits simulation provides a comprehensive and interactive approach to understanding gravitational forces and orbital dynamics․ By exploring how mass, distance, and velocity influence motion, students gain practical insights into fundamental astronomical principles․ The simulation aligns with Kepler’s laws, offering visual and dynamic representations of elliptical orbits and velocity variations․ This tool not only enhances learning but also encourages critical thinking about celestial mechanics․ Its accessibility and versatility make it an invaluable resource for educators and learners seeking to deepen their understanding of gravity and orbital systems․

Manuals

spaceman 10k pro manual

Welcome to the Spaceman 10K Pro Manual, your comprehensive guide to understanding and optimizing your vaping experience with this cutting-edge device․ Designed to enhance user satisfaction, this manual provides detailed insights into the product’s features, setup, and maintenance, ensuring a seamless and enjoyable journey with the Spaceman 10K Pro․

1․1 Understanding the Purpose of the Manual

This manual serves as your ultimate guide to the Spaceman 10K Pro, helping you explore its features, troubleshoot issues, and maximize performance․ Designed to be user-friendly, it covers everything from setup to maintenance, ensuring a smooth vaping experience․ Whether you’re a novice or an experienced user, this manual provides essential insights to help you make the most of your device safely and effectively․

1․2 Key Features and Benefits of the Spaceman 10K Pro

The Spaceman 10K Pro offers a sleek, user-friendly design with a pre-filled e-liquid system, ensuring a hassle-free vaping experience․ Its advanced features include a long-lasting battery life and a generous e-liquid capacity, providing extended usage․ The device is also backed by industry leader SMOK, guaranteeing quality and reliability․ These features make it a standout choice for both beginners and experienced vapers seeking convenience and performance․

Product Overview

The Spaceman 10K Pro is a cutting-edge disposable vape kit designed for simplicity and performance․ It features a sleek design, pre-filled e-liquid, and intuitive controls, offering a seamless vaping experience․

2․1 Design and Build Quality

The Spaceman 10K Pro boasts a sleek and ergonomic design, crafted with high-quality materials for durability․ Its lightweight construction ensures portability, while the smooth finish provides a comfortable grip․ The device’s compact size and modern aesthetics make it a stylish choice for vapers․ Attention to detail in its build ensures a premium feel, enhancing the overall user experience significantly․

2․2 Specifications and Technical Details

The Spaceman 10K Pro features a powerful 1000mAh battery, offering extended vaping sessions․ It supports a resistance range of 1․0-3․0Ω, ensuring optimal performance․ With a 10ml e-liquid capacity, it provides ample usage before refills․ The device includes advanced safety features like overcharge protection and temperature control, making it both reliable and secure for users․

Setup and Initialization

The setup and initialization of the Spaceman 10K Pro are designed to be straightforward, ensuring a seamless experience․ Follow the manual’s guidance to prepare your device efficiently․

3․1 Unboxing and First Impressions

Upon unboxing the Spaceman 10K Pro, users are greeted with a sleek, user-friendly device that promises a hassle-free vaping journey․ The kit includes the device itself, pre-filled with a generous amount of e-liquid, and a user manual to guide you through the setup process․ Initial impressions highlight its modern design and ease of use․

3․2 Step-by-Step Setup Guide

Begin by unboxing the Spaceman 10K Pro and ensuring all components are included․ Charge the device using the provided USB Type-C cable until the battery indicator shows a full charge․ Carefully read the manual to understand the device’s features․ Allow the e-liquid to prime by letting the device stand upright for a few minutes․ Finally, inhale gently to activate and enjoy a smooth vaping experience․

Using the Spaceman 10K Pro

Welcome to the Spaceman 10K Pro user guide․ This section will walk you through the essentials of operating your device, ensuring a seamless and enjoyable vaping experience․

4․1 Navigation and Controls

Navigating the Spaceman 10K Pro is intuitive, with a simple interface designed for ease of use․ The device features a responsive button for power control and a LED indicator for battery status․ Users can activate the device with a draw or press the button, depending on the model․ The controls are minimalistic, ensuring a seamless vaping experience for both beginners and advanced users․

4․2 Customization Options

The Spaceman 10K Pro offers versatile customization options to tailor your vaping experience․ Adjust the airflow to suit your preference, and explore a variety of e-liquid flavors․ While the device is designed for simplicity, it allows users to personalize their settings and flavor profiles, ensuring a tailored experience that meets individual preferences without compromising on ease of use or performance․

Maintenance and Care

Regularly clean the Spaceman 10K Pro to ensure optimal performance․ Wipe the mouthpiece and connections with a soft cloth․ Store the device in a cool, dry place to maintain its integrity and extend its lifespan․

5․1 Cleaning and Upkeep

To maintain the Spaceman 10K Pro’s performance, regularly clean the device․ Turn it off before cleaning and use a soft cloth to wipe the mouthpiece and connections․ Avoid harsh chemicals or water, as they may damage the components․ Gently remove any residue or debris to ensure proper airflow and flavor quality․ Store the device in a cool, dry place to preserve its functionality and appearance․

5․2 Troubleshooting Common Issues

If the Spaceman 10K Pro isn’t functioning properly, check for common issues like clogged airflow or depleted e-liquid․ Gently clean the mouthpiece and connections with a soft cloth․ If the battery isn’t charging, ensure the USB port is free of debris․ For inconsistent vapor production, inspect for blockages in the airflow system․ Refer to the troubleshooting section in the manual for detailed solutions to optimize performance and resolve issues effectively․

Advanced Features

The Spaceman 10K Pro offers customizable settings and superior vapor production, making it a standout choice for those seeking enhanced vaping experiences with advanced functionality and precision․

6․1 Exploring Special Functions

The Spaceman 10K Pro boasts innovative features like adjustable airflow, customizable vapor settings, and a long-lasting battery life․ Its advanced chipset ensures smooth operation, while the ergonomic design enhances user comfort․ The device also includes a smart LED indicator for battery status and a unique flavor-enhancing mode, making it a versatile choice for vapers seeking a tailored experience with cutting-edge technology․

6․2 Maximizing Performance

To maximize the Spaceman 10K Pro’s performance, utilize its adjustable airflow system for tailored draws and explore customizable vapor settings․ Regularly clean the device and ensure proper e-liquid levels to maintain flavor consistency․ Charge the battery fully before use and avoid overcharging to prolong its lifespan․ Primes the coil before vaping to prevent dry hits and ensure smooth, flavorful sessions every time․

Safety Precautions

Always follow safety guidelines to ensure safe usage of the Spaceman 10K Pro․ Avoid exposing the device to extreme temperatures or water․ Keep it out of reach of children and pets․ Do not modify the device or batteries, as this can cause malfunctions or hazards․ Charge only with the provided charger and avoid overcharging to prevent battery damage․

7․1 Important Safety Guidelines

To ensure safe usage of the Spaceman 10K Pro, avoid exposing the device to extreme temperatures, water, or direct sunlight․ Keep it out of reach of children and pets to prevent accidental ingestion of e-liquids or battery damage․ Use only the original charger provided, as third-party chargers may cause malfunctions․ Avoid overcharging, as this can lead to battery degradation or safety hazards․ Always follow proper handling and disposal procedures for batteries and e-liquids․ By adhering to these guidelines, you can enjoy a safe and optimal vaping experience with your Spaceman 10K Pro․

7․2 Battery Care and Charging Tips

For optimal performance, use the original charger provided with your Spaceman 10K Pro․ Avoid overcharging, as it may reduce battery lifespan․ Store the device in a cool, dry place, away from direct sunlight․ Clean the charging port regularly to prevent connectivity issues․ Never use damaged chargers or batteries, as this can pose safety risks․ Proper care ensures reliable operation and extends battery life․

Warranty and Support

The Spaceman 10K Pro is backed by a limited warranty covering manufacturing defects․ For inquiries or assistance, contact the dedicated customer support team via the official website or email․

8․1 Understanding the Warranty

The Spaceman 10K Pro warranty covers manufacturing defects for a specified period, ensuring defect-free performance․ It does not cover misuse or normal wear and tear․ Registration may be required to activate the warranty, providing customers with peace of mind and protection for their investment․ For details, refer to the official documentation or contact support․

8․2 Contacting Customer Support

For any inquiries or issues, Spaceman 10K Pro customers can reach out to the dedicated support team via email, phone, or live chat․ Support is available 24/7, with a typical response time of 24 hours․ Visit the official website for contact details and ensure to have your product details ready for efficient assistance․ The team is committed to resolving concerns promptly and effectively․

User Reviews and Feedback

Users praise the Spaceman 10K Pro for its sleek design, long battery life, and rich flavor options․ Many highlight its user-friendly interface and generous e-liquid capacity, ensuring satisfaction․

9․1 Real-World User Experiences

Users have shared positive experiences with the Spaceman 10K Pro, emphasizing its portability and consistent performance․ Many appreciate the variety of flavors and the device’s durability․ Some mention the easy setup process, while others highlight the long battery life, making it a reliable choice for daily vaping․ Overall, the device has received praise for its balance of quality and convenience․

9․2 Common Praise and Criticisms

The Spaceman 10K Pro is often praised for its sleek design, long-lasting battery, and impressive 10,000-puff capacity․ Users also commend its portability and smooth vaping experience․ However, some critics note the lack of adjustable airflow and the non-refillable tank as drawbacks․ Despite this, the device remains popular for its convenience and performance, making it a favorite among both newcomers and experienced vapers․

Comparison with Other Models

The Spaceman 10K Pro stands out for its sleek design and long battery life, offering a user-friendly experience compared to similar disposable vapes in the market today․

10․1 How It Stands Out in the Market

The Spaceman 10K Pro distinguishes itself with its innovative design, featuring a sleek and ergonomic build that enhances portability․ Its long-lasting battery life and generous e-liquid capacity set it apart from competitors, providing an extended vaping experience․ Additionally, its user-friendly interface and hassle-free operation make it a preferred choice among vapers seeking convenience and reliability in a disposable device․

10․2 Competitive Advantages

The Spaceman 10K Pro offers superior performance with its long-lasting battery life and generous e-liquid capacity, ensuring extended vaping sessions․ Its sleek, ergonomic design enhances portability, while the hassle-free operation appeals to both newcomers and experienced vapers․ Backed by industry leader SMOK, it delivers reliable quality, making it a top choice for those seeking durability and satisfaction in a premium disposable vape․

Accessories and Compatible Products

Explore a range of Spaceman 10K Pro accessories, including replacement coils and stylish carry cases, designed to enhance your vaping experience and device longevity seamlessly․

11․1 Recommended Accessories

Enhance your Spaceman 10K Pro experience with essential accessories like premium replacement coils, stylish carry cases, and high-quality charging cables․ These accessories ensure optimal performance and convenience, while maintaining the device’s sleek appearance and functionality for a superior vaping journey․

11․2 Expanding Functionality

Expand your Spaceman 10K Pro experience by exploring additional features such as customizable settings or compatible attachments․ These enhancements allow users to tailor their device to personal preferences, ensuring a more personalized and satisfying vaping experience while maintaining peak performance and convenience․

The Spaceman 10K Pro offers a sleek, user-friendly experience with its generous e-liquid capacity and comprehensive manual, making it a top choice for vapers seeking convenience and satisfaction․ Highly recommended!

12․1 Summary of Key Points

The Spaceman 10K Pro manual is a comprehensive guide that offers insights into its sleek design, user-friendly interface, and advanced features․ It provides detailed instructions and troubleshooting tips to help users optimize their vaping experience, ensuring a seamless journey from initial setup to ongoing maintenance and care․

12․2 Final Recommendations

For optimal performance, ensure regular maintenance, proper charging, and explore customization options․ Refer to the troubleshooting section for common issues and follow safety guidelines to maximize your experience․ The Spaceman 10K Pro is designed to deliver a premium vaping experience, and adhering to the manual’s instructions will ensure longevity and satisfaction․

Manuals

rebuilding a manual transmission

Rebuilding a manual transmission is a cost-effective and rewarding process, allowing drivers to restore performance and extend vehicle life. It requires mechanical skills, patience, and the right tools to ensure success.

Overview of the Process

Rebuilding a manual transmission involves a systematic approach to disassemble, inspect, and replace worn or damaged components. The process begins with removing the transmission from the vehicle, followed by disassembling the case and internal parts. Each component is evaluated for wear or damage, and necessary replacements are made. Key steps include replacing gears, bearings, seals, and gaskets. After reassembly, the transmission is tested to ensure proper function. This process requires mechanical aptitude, specialized tools, and attention to detail to restore optimal performance and reliability.

Importance of Proper Tools and Preparation

Proper tools and preparation are critical for a successful manual transmission rebuild. Specialized tools like bearing pullers and a hydraulic press are essential for safely removing and reinstalling components without damage. A clean, well-organized workspace ensures parts are protected from contamination and helps prevent losing small items. Consulting a repair manual specific to your transmission model is vital for accurate guidance. Adequate preparation saves time, reduces frustration, and prevents costly mistakes. Investing in the right tools and environment ensures a smooth, efficient rebuilding process.

Tools and Equipment Required

Essential tools include wrenches, screwdrivers, and a socket set. Specialized equipment like bearing pullers and a hydraulic press are necessary for safe and precise component handling.

Essential Tools for the Job

Rebuilding a manual transmission requires a mix of basic and specialized tools. Essential tools include a socket set, wrenches, screwdrivers, and pliers. A torque wrench ensures proper bolt tightening. A hydraulic press is necessary for removing and installing bearings. Bearing pullers are crucial for safely extracting bearings without damage. Additionally, a set of punches and chisels aids in removing and aligning components. These tools are fundamental for disassembling, inspecting, and reassembling the transmission effectively. Having the right tools on hand ensures the rebuild process is efficient and avoids costly mistakes.

Specialized Tools and Their Uses

Specialized tools are indispensable for a manual transmission rebuild. A bearing press is used to install bearings without damage, ensuring proper alignment. A gear puller safely removes gears from shafts, preventing wear. A synchro ring installer aligns and seats synchromesh rings accurately. A dial indicator measures shaft end play and bearing preload, ensuring precise adjustments. These tools, often specific to transmission models, are crucial for handling intricate components and ensuring a smooth rebuild process. They minimize the risk of damage and help achieve professional-grade results.

Preparation and Planning

Preparation and planning are crucial for a successful manual transmission rebuild. Gather all necessary parts, tools, and manuals beforehand. Ensure a clean, well-lit workspace and adhere to safety protocols to avoid accidents and ensure efficiency.

Gathering Parts and Manuals

Gathering all necessary parts and manuals is essential for a smooth rebuild. This includes purchasing a complete rebuild kit, bearings, seals, and any worn components. Ensure you have the vehicle’s service manual or a transmission-specific guide. These resources provide detailed instructions, torque specifications, and diagrams. Additionally, source specialty tools like bearing pullers and a hydraulic press. Verify parts compatibility with your transmission model to avoid mismatches. Organize everything in a clean workspace to maintain efficiency throughout the process.

Workspace Setup and Safety Precautions

Setting up a clean, well-lit workspace is crucial for efficiency and safety. Cover the floor with a drop cloth to protect it from grease and debris. Use jack stands to securely lift and support the vehicle, ensuring it cannot fall. Wear protective gear, including gloves, safety glasses, and a face mask. Keep a fire extinguisher nearby and avoid working near open flames. Organize tools and parts in labeled containers to prevent misplacement. Proper ventilation is essential when working with chemicals like cleaning solvents. Refer to your manual for specific safety guidelines related to your transmission model.

Disassembly of the Transmission

Disassembling the transmission involves removing it from the vehicle and carefully taking apart the case to access internal components for inspection and replacement.

Removing the Transmission from the Vehicle

Removing the transmission from the vehicle is a critical step that requires careful planning and execution. Start by disconnecting the battery and draining the transmission fluid. Next, remove the driveshaft and any components connected to the transmission, such as the gearshift linkage and clutch assembly. Use a jack or lifting equipment to support the transmission. Finally, unbolt the transmission from the engine and carefully lower it onto a transmission jack or workbench, ensuring it’s stable and secure for disassembly.

Disassembling the Transmission Case

Disassembling the transmission case involves carefully removing the bolts and separating the housing. Begin by using a socket set or wrench to remove the case bolts, working in a pattern to avoid warping the housing. Gently pry the case apart using a soft-faced hammer or pry bar, taking care not to damage the mating surfaces. Once separated, the case will reveal the internal components. Be cautious of bearings or gears that may fall out during disassembly. Organize all removed parts to ensure they are accounted for during reassembly. Proper disassembly is key to a successful rebuild.

Identifying and Removing Internal Components

After disassembly, identify internal components such as gears, bearings, shafts, and synchronizers. Use a service manual to map each part. Carefully remove bearings using a press or pullers. Gears and shafts often require specific tools for extraction. Synchronizers and rings are typically removed with specialized tools to avoid damage. Document each part’s location and condition for reassembly. Organize components in labeled containers to prevent loss or confusion. This step ensures accuracy and efficiency when rebuilding, allowing for a precise and successful restoration of the transmission’s functionality and performance.

Inspection and Assessment

Inspecting gears and bearings for wear and damage is crucial. Check for cracks, scoring, or excessive play. Assess seals and gaskets for leaks or deterioration. Proper evaluation ensures effective repairs and prevents future issues.

Evaluating Gears and Bearings

Evaluating gears and bearings involves inspecting for wear, scoring, or cracks. Check each gear tooth for chipping or excessive wear. Bearings should be examined for smooth rotation and any signs of pitting or damage. Proper assessment ensures that all components are in good condition or need replacement. This step is critical to maintaining the transmission’s performance and longevity. Any damaged parts must be replaced to prevent further issues. Use specialized tools to measure play and ensure precise fits during reassembly.

Checking for Wear and Damage

Checking for wear and damage involves inspecting each component for signs of deterioration. Look for excessive play in gears, scoring on shafts, and worn synchronizers. Bearings should be checked for smooth operation and any signs of pitting. Clutch packs and seals may show wear, leading to leaks or slippage. Inspect gear teeth for chipping or cracking, and assess the condition of the transmission case for damage. Proper evaluation ensures that all worn or damaged parts are identified and replaced, preventing future issues and ensuring smooth operation after the rebuild.

Replacing Worn or Damaged Parts

Replace worn gears, bearings, and seals with new components. Use a hydraulic press for bearings and ensure all parts are properly aligned and secured.

Installing New Gears and Bearings

Begin by preparing the transmission case for new components. Install gears, ensuring proper alignment and fitment. Use a hydraulic press to seat bearings securely. Apply a thin layer of grease to gear teeth and bearing surfaces for lubrication. Carefully align and slide the shafts into place, verifying proper engagement. Ensure all components are torque-specific to manufacturer specifications. Double-check alignment and seating before proceeding to reassembly. This step requires precision to ensure smooth operation and longevity of the transmission.

Replacing Seals and Gaskets

Replacing seals and gaskets is crucial to prevent leaks and ensure proper lubrication. Begin by cleaning all surfaces thoroughly. Apply a thin layer of RTV silicone to gasket surfaces for a tight seal. Install new seals using a seal driver to avoid damage. Pay special attention to the input and output shaft seals, as these are prone to wear. Use a gasket installer for precise alignment. Allow the RTV to cure slightly before reassembling. Double-check all connections to ensure no leaks. This step is vital for maintaining transmission reliability and performance over time.

Reassembly of the Transmission

Reassembly requires meticulous attention to detail, ensuring all components are clean and properly aligned. Reverse the disassembly process, starting with internal parts before refitting the case.

Reassembling Internal Components

Reassembling internal components requires precision and care. Begin by cleaning and inspecting all parts thoroughly. Reverse the disassembly process, starting with the gearsets and bearings. Use a hydraulic press or bearing pullers for stubborn parts. Ensure proper alignment and torque specifications for each component. Reinstall the gearbox shafts, pilot bearing, and input shaft, checking for smooth operation. Pay special attention to synchromesh mechanisms and gear engagement teeth. Lubricate all moving parts generously to prevent wear. Proper reassembly ensures optimal performance and longevity of the transmission.

Refitting the Transmission Case

Refitting the transmission case requires meticulous care to ensure proper alignment and sealing. Clean and inspect the case thoroughly before reassembly. Apply a thin layer of sealant to the gasket surfaces and carefully align the case halves. Use a torque wrench to secure the bolts in the recommended pattern and sequence. Tighten gradually to avoid warping the case. Ensure all ports and openings are clear of debris. Once refitted, verify the case alignment with the engine and chassis. Double-check all connections and components for proper fitment and security.

Testing and Adjustment

Testing involves checking for leaks, proper gear engagement, and smooth operation. Adjustments ensure optimal performance, addressing any issues before final installation and test driving the vehicle.

Initial Testing and Adjustment

Initial testing involves verifying smooth gear shifts and ensuring no leaks. Adjustments focus on clutch alignment, gear engagement points, and synchronizer function. Proper setup ensures reliability and performance.

Final Check and Test Drive

A final inspection ensures all components are securely fastened, and fluid levels are correct. A test drive verifies smooth operation, checking for unusual noises, vibrations, or gear issues. Documenting the process aids in future maintenance and troubleshooting, ensuring long-term reliability and performance.

Troubleshooting Common Issues

Identifying and resolving post-rebuild problems involves diagnosing symptoms like gear slippage or noise, ensuring proper alignment, and verifying fluid levels for optimal transmission performance.

Identifying and Resolving Post-Rebuild Problems

After rebuilding, common issues include gear slippage, noisy operation, or difficulty shifting. Inspect for misaligned components, worn bearings, or improper torque specifications. Check fluid levels and condition, as contamination can cause malfunction. Ensure all seals and gaskets are properly seated to prevent leaks. If problems persist, consult the repair manual or seek professional assistance to diagnose and correct any overlooked details during the rebuild process.

PDF

the open boat pdf

Stephen Crane’s “The Open Boat” is a gripping tale of survival, inspired by his real-life shipwreck experience. The PDF format offers a portable, clear reading experience, ideal for analyzing Crane’s vivid descriptions and themes of nature’s indifference and human resilience, making it a valuable resource for both casual readers and students studying the story.

1.1 Overview of the Short Story

The Open Boat by Stephen Crane recounts the harrowing tale of four men—a captain, cook, oiler, and correspondent—stranded in a small dinghy after their ship sinks. The story vividly depicts their relentless battle against the merciless sea, exploring themes of nature’s indifference and human perseverance. The PDF version captures Crane’s masterful prose, offering readers a portable and immersive way to experience this classic tale of survival and existential reflection.

1.2 Importance of the PDF Format for Readers

The PDF format of The Open Boat offers readers a convenient and accessible way to engage with Stephen Crane’s timeless tale. It ensures portability across devices, allowing readers to enjoy the story anytime, anywhere. The PDF preserves the original formatting and text, making it ideal for close reading and analysis. Additionally, it enables easy sharing and printing, providing a reliable resource for both casual readers and academic study.

Plot Summary of “The Open Boat”

The story follows four men—captain, cook, correspondent, and oiler—adrift in a small boat after a shipwreck. They battle nature’s relentless power, showcasing human resilience and sacrifice in their desperate fight for survival.

2.1 The Shipwreck and the Four Survivors

The story begins with a shipwreck, leaving four men—a captain, cook, correspondent, and oiler—adrift in a small boat. The survivors face the harsh realities of the sea, struggling to stay alive amid towering waves and relentless winds. The PDF version captures the vivid details of their ordeal, offering readers a gripping narrative of survival and nature’s indifference. The men’s diverse roles highlight their unique perspectives during the crisis.

2.2 The Struggle Against Nature

The men face a relentless battle against the sea, with towering waves and harsh winds threatening their survival. The PDF vividly captures their futile efforts to control the tiny boat, emphasizing nature’s indifference. The narrative highlights the men’s physical and emotional exhaustion as they confront the overwhelming power of the ocean, illustrating the futility of human struggle against nature’s forces. The sea’s majesty and cruelty dominate their existence.

Themes in “The Open Boat”

The story explores themes of the indifference of nature and human resilience, as men confront the sea’s brutality. The PDF highlights these themes through vivid imagery and descriptive language, emphasizing the struggle between human will and nature’s power.

3.1 The Indifference of Nature

In “The Open Boat,” nature is portrayed as indifferent to human fate. The vast, unfeeling sea treats the men’s struggle for survival with cold neutrality, showing no regard for their efforts or emotions. This theme is underscored by the relentless waves and the men’s small, vulnerable boat, emphasizing humanity’s fragility against nature’s immense power; The PDF highlights this through vivid descriptions of the sea’s indifference, reinforcing the story’s philosophical depth.

3.2 Human Resilience and Survival

The story underscores human resilience as the four men confront the relentless sea. Despite exhaustion and despair, their determination to survive prevails. The correspondent reflects on life’s meaning, while the oiler’s strength embodies hope. Their shared struggle highlights the human spirit’s capacity to endure adversity, even in the face of nature’s indifference. The PDF vividly captures their emotional and physical battles, illustrating survival’s profound significance.

Key Characters in the Story

The story features four distinct characters: the correspondent, the oiler, the cook, and the captain. Each plays a vital role, showcasing their unique strengths and vulnerabilities while navigating the perilous sea together, as detailed in the PDF.

4.1 The Correspondent: Reflections and Inner Conflict

The correspondent is portrayed as introspective and philosophical, grappling with existential questions amidst the chaos. His inner turmoil reflects humanity’s struggle against nature’s indifference, as he contemplates life’s meaning and the universe’s disregard for human fate. Through his thoughts, Crane explores themes of mortality and the human condition, enriching the narrative’s depth and emotional resonance, as detailed in the PDF.

4.2 The Oiler: Strength and Sacrifice

The oiler embodies strength and resilience, tirelessly rowing to save his comrades despite the harsh conditions. His eventual sacrifice underscores his selflessness and humanity, contrasting the indifference of nature. The PDF highlights his physical endurance and unwavering determination, making him a tragic yet noble figure in the story, symbolizing the human spirit’s capacity for sacrifice in the face of overwhelming adversity.

Symbolism in “The Open Boat”

The story is rich in symbolism, with the open boat representing human vulnerability against nature’s vastness. The sea symbolizes nature’s indifference, while the boat embodies the fragile human condition, highlighting the struggle between resilience and the overwhelming power of the natural world.

5.1 The Open Boat as a Symbol of Vulnerability

The open boat symbolizes human vulnerability, emphasizing the fragility of life against nature’s vastness. The small, fragile craft, tossed by waves, mirrors the men’s helplessness and dependency on chance. Its fragility underscores the existential struggle, highlighting how human beings are at the mercy of forces beyond their control, making the boat a powerful metaphor for human vulnerability in an indifferent world.

5.2 The Sea: A Representation of Nature’s Power

The sea in “The Open Boat” symbolizes nature’s immense and indifferent power. The towering waves and relentless tides emphasize the men’s helplessness against the vast, uncontrollable natural forces; Crane’s vivid descriptions of the waves as “gray, except for the tops” highlight the sea’s dominance, illustrating how human struggles are insignificant in the face of nature’s overwhelming might and indifference to human fate.

Historical Context and Stephen Crane’s Inspiration

Stephen Crane’s real-life survival of a shipwreck deeply influenced “The Open Boat,” drawing from his harrowing experience of being stranded at sea, which shaped the story’s authenticity and themes.

6.1 Crane’s Real-Life Experience with a Shipwreck

Stephen Crane’s harrowing survival of a shipwreck in 1897 inspired “The Open Boat.” After his ship sank off the Florida coast, Crane and three others endured a treacherous journey in a small dinghy, an experience that deeply influenced the story’s vivid portrayal of human struggle against nature, infusing it with raw authenticity and emotional depth.

6.2 The Influence of Literary Naturalism

Stephen Crane’s “The Open Boat” is a prime example of literary naturalism, emphasizing the harsh realities of life and nature’s indifference. Crane’s vivid, unromantic portrayal of the men’s struggle reflects the movement’s focus on human vulnerability and the deterministic forces of nature. His gritty, descriptive style and objective tone underscore the story’s naturalistic themes, creating a powerful exploration of survival and existential awareness.

PDF Availability and Download Options

The PDF of “The Open Boat” is freely available on reputable websites, offering readers a convenient way to access and analyze Stephen Crane’s timeless short story.

7.1 Free PDF Downloads from Reputable Sources

Several trusted platforms offer free PDF downloads of “The Open Boat,” including educational websites and digital libraries. These sources provide high-quality, full-text versions of Stephen Crane’s story, ensuring easy access for readers worldwide. Downloading from reputable sites guarantees an authentic and uninterrupted reading experience.

7.2 Guides for Reading and Analyzing the PDF

Reading guides and analysis frameworks accompany the PDF, offering insights into themes, characters, and literary devices. These resources include discussion questions, reading comprehension exercises, and study materials to deepen understanding. Supplementary materials like worksheets and lesson plans are also available, helping readers effectively engage with and interpret Stephen Crane’s classic tale.

Analysis of Literary Devices

Crane employs vivid imagery and descriptive language to portray nature’s brutality, while irony underscores the men’s precarious fate, enhancing the story’s emotional depth and thematic resonance.

8.1 Use of Imagery and Descriptive Language

Stephen Crane’s masterful use of imagery and descriptive language immerses readers in the harsh marine environment. Vivid depictions of towering waves, the “gray, relentless sea,” and the men’s physical struggles create a visceral experience. Crane’s precise descriptions of natural elements and human emotions heighten tension, drawing readers into the survivors’ desperate plight. His evocative prose transforms the open boat into a symbol of vulnerability, emphasizing the vast, indifferent ocean’s power.

8.2 The Role of Irony and Foreshadowing

Crane employs irony and foreshadowing to underscore the story’s tragic undertones. The oiler, despite his strength, meets a poignant end, while the cook’s superstition subtly hints at doom. The lighthouse, symbolizing hope, remains elusive, heightening the sense of inevitable fate. These elements amplify tension, reflecting Crane’s naturalistic view of life’s unpredictability and the futility of human endeavor against nature’s indifference.

Educational Resources and Lesson Plans

Educational resources include lesson plans, worksheets, and reading comprehension exercises, providing teachers with tools to effectively teach and analyze “The Open Boat” in classrooms.

9.1 Worksheets and Reading Comprehension Exercises

Worksheets and reading comprehension exercises for “The Open Boat” PDF include multiple-choice questions, short-answer prompts, and essay topics. These tools help students engage deeply with the text, analyze themes, and understand the characters’ motivations. Resources also provide activities for identifying literary devices and summarizing key events, making them ideal for classroom use and independent study.

9.2 Teaching “The Open Boat” in the Classroom

Teaching “The Open Boat” in the classroom involves guiding students through its complex themes and literary devices. Educators can use the PDF to facilitate discussions on nature’s indifference and human resilience. Activities include close reading exercises, group discussions, and reflective writing prompts. The story’s vivid imagery and moral dilemmas make it ideal for exploring naturalism and encouraging critical thinking among students.

Stephen Crane’s “The Open Boat” remains a timeless exploration of human resilience and nature’s indifference. The PDF format ensures accessibility, preserving its impact for modern readers worldwide.

10.1 The Lasting Impact of “The Open Boat”

Stephen Crane’s “The Open Boat” endures as a literary masterpiece, captivating readers with its raw depiction of human resilience. Its emotional depth and philosophical reflections continue to resonate, making it a cornerstone of American literature. The story’s universal themes ensure its relevance, while its PDF availability has introduced it to new generations, solidifying its place in both academic and casual reading circles worldwide.

10.2 The Significance of the PDF Format for Modern Readers

The PDF format of “The Open Boat” offers modern readers unparalleled accessibility and convenience. It preserves the original text’s integrity while allowing seamless sharing and storage. Readers can annotate and highlight key passages, enhancing their engagement with Crane’s vivid prose. This digital accessibility ensures the story’s timeless themes reach a global audience, fostering deeper connections and fostering new interpretations of this classic tale.

Canada

hamilton beach slow cooker manual

The Hamilton Beach Slow Cooker Manual is a comprehensive guide for optimal use of your appliance, covering setup, operation, and maintenance. It provides essential details for popular models like the 33167, 33861, and 33867, ensuring you get the most out of your cooker. With programmable features and temperature control, this manual helps you master slow cooking effortlessly. Discover tips for adjusting cooking times and ingredient addition, as well as troubleshooting common issues. Keep your slow cooker in top condition with cleaning and care instructions.

Overview of the Manual

The Hamilton Beach Slow Cooker Manual is a detailed guide designed to help users understand and utilize their appliance effectively. It covers essential features, programmable settings, and temperature control options. The manual includes instructions for popular models like the 33167, 33861, and 33867, ensuring compatibility and clarity. You’ll find sections on cooking times, ingredient preparation, and maintenance tips. Additionally, it provides troubleshooting advice and care instructions to extend the lifespan of your slow cooker. This comprehensive resource is tailored to enhance your cooking experience and ensure optimal performance.

Importance of Reading the Manual

Reading the Hamilton Beach Slow Cooker Manual is essential for understanding its features, operation, and maintenance. It provides guidance on programmable settings, temperature control, and cooking techniques, ensuring optimal performance. The manual offers practical tips for adjusting cooking times, adding ingredients, and troubleshooting common issues. By following its instructions, you can prevent overcooking, ensure food safety, and extend the lifespan of your slow cooker. It also highlights safety precautions and care routines to maintain your appliance in excellent condition. Reading the manual is key to unlocking the full potential of your Hamilton Beach Slow Cooker.

Popular Hamilton Beach Slow Cooker Models

Hamilton Beach offers several popular slow cooker models, including the 33167, Flex Cook 33861, and Temp Tracker 33867. Each model features programmable settings and innovative designs for convenient cooking experiences.

Hamilton Beach 33167

The Hamilton Beach 33167 is a 6-quart programmable slow cooker designed for versatility and ease of use. It features digital controls, a secure lid, and a stovetop-safe crock for seamless transitions between cooking methods. This model is ideal for preparing a variety of dishes, from hearty stews to tender roasts. The manual provides specific guidelines for adjusting cooking times and liquid requirements, ensuring perfect results. It also highlights tips for cooking dense vegetables and meats together, emphasizing the importance of monitoring doneness. This cooker is a practical choice for both beginners and experienced home cooks.

Hamilton Beach Flex Cook 33861

The Hamilton Beach Flex Cook 33861 model offers versatile cooking options with programmable settings and a stovetop-safe crock for searing. Its 6-quart capacity is ideal for large families or entertaining. This cooker features a digital interface for easy operation and a ‘set & forget’ timer for hands-free cooking. The Flex Cook 33861 also includes a temperature tracker, ensuring precise control for tender results. Perfect for dishes like roasts or stews, this model combines convenience and flexibility for a variety of recipes. Its durable design and easy cleaning make it a practical choice for everyday use.

Hamilton Beach Temp Tracker 33867

The Hamilton Beach Temp Tracker 33867 is a high-performance 6-quart slow cooker designed for precise temperature control. It features programmable settings and a digital display, making it easy to monitor and adjust cooking temperatures. This model is ideal for dishes requiring accurate heat management, such as tender meats or delicate sauces. With its large capacity, it’s perfect for family meals or entertaining. The Temp Tracker also includes a stovetop-safe crock, allowing for searing before slow cooking. Its advanced features and versatility make it a top choice for home cooks seeking consistent results.

Cooking Guidelines and Tips

For perfect meals, adjust cooking times based on recipe requirements and ingredient density. Add delicate foods like pasta or seafood near the end. Use evaporated milk for creamy dishes, as regular milk may curdle. Dense vegetables like potatoes may need extra time when cooked with meats. Always monitor liquid levels to ensure optimal results.

Adjusting Cooking Times for Different Recipes

Adjusting cooking times is crucial for perfect results. Since modern slow cookers heat faster, older recipes may require shorter times. Dense vegetables like potatoes may take longer when cooked with meats. Always check doneness when meats reach desired temperatures. For delicate ingredients like pasta, seafood, or dairy, add them 2 hours before serving. This ensures they don’t overcook. Higher fat meats need less liquid, while lean meats may require more. Adjust sizes to fit smaller cookers and monitor progress for optimal results.

Adding Ingredients at the Right Time

Adding ingredients at the right time is crucial for optimal results when using your Hamilton Beach Slow Cooker. Delicate foods like pasta, seafood, milk, or cream should be added 2 hours before serving to prevent overcooking. Evaporated milk or condensed soups work well for slow cooking, while higher-fat meats may require less liquid. Layer ingredients correctly, placing denser foods like root vegetables at the bottom. Always refer to your manual for specific guidelines tailored to your model, ensuring perfectly cooked meals every time with minimal effort and maximum flavor.

Maintenance and Care

Regular cleaning and proper storage ensure longevity. Avoid abrasive cleaners and scouring pads. The stovetop-safe crock and lid simplify maintenance, allowing for easy cleaning and reuse.

Cleaning the Slow Cooker

Clean your Hamilton Beach slow cooker regularly to maintain hygiene and performance. Unplug the unit before cleaning. The stoneware crock and glass lid are dishwasher-safe, but hand-washing with mild soap and warm water is recommended to prevent scratches. For tough stains, soak the crock in soapy water. Wipe the exterior with a damp cloth, avoiding electrical components. The stovetop-safe crock and lid can be cleaned like regular cookware. Avoid abrasive cleaners to preserve the finish. Regular cleaning ensures longevity and optimal functionality of your slow cooker.

Stovetop-Safe Crock and Lid

The stovetop-safe crock and lid of your Hamilton Beach slow cooker are designed for convenience and versatility. This feature allows you to brown meat or sauté vegetables directly on the stovetop before transferring to the slow cooker, streamlining your meal preparation; The durable construction ensures safe use on both the stovetop and in the slow cooker. This functionality reduces the need for multiple pans, making cleanup easier. Always ensure the crock and lid are free from metal utensils or abrasive cleaners to maintain their stovetop-safe finish and longevity.

Troubleshooting Common Issues

Address common problems like overcooking or undercooking by adjusting cook times and liquid levels. Ensure the lid is sealed properly to maintain consistent temperatures and prevent moisture loss.

Overcooking or Undercooking Food

Overcooking or undercooking food in your Hamilton Beach slow cooker can be prevented by adjusting cooking times based on your model and recipe. For instance, the Hamilton Beach 33167 and 33867 models may cook faster, requiring shorter times. Ensure meats reach safe internal temperatures and check dense vegetables for doneness. Adding ingredients like pasta or dairy near the end prevents overcooking. Monitor liquid levels, as excessive moisture can lead to undercooked food. Refer to your manual for specific guidelines tailored to your slow cooker model for perfect results every time.

Understanding Liquid Requirements

  • Liquid is crucial for slow cooking, as it maintains moisture and flavor. The amount needed varies based on ingredients and cooking time.
  • Meats with higher fat content require less liquid, while lean meats may need more to prevent drying out.
  • Dairy products like milk or cream should be added near the end of cooking to avoid curdling.
  • Always leave at least 2 inches of space in the crock to prevent overflow during cooking.
  • Browning meat before slow cooking can reduce the need for extra liquid, enhancing flavor naturally.

Additional Resources

Download the Hamilton Beach Slow Cooker manual online from websites like ManualsLib or Manua.ls for detailed instructions. Visit Hamilton Beach’s official website for customer support and warranty details.

Downloading the Manual Online

Downloading the Hamilton Beach Slow Cooker manual is convenient and straightforward. Visit trusted websites like ManualsLib, where over 311 manuals are available for various models, such as the 33167, 33861, and 33867. Simply search for your specific model, and follow the download instructions. Ensure you select the correct model to access accurate information. Having the manual handy allows easy access to troubleshooting guides, cooking tips, and maintenance advice. Downloading the manual online is the best way to keep a digital copy for quick reference whenever needed.

Customer Support and Warranty Information

Hamilton Beach offers dedicated customer support to address any questions or concerns about your slow cooker. For assistance, visit their official website or contact their support team directly. The warranty information is outlined in the manual, covering defects in materials and workmanship. Register your product online to ensure warranty validity. Additionally, the manual provides details on how to access repair services or obtain replacement parts. For troubleshooting or maintenance tips, refer to the specific sections within the manual. Ensure to keep your proof of purchase for warranty claims.

The Hamilton Beach Slow Cooker Manual offers comprehensive guidance for optimal cooking experiences. By following its tips, you’ll enjoy perfectly cooked meals while extending your cooker’s lifespan.

Final Tips for Optimal Use

For the best results, always preheat your slow cooker before adding ingredients and ensure the lid is sealed tightly during cooking. Avoid overfilling, as this can lead to uneven cooking. Use the correct liquid ratios to prevent food from drying out. Experiment with spices and seasonings to enhance flavors. Clean the cooker immediately after use to maintain hygiene and longevity. Store leftovers properly and reheat safely. By following these tips, you’ll enjoy delicious, perfectly cooked meals every time with your Hamilton Beach slow cooker.

Enjoying Your Hamilton Beach Slow Cooker

Your Hamilton Beach Slow Cooker is designed to simplify meal preparation while delivering delicious results. Experiment with various recipes, from hearty stews to flavorful desserts, to explore its versatility. Take advantage of programmable features and temperature control for perfectly cooked dishes every time. Remember to add ingredients like pasta or seafood toward the end of cooking for optimal texture. With proper care and creative use, your slow cooker will become a trusted companion in the kitchen, helping you enjoy home-cooked meals with ease and convenience.

PDF

basic american sign language pdf

American Sign Language (ASL) is a complete, natural language with its own grammar and syntax, distinct from spoken languages. It is widely used by the Deaf community.

What is ASL?

American Sign Language (ASL) is a complete, natural language expressed through hand movements, facial expressions, and body language. It is the primary means of communication for the Deaf community in the United States and parts of Canada. ASL has its own unique grammar, syntax, and vocabulary, which differ from spoken English. It is not a simplified version of English but a complex language with its own linguistic structure. ASL is visually oriented and relies heavily on non-manual markers, such as facial expressions and head movements, to convey meaning. It is widely recognized as a legitimate language in academic and linguistic circles, with a rich cultural and historical background. Resources like PDF guides and tutorials are available for learning basic ASL, making it accessible to both beginners and those looking to deepen their understanding.

Importance of ASL in Deaf Culture

ASL is deeply intertwined with Deaf culture, serving as a vital means of identity and community bonding. It is not just a language but a cultural expression that reflects the values, history, and experiences of the Deaf community. ASL storytelling, art, and literature are central to Deaf cultural heritage, fostering a sense of unity and pride. Many Deaf individuals view ASL as a cornerstone of their cultural identity, emphasizing the importance of preserving and promoting the language. Learning ASL can bridge communication gaps and show respect for Deaf traditions, encouraging inclusivity and understanding. Resources like PDF guides and online tutorials make it easier for hearing individuals to connect with Deaf culture through ASL.

Basic ASL Grammar

American Sign Language (ASL) has a unique grammar, with word order differing from English. Question words like “who” and “what” are signed at the end. Its structure emphasizes visual and spatial expressions, making it distinct from spoken languages.

Handshapes and Finger Spelling

Handshapes are fundamental in ASL, representing letters, words, and concepts. There are 26 basic handshapes for finger spelling, corresponding to the English alphabet. Each handshape is precise, with specific placements and orientations. For example, the “flat hand” and “claw hand” are common, while others mimic shapes of letters like “A” or “C.” Finger spelling is used to spell names, loanwords, or terms without a direct ASL sign; Mastery of handshapes is crucial for clear communication, as slight variations can change meanings. Practice handshape drills to build muscle memory and accuracy. This foundation is essential for progressing in ASL, enabling effective expression and comprehension in conversations.

  • Handshapes represent letters, words, and ideas in ASL.
  • 26 basic handshapes correspond to the English alphabet.
  • Finger spelling is used for names, loanwords, and specific terms.
  • Practice handshapes to improve clarity and accuracy in signing.

Facial Expressions and Non-Manual Markers

Facial expressions and non-manual markers (NMMs) are vital in ASL, conveying emotions, tone, and grammatical context. They include head movements, eye gaze, and mouth actions. For example, raised eyebrows can indicate a question, while a furrowed brow may show seriousness. NMMs also emphasize statements or add emotional depth. Mastery of these elements enhances communication, making signing more expressive and nuanced. Practice observing and incorporating facial expressions and NMMs to ensure clear and effective signing. They are integral to the storytelling and cultural expression within the Deaf community, reflecting the richness of ASL as a visual language.

  • Facial expressions convey emotions and tone in ASL.
  • Non-manual markers include head movements and eye gaze.
  • They add context and emphasis to signed messages.
  • Mastering NMMs improves communication and expression.

Common ASL Phrases and Vocabulary

Learning basic ASL phrases like greetings, introductions, and everyday expressions enhances communication. Common signs include “Hello,” “How are you?” and “What’s up?” for casual interactions.

  • Start with simple greetings like “Hello” and “Hi.”
  • Ask questions using “What’s up?” or “How are you?”
  • Express gratitude with “Thank you” and “Please.”
  • Mastering these phrases aids in building connections.
  • Start with simple greetings like “Hello” and “Hi.”
  • Learn to ask “How are you?” and respond appropriately.
  • Practice introducing yourself with “My name is [name].”
  • Use facial expressions to convey friendliness and sincerity.

Regular practice ensures fluency and confidence in these essential interactions.

Everyday Expressions and Questions

Everyday expressions and questions in ASL are vital for practical communication. Common phrases like “What’s up?” or “How are you?” are easy to learn and frequently used. To ask questions, sign the question word (e.g., “what,” “where”) at the end of the sentence and use a manual question mark. Expressions like “Thank you” and “Please” are essential for politeness. Non-manual markers, such as raised eyebrows for questions, enhance clarity. Practice these phrases regularly to build confidence in daily interactions.

  • Learn phrases like “What’s up?” and “How are you?”
  • Master question formation using signs like “who,” “what,” and “where.”
  • Incorporate expressions like “Thank you” and “Please” for politeness.
  • Use facial expressions to convey tone and intent effectively.

These expressions are foundational for engaging in meaningful conversations in ASL.

ASL Resources for Beginners

Free online lessons, ASL dictionaries, and printable guides like the American Sign Language Phrase Book and ASL For Dummies are excellent for learning basics.

Free Online Lessons and Tutorials

Beginners can access numerous free online resources to learn ASL, such as video tutorials, dictionaries, and printable guides. Websites like ASL University and Lifeprint offer comprehensive lessons, including finger spelling, basic vocabulary, and grammar. Platforms like YouTube host channels dedicated to ASL instruction, providing step-by-step signing demonstrations. Additionally, apps and websites such as Signing Savvy and ASL Rochelle allow users to practice signs interactively. Many tutorials are designed for self-paced learning, making it easy to master the fundamentals at home. These resources are ideal for those looking to start their ASL journey without financial barriers.

Some popular options include:

  • ASL University: Offers free online courses and lessons.
  • Lifeprint: Provides video tutorials and printable materials.
  • TakeLessons Live: Free ASL classes with expert instructors.

Recommended PDF Guides and Worksheets

For learners seeking structured materials, various PDF guides and worksheets are available online. These resources often include diagrams, exercises, and practice drills to enhance ASL skills. Some popular PDF guides, such as A Basic Course in American Sign Language, provide comprehensive lessons on handshapes, grammar, and vocabulary. Worksheets like sign language alphabet charts and phrase exercises are also widely accessible. Many websites offer free downloadable PDFs, making it easy to print and practice offline. These materials are ideal for self-paced learning and complement online tutorials.

Key resources include:

  • ASL Alphabet Charts: Printable guides for mastering finger spelling.
  • Phrase Worksheets: Practice common expressions and sentences.
  • Grammar Exercises: Drills to understand ASL syntax and structure.

Practicing ASL

Regular practice with PDF guides and worksheets enhances ASL skills. Use drills, exercises, and charts to improve handshapes, grammar, and communication effectively.

Tips for Effective Communication

Tips for Effective Communication

Mastering ASL requires consistent practice and attention to detail. Start by learning basic handshapes and facial expressions, as they are essential for clear communication. Use online resources and PDF guides to practice regularly. Focus on understanding the grammar and syntax, which differ from English. Watch native signers to grasp nuances like non-manual markers. Practice with others to build confidence and fluency. Begin with simple phrases and gradually move to complex sentences. Be patient with yourself and others, as learning a new language takes time. Engage in conversations regularly to improve your skills and cultural understanding. Embrace the journey and enjoy the process of becoming proficient in ASL.

Using ASL in Daily Conversations

Incorporating ASL into daily interactions enhances communication with the Deaf community. Begin with simple greetings like “Hello” or “How are you?” and gradually introduce common phrases. Practice signing questions using “what,” “where,” and “when” at the end of sentences. Use facial expressions and handshapes to convey emotions and clarity. Start with one-handed signs for casual questions like “What’s up?” and progress to more complex expressions. Utilize free online tutorials and PDF guides to learn practical vocabulary. Engage in conversations regularly to build confidence and fluency. ASL can be used in both personal and professional settings, fostering deeper connections and cultural understanding. Embrace the language to enrich your interactions and expand your communication skills.

Understanding Deaf Culture

Deaf culture encompasses a vibrant community with rich values, emphasizing mutual support and inclusivity. ASL is deeply intertwined with this culture, fostering identity and connection among its members.

History and Community Values

ASL has a rich history, emerging in the early 19th century with the founding of the American School for the Deaf. The community values resilience, solidarity, and cultural preservation, emphasizing ASL as a cornerstone of identity. Historical milestones, like the 1988 Deaf President Now movement, highlight the community’s fight for recognition and rights. These events have shaped a strong, unified culture where ASL is not just a language but a symbol of pride and heritage, fostering connection and empowerment among its members.

Etiquette for Interacting with Deaf Individuals

When interacting with Deaf individuals, it is essential to maintain eye contact, as this shows respect and ensures clear communication. Always face the person directly and avoid turning away while signing. Patience is key; never rush the conversation. If misunderstandings occur, repeat slowly or rephrase. Use visual cues, like waving your hand, to gain their attention before signing. Avoid standing in front of bright lights or barriers that could block their view. Be prepared to write notes if complex discussions arise. Lastly, respect their preference for communication methods, whether through ASL or written English, and always approach interactions with kindness and openness.

Advanced ASL Skills

Mastering ASL storytelling involves complex techniques like role-shifting, visual descriptions, and emotional expressions, enhancing communication and engagement in Deaf culture and professional settings.

Storytelling in ASL

Storytelling in American Sign Language (ASL) is a vibrant and expressive art form that combines handshapes, facial expressions, and body language to convey narratives. Unlike spoken languages, ASL storytelling relies heavily on visual descriptions and role-shifting, where the signer embodies different characters or perspectives. This technique allows for dynamic and engaging communication, making stories more relatable and immersive. Advanced signers often incorporate intricate details, such as spatial arrangements and emotional nuances, to bring stories to life. Storytelling in ASL is not only a means of entertainment but also a way to preserve Deaf culture, history, and values, ensuring their transmission to future generations. It is a powerful tool for connection and understanding within the Deaf community.

ASL in Education and Workplaces

American Sign Language (ASL) plays a vital role in education and workplaces, fostering inclusivity and communication. Many colleges now offer ASL courses for academic credit, recognizing it as a valuable language skill. In educational settings, ASL is used to teach Deaf and hard-of-hearing students, ensuring equal access to learning. Workplaces are increasingly adopting ASL to accommodate Deaf employees, promoting diversity and accessibility. ASL interpreters are often provided in meetings, trainings, and conferences to facilitate understanding. This integration not only supports Deaf individuals but also enriches workplace culture by encouraging broader communication and collaboration. ASL’s presence in these environments highlights its importance as a tool for breaking barriers and fostering inclusion.