
gpx clock radio with dual alarm manual
The GPX Clock Radio with Dual Alarm Manual provides a comprehensive guide to operating your device, ensuring seamless setup and use of its dual alarm system, AM/FM radio, and additional features for enhanced convenience.
Overview of the GPX Clock Radio
The GPX Clock Radio is a versatile and user-friendly device designed to enhance your daily routine. It combines a reliable alarm system with an AM/FM radio, allowing you to wake up to your favorite stations or a traditional buzzer. The dual alarm feature is perfect for couples or those needing multiple wake-up times. With a sleek design and easy-to-use interface, this clock radio offers convenience and functionality. It also includes preset station memory, adjustable display brightness, and a battery backup option for uninterrupted performance. Whether you’re starting your day or relaxing at home, the GPX Clock Radio is a practical and enjoyable addition to any room.
Key Features of the Dual Alarm System
The dual alarm system on the GPX Clock Radio offers flexibility and convenience for users with different schedules. Each alarm can be set independently, allowing you to customize wake-up times for weekdays, weekends, or specific days. Choose between waking up to the radio or a traditional buzzer, ensuring a gentle or invigorating start to your day. The system also features repeat options, so you can set alarms for daily use or one-time events. With clear, intuitive controls, setting and managing alarms is straightforward. This feature is particularly useful for couples or roommates who need separate wake-up times, making the GPX Clock Radio an ideal solution for shared spaces.
Setting Up the GPX Clock Radio
Setting up the GPX Clock Radio involves unpacking, plugging in the power cord, and setting the time and date for proper functionality and personalized use.
Unpacking and Initial Setup
Begin by carefully unpacking the GPX Clock Radio from its box, ensuring all components, such as the warranty card and user guide, are included. Place the device on a stable, flat surface in a convenient location. Plug in the power cord into a nearby outlet to ensure consistent operation. Take a moment to familiarize yourself with the buttons and controls, as outlined in the user guide. This initial setup ensures the device is ready for further configurations, such as setting the time and alarms. Proper unpacking and placement are essential for optimal performance and ease of use. Follow these steps to prepare your GPX Clock Radio for seamless functionality.
Plugging in the Power Cord
Locate the power cord port, typically found on the back or bottom of the GPX Clock Radio. Insert the provided power cord firmly into this port. Plug the other end of the cord into a nearby grounded electrical outlet. Ensure the outlet is easily accessible and not overloaded with other devices. Once connected, the clock radio should power on automatically, and the display will light up. If it does not turn on, check that the outlet is functioning properly. Avoid using extension cords or adapters, as they may interfere with the device’s performance. Properly plugging in the power cord ensures reliable operation and prevents potential malfunctions. Always follow safety guidelines when working with electrical components.
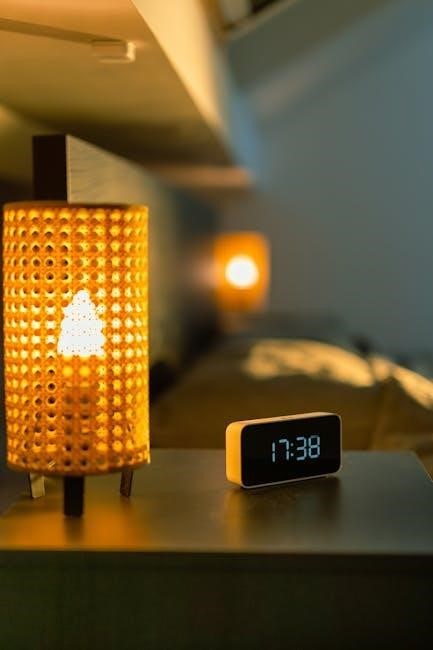
Setting the Time and Date
To set the time and date on your GPX Clock Radio, first ensure the device is powered on. Use the CLOCK button to enter time-setting mode; Press the SET button to toggle between hours, minutes, and the date. Adjust the values using the + and ─ buttons. Once the correct time and date are displayed, press SET to save your settings. The clock will automatically update and maintain the time, even during power outages when the battery backup is activated. Ensure the time zone is correctly set for your location. If the device has an automatic time-update feature, enable it for hassle-free accuracy. Properly setting the time and date ensures your alarms and radio functions operate correctly. Refer to the manual for additional details if needed.
Using the Dual Alarm System
The dual alarm system allows you to set two independent wake-up times, perfect for couples or weekend schedules. Choose to wake to the radio or a buzzer, and customize settings like volume and snooze duration for a personalized experience.
Setting the First Alarm
To set the first alarm, press the ALARM button until the display shows ALARM 1. Use the TUN buttons to scroll through the time options. Select your desired wake-up time and press the CHECK button to save. Choose between waking up to the radio or the built-in buzzer by pressing the SOURCE button. Adjust the volume using the VOLUME dial to your preferred level. The alarm will now be active, and the ALARM 1 indicator will appear on the display. For added convenience, you can also set the snooze duration by pressing the SNOOZE button after the alarm sounds. This feature ensures you can customize your wake-up experience to suit your needs perfectly.
Setting the Second Alarm
To set the second alarm, press the ALARM button until the display shows ALARM 2. Use the TUN buttons to adjust the time to your desired setting. Press the CHECK button to save. Choose between waking to the radio or buzzer by pressing the SOURCE button. Adjust the volume using the VOLUME dial. The second alarm will activate, and the ALARM 2 indicator will appear. For convenience, set the snooze duration by pressing the SNOOZE button after the alarm sounds. Ensure the time is different from the first alarm by checking the display. This feature allows you to customize your wake-up experience perfectly, with separate times for weekdays or weekends.
Customizing Alarm Settings
Customize your alarm experience by adjusting settings to suit your preferences. Use the SNOOZE button to set the snooze duration, allowing you to extend sleep in short intervals. Adjust the alarm volume using the VOLUME dial for a gentle or loud wake-up. Choose between waking up to the radio or the buzzer by pressing the SOURCE button. For added flexibility, enable the WEEKEND mode to deactivate alarms on Saturdays and Sundays. You can also set alarms to repeat daily or on specific days of the week. The DISPLAY button lets you dim the screen for less disruption. These features ensure a tailored wake-up experience, catering to your unique schedule and preferences.

Operating the AM/FM Radio
Effortlessly tune into your favorite AM/FM stations using the TUNING dial or PRESET buttons for quick access to saved stations. Adjust the VOLUME for optimal sound. Enjoy clear reception and easy station navigation with the intuitive controls.
Tuning into Radio Stations
Tuning into your favorite AM/FM radio stations on the GPX Clock Radio is straightforward. Use the TUNING dial to manually adjust the frequency or press the PRESET buttons to access saved stations. For manual tuning, rotate the dial until you find a station with clear reception. To save a station, press and hold the desired PRESET button (1-10) until it beeps. This allows quick access to your favorite stations. The digital display shows the selected frequency, ensuring precise tuning. Adjust the VOLUME as needed for optimal sound quality. With its intuitive controls and clear reception, the GPX Clock Radio makes listening to music, news, or sports effortless and enjoyable.
Using Preset Stations
Using preset stations on your GPX Clock Radio simplifies access to your favorite AM/FM stations. With the ability to store up to 20 stations (10 AM and 10 FM), you can quickly recall them at the touch of a button. To select a preset station, press the corresponding PRESET button (1-10) on the front panel. The display will show the saved station frequency, ensuring easy identification. If you need to change a preset, press and hold the desired PRESET button while tuning to the new station. This feature allows you to customize your listening experience, making it convenient to enjoy your preferred radio stations without manual tuning each time.
Listening to the Radio
Listening to the radio on your GPX Clock Radio is straightforward and enjoyable. Simply press the AM/FM button to select your preferred band. Use the Tuning buttons to find your desired station. Adjust the volume using the Volume control for optimal sound. For clearer reception, switch between mono and stereo modes. The clear LCD display shows the current station frequency, ensuring you’re tuned in correctly. With its user-friendly interface, you can effortlessly enjoy music, news, and more. The radio’s digital tuning ensures stable reception, and preset stations allow quick access to favorites. This makes listening to the radio a seamless and satisfying experience.

Additional Features and Settings
The GPX Clock Radio offers adjustable display brightness for comfortable viewing in any light. It also features a battery backup option, ensuring time accuracy during power outages.
Adjusting the Display Brightness
Adjusting the display brightness on your GPX Clock Radio is straightforward. Press the Brightness button located on the top panel to cycle through the available settings. Choose from Low, Medium, or High brightness levels to suit your viewing preference. This feature ensures optimal visibility in both bright and dim environments. For energy efficiency, the display automatically dims slightly when not actively in use. If you prefer a constant brightness level, disable the auto-dim feature in the settings menu. Proper adjustment enhances readability and reduces eye strain, making the clock radio more convenient to use day or night. Factory settings can be restored if desired, providing a balanced default brightness level. Adjusting the display brightness is a simple way to personalize your experience with the GPX Clock Radio.
Using the Battery Backup Option
The GPX Clock Radio features a convenient battery backup option to ensure uninterrupted functionality during power outages. To activate this feature, install the required batteries (typically 2 AAA batteries) in the compartment located at the bottom of the device. The backup system will automatically engage if the power cord is disconnected or during a power failure. While the radio functionality will not operate without AC power, the clock and alarms will continue to run on battery power. This ensures that you remain on schedule and receive timely alerts. The battery backup is ideal for maintaining time and alarm settings during brief outages. For extended power losses, the device will conserve battery life by minimizing non-essential functions. This feature provides peace of mind and reliability in all situations. Always use the recommended battery type for optimal performance;

Troubleshooting Common Issues
Troubleshooting common issues with your GPX Clock Radio involves identifying problems like alarm malfunctions or poor radio reception. Check power connections, antenna placement, and reset settings if necessary.
Resolving Alarm Malfunctions
If your GPX Clock Radio’s alarm isn’t working, start by ensuring the power cord is securely plugged in and the outlet is functioning. Check that the alarm is enabled and the time is set correctly. If the alarm fails to sound, verify that the volume is not muted or set too low. For dual alarms, ensure both alarms are configured properly. If issues persist, reset the alarm by turning it off and on again. Additionally, check the battery backup option to ensure it is functional in case of a power outage. Refer to the manual for detailed steps to restore default settings if necessary.
Fixing Radio Reception Problems
Experiencing poor radio reception on your GPX Clock Radio? Ensure the unit is placed away from electronic interference sources like televisions or computers. Check the antenna orientation and adjust it for optimal signal strength. If using an indoor antenna, consider moving the radio closer to a window. For FM stations, switch to mono mode to reduce static. For AM stations, reorient the unit to minimize interference. Ensure the volume is set appropriately and that the correct station preset is selected. If issues persist, reset the radio by unplugging and replugging the power cord. Refer to the manual for additional troubleshooting steps to enhance your listening experience.