
hoover clean slate instructions
The Hoover Clean Slate is a portable carpet and upholstery spot cleaner designed for effective stain removal․ It combines powerful suction with versatile cleaning tools for efficient cleaning solutions․
1․1 Overview of the Hoover Clean Slate Carpet & Upholstery Spot Cleaner
The Hoover Clean Slate is a portable and versatile cleaning solution designed for tackling stains and spills on carpets and upholstery․ It combines powerful suction with a scrubbing action to effectively remove dirt and stains․ The device is lightweight and easy to maneuver, making it ideal for household use․ It features a solution tank for cleaning fluids, multiple cleaning tools, and a compact design for convenient storage․ The Clean Slate is perfect for quick cleanups and maintaining fabric surfaces in homes, ensuring a fresh and clean environment with minimal effort․
1․2 Importance of Following Manufacturer Instructions
Adhering to the manufacturer’s instructions is crucial for safe and effective use of the Hoover Clean Slate․ Proper assembly, operation, and maintenance ensure optimal performance and longevity of the device․ Failure to follow guidelines may result in reduced suction power, clogged components, or even damage to the machine․ Additionally, using unauthorized cleaning fluids can void the warranty and potentially harm the device or fabrics․ Always prioritize safety by avoiding improper modifications or ignoring warning labels to prevent risks like electric shock or fire hazards․ Following the instructions ensures a satisfactory cleaning experience and protects your investment in the product․

Before You Begin Cleaning
Always check fabric compatibility using W/SW labels and test for colorfastness in a hidden area to ensure safe and effective cleaning without damaging materials․
2․1 Checking Fabric Compatibility (W/SW Labels)
Before cleaning, always check the fabric label for compatibility․ The Hoover Clean Slate is designed for fabrics marked with a W (wet clean) or S/W (solvent/wet clean)․ Avoid fabrics labeled S (solvent clean only) to prevent damage․ Ensure the fabric can withstand water-based cleaning solutions․ Testing for colorfastness in a hidden area is also recommended to ensure colors won’t bleed or fade․ Following these guidelines helps maintain fabric integrity and ensures safe, effective cleaning․ Always adhere to the manufacturer’s instructions for optimal results․
2․2 Testing for Colorfastness
Before cleaning, test the fabric’s colorfastness to ensure it won’t bleed or fade․ Choose an inconspicuous area, such as the bottom or behind a cushion․ Apply a small amount of cleaning solution, gently blot with a white cloth, and let it sit for 5-10 minutes․ If no color transfers to the cloth, the fabric is safe to clean․ This step prevents damage and ensures vibrant colors remain intact․ Always perform this test before proceeding with any cleaning process to avoid discoloration or fabric damage․

Assembly and Preparation
Unpack and assemble the Hoover Clean Slate by attaching the hose and tools․ Fill the solution tank with the recommended cleaning fluid and warm water․ Ensure all parts are securely connected before use․
3․1 Unpacking and Initial Setup
Begin by carefully unpacking the Hoover Clean Slate and verifying all components are included․ Inspect for any damage during shipping․ Place the cleaner on a flat, stable surface and ensure the power cord is undamaged․ Remove any packaging materials and prepare the machine for use by filling the solution tank with the recommended cleaning fluid and warm water, following the guidelines provided in the user manual․
3․2 Attaching Tools and Accessories
Attach the hose to the cleaner by aligning the connectors and securing it firmly․ Next, connect the desired cleaning tool, such as the WidePath tool or the upholstery brush, to the end of the hose․ Ensure the tool clicks into place for a secure fit․ For additional attachments, like the crevice tool, slide them onto the hose until they lock securely․ Always ensure the machine is turned off before attaching or detaching accessories to avoid accidental start-ups․ Properly securing tools ensures effective cleaning and prevents damage to the device or surrounding surfaces․

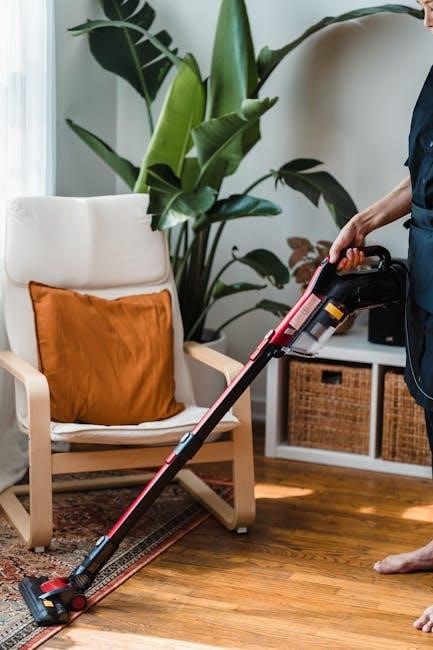
Using the Hoover Clean Slate
Press the power button to turn on the device․ Spray cleaning solution onto stains, then scrub gently with the attached tool․ Move slowly for best results․
4․1 Turning On the Device
To activate the Hoover Clean Slate, locate the red power button on the top of the unit․ Press it firmly to turn the device on․ Ensure the device is plugged into a nearby electrical outlet before operation․ Once powered on, the machine will hum, indicating it’s ready for use․ Avoid overloading the device or using it in damp environments to prevent electric shock․ Always follow safety guidelines provided in the user manual for optimal performance and longevity of the cleaner․
4․2 Spraying Cleaning Solution
To spray cleaning solution with the Hoover Clean Slate, press the trigger located behind the tool while holding it about 5 inches above the stain․ This action releases the solution evenly onto the surface․ Ensure the solution is applied generously but avoid over-saturating the fabric․ Always use Hoover-approved cleaning fluids to maintain device performance and safety․ For optimal results, spray in a steady, back-and-forth motion to cover the entire stained area thoroughly before scrubbing․ This method ensures effective stain penetration and removal․
4․4 Scrubbing Stains
After applying the cleaning solution, use the attached tool to scrub the stain gently but firmly in a back-and-forth motion․ Ensure the device is turned on by pressing the red power button before scrubbing․ Hold the tool about 5 inches above the surface and move it slowly over the stained area to maximize suction power․ For tough stains, repeat the process as needed, ensuring not to over-saturate the fabric․ This method effectively removes dirt and stains while maintaining fabric integrity․

Maintenance and Cleaning
Regular maintenance ensures optimal performance․ Empty and rinse the solution tank after use, clean tools under a faucet, and inspect the hose for blockages to maintain efficiency․
5․1 Emptying and Rinsing the Solution Tank
To maintain the Hoover Clean Slate’s performance, empty the solution tank after each use․ Press the TANK RELEASE button, lift the lid, and discard the liquid․ Rinse the tank thoroughly with clean water to remove dirt and debris․ Allow it to air dry before reattaching to prevent mold or odors․ Regular cleaning ensures optimal function and keeps the machine ready for future use․
5․2 Cleaning the Tools and Nozzle
For optimal performance, clean the tools and nozzle regularly․ Remove the tool from the hose and rinse under a faucet to eliminate dirt and debris․ Detach the nozzle cover by releasing the clear tab, then remove and rinse the insert thoroughly․ This ensures proper function and prevents clogging; Regular maintenance extends the life of the cleaner and maintains its effectiveness in removing stains and spills․
5․3 Cleaning the Hose
To clean the hose, remove the solution tank and fill it with warm water (up to 140°F or 60°C) to the small fill line․ Reattach the tank, then spray water through the hose to flush out any debris․ Repeat if necessary until the water runs clear․ After cleaning, rinse the hose with clean water and allow it to air dry․ Regular cleaning prevents blockages and ensures optimal performance when using the Hoover Clean Slate for future cleaning tasks․

Safety Precautions
Always keep children away while using the cleaner․ Avoid overheating the device and ensure good ventilation․ Handle electrical components with care to prevent accidents․
6․1 Avoiding Fire and Electric Shock Risks
To prevent fire or electric shock, avoid damaging the power cord or internal components․ Never expose the device to water or use it in wet conditions․ Ensure the cleaner is turned off and unplugged before cleaning or maintaining it․ Avoid overheating the device and keep it away from flammable materials․ Always follow the manufacturer’s guidelines for safe operation and maintenance to minimize risks associated with electric appliances․
6․2 Using Only Approved Cleaning Fluids
Using only approved Hoover cleaning fluids is essential for safe and effective operation․ Unapproved fluids may damage internal components or void the warranty․ Always refer to the manual for recommended solutions․ Using non-Hoover fluids can lead to machine malfunction or chemical incompatibility․ Approved fluids are formulated to work seamlessly with the Clean Slate, ensuring optimal cleaning performance and longevity of the device․ Avoid using household cleaners or untested solutions to maintain safety and efficiency․

Troubleshooting Common Issues
Identify and resolve issues quickly with troubleshooting tips․ Common problems include low suction, clogged nozzles, or blockages․ Check for obstructions, ensure proper assembly, and clean filters regularly for optimal performance․
7․1 Low Suction Power
Low suction power can occur due to blockages or improper maintenance․ Check the nozzle and hose for kinks or debris․ Ensure the solution tank is empty and rinsed thoroughly, as residue can reduce performance․ Allow the tank to air dry before reinstalling․ If issues persist, inspect the filters and clean or replace them as needed․ Regularly cleaning the tools and ensuring proper assembly can also restore suction power․ For optimal results, refer to the user manual for detailed troubleshooting steps and maintenance tips specific to the Hoover Clean Slate model․
7․2 Clogged Nozzle or Hose
A clogged nozzle or hose can disrupt cleaning efficiency․ To resolve this, remove the nozzle cover by unlatching the clear tab and rinse it under running water to eliminate debris․ For the hose, fill it with warm water (max 140°F) and allow it to flush out any blockages․ Regularly cleaning these parts ensures optimal performance and prevents future clogs․ Always dry components thoroughly after cleaning to avoid mold or mildew buildup․ Refer to the user manual for detailed instructions on maintaining your Hoover Clean Slate․

Additional Resources
Access the user manual online or download it as a PDF․ Watch video tutorials for setup and usage on Hoover’s website․ For assistance, contact Hoover support․
8․1 Accessing the User Manual
The Hoover Clean Slate user manual is available online in PDF format․ Visit Hoover’s official website or support page․ Download Adobe Acrobat Reader to view the document․ The manual covers assembly, operation, maintenance, and troubleshooting․ Refer to it for detailed instructions and safety guidelines․ Ensure to read it carefully before using the cleaner to understand all features and proper usage techniques․ This resource is essential for maximizing the product’s performance and longevity․ It’s a comprehensive guide for both beginners and experienced users․ Always check for the latest version online․
8․2 Watching Video Tutorials
Video tutorials are an excellent way to understand how to use the Hoover Clean Slate effectively․ Visit Hoover’s official YouTube channel for step-by-step guides․ These videos cover assembly, operation, and maintenance․ Topics include how to assemble the cleaner, use cleaning solutions, and troubleshoot common issues․ Watching these tutorials ensures you maximize the product’s performance․ For example, the video titled “Hoover Clean Slate Portable Carpet Cleaner Tutorial” provides a detailed walkthrough․ Additionally, videos like “How to Use Hoover Clean Slate for Stain Removal” offer practical tips for tackling tough stains․ These resources are invaluable for both new and experienced users․
8․4 Contacting Hoover Support
For assistance with your Hoover Clean Slate, visit the Hoover Support website․ Here, you can access live chat, phone support, or email options․ Support agents are available to help with troubleshooting, maintenance, and warranty inquiries․ Additionally, the site offers a comprehensive FAQ section and downloadable user manuals․ For further guidance, explore video tutorials or contact Hoover directly at customer․service@hoover․com․ Their team is ready to address your concerns and ensure optimal performance of your cleaner․